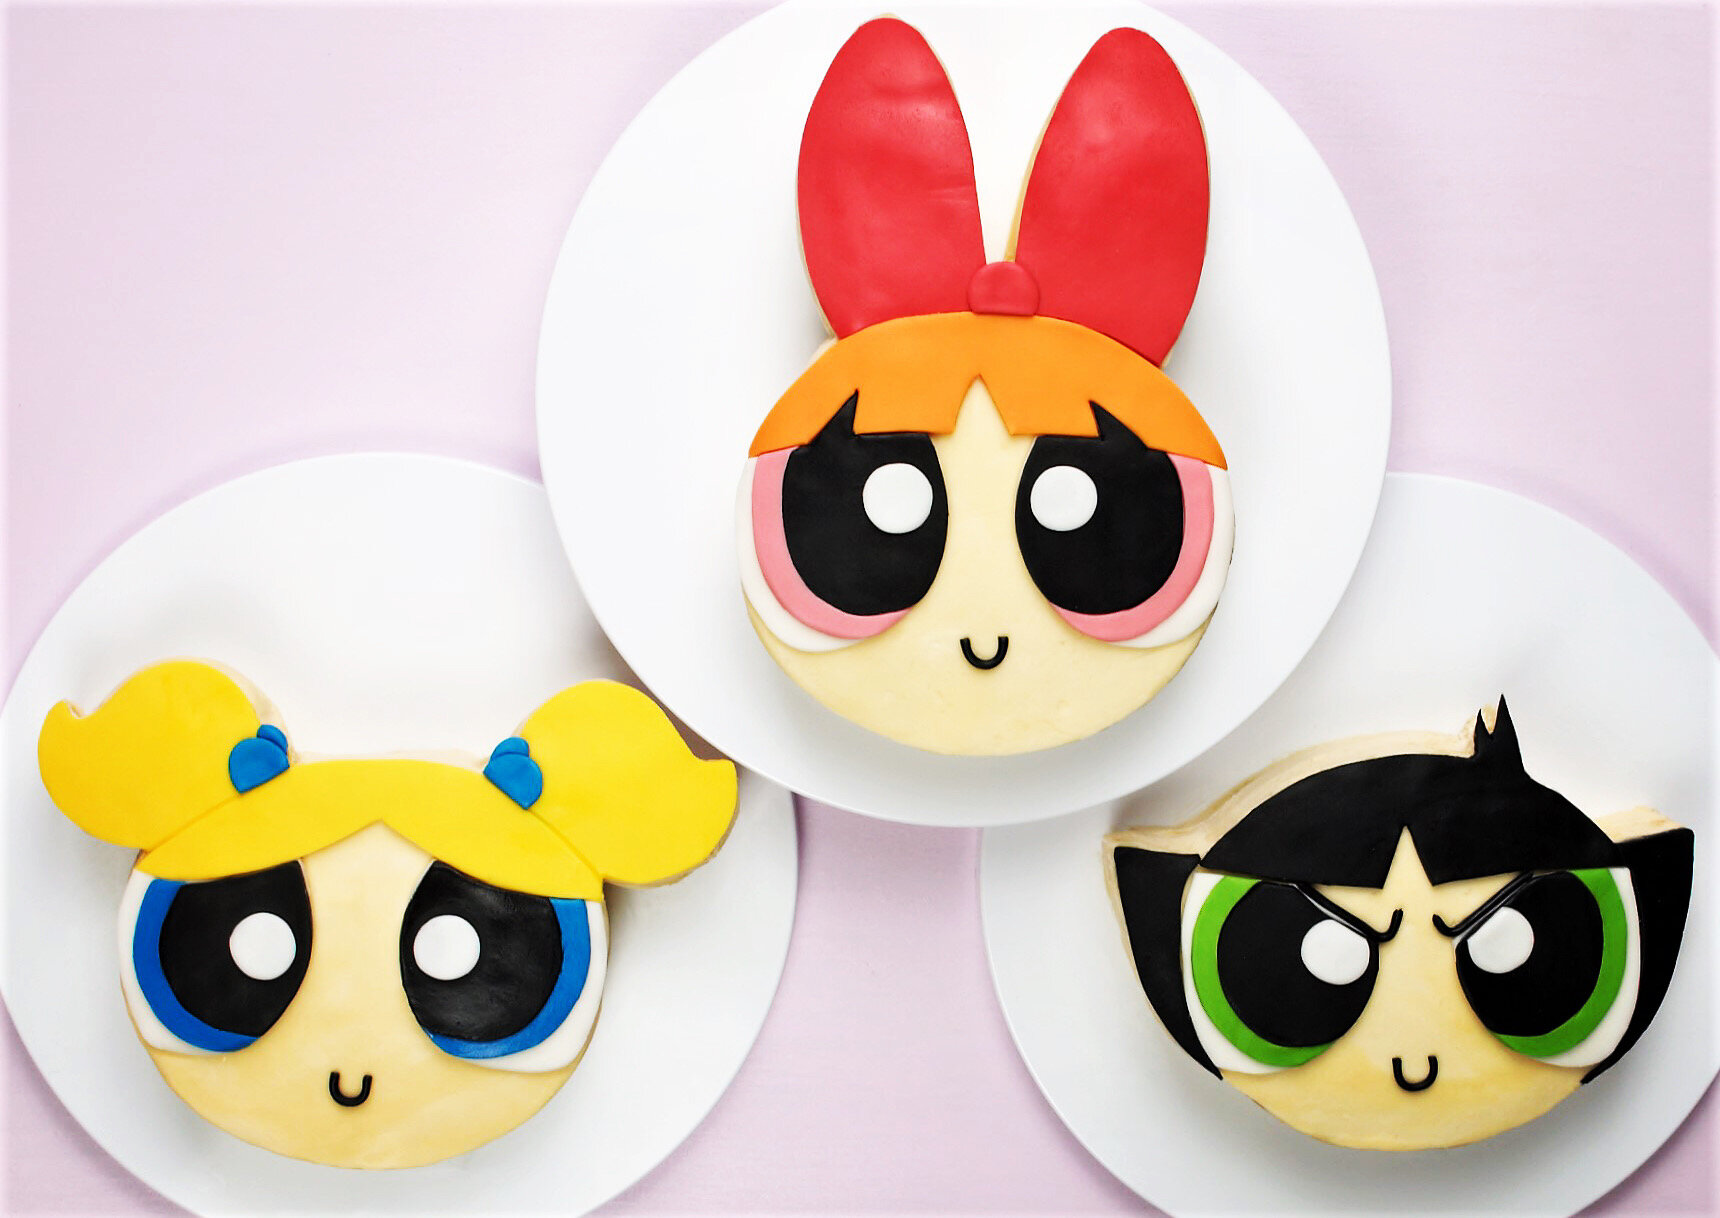
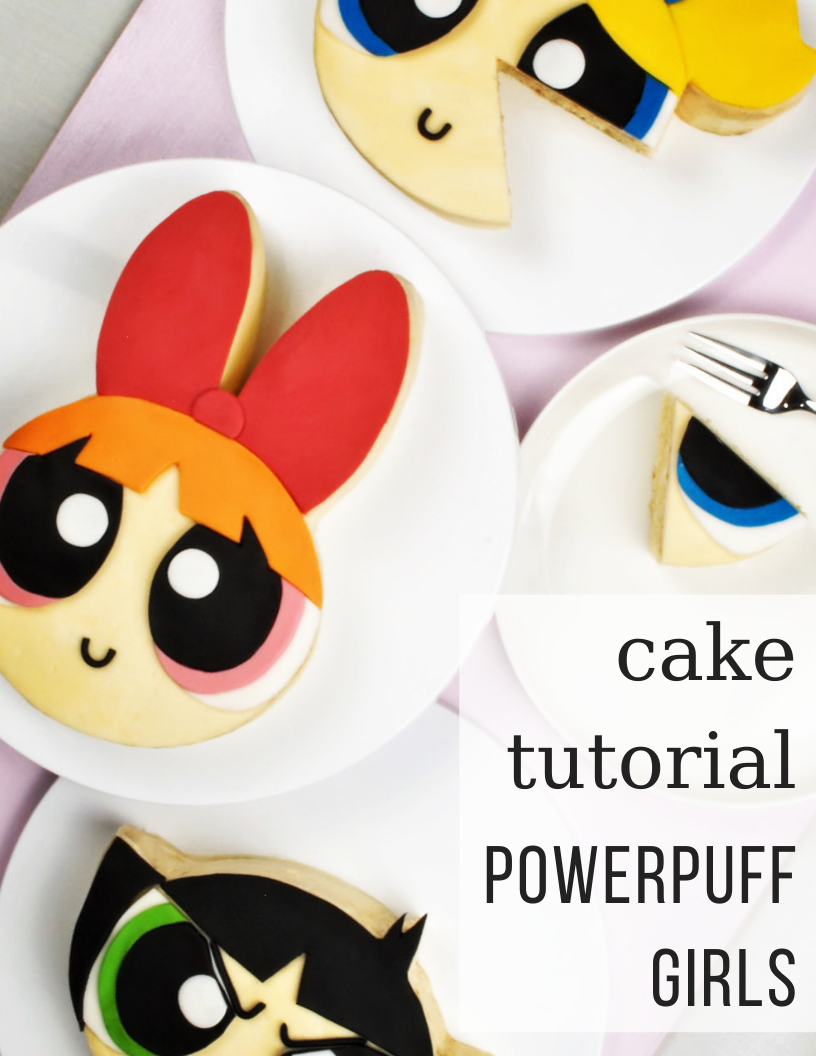
How To Make Cute AF Powerpuff Girls Cakes
Okay, if you don’t love these bad ass ladies then I’m sorry but you can't sit with us. I was so in love with this classic trio I had a handbag covered in them when I was in my twenties (desperately hoping it was quirky and kitschy). The idea of caking them has been kicking around my noggin for a while now but its finally time to bring the dream to life. Drum roll please...
Ingredients
serves 24, 4-6 hours, beginner/intermediate

Cake
450g self raising flour
450g of butter
450g sugar
8 eggs (lightly whisked)
50g plain flour
4tbsp boiled water
Decoration
375g butter*
750g icing sugar
Ivory gel food colouring
125g black fondant
70g each of red and yellow fondant
50g orange fondant
30g each of blue, pink and green fondant
Method
1. Line two 20cm x 30cm rectangle cake pans and preheat the oven to 160°C Fan/180°C. In a large bowl, beat together 450g of butter and 450g of sugar until pale and fluffy. While mixing, gradually add in the beaten eggs until fully combined. Into the same bowl, sift together 450g of self raising flour and 50g of plain flour and fold into the wet ingredients. Once fully combined, gently mix through the 4 tbsp of boiled water and transfer to the prepared tins, equal amounts of mixture in each. Bake for 25-30 minutes or until a skewer comes out clean. Leave to cool for 5 minutes before turning out onto a rack to cool completely.
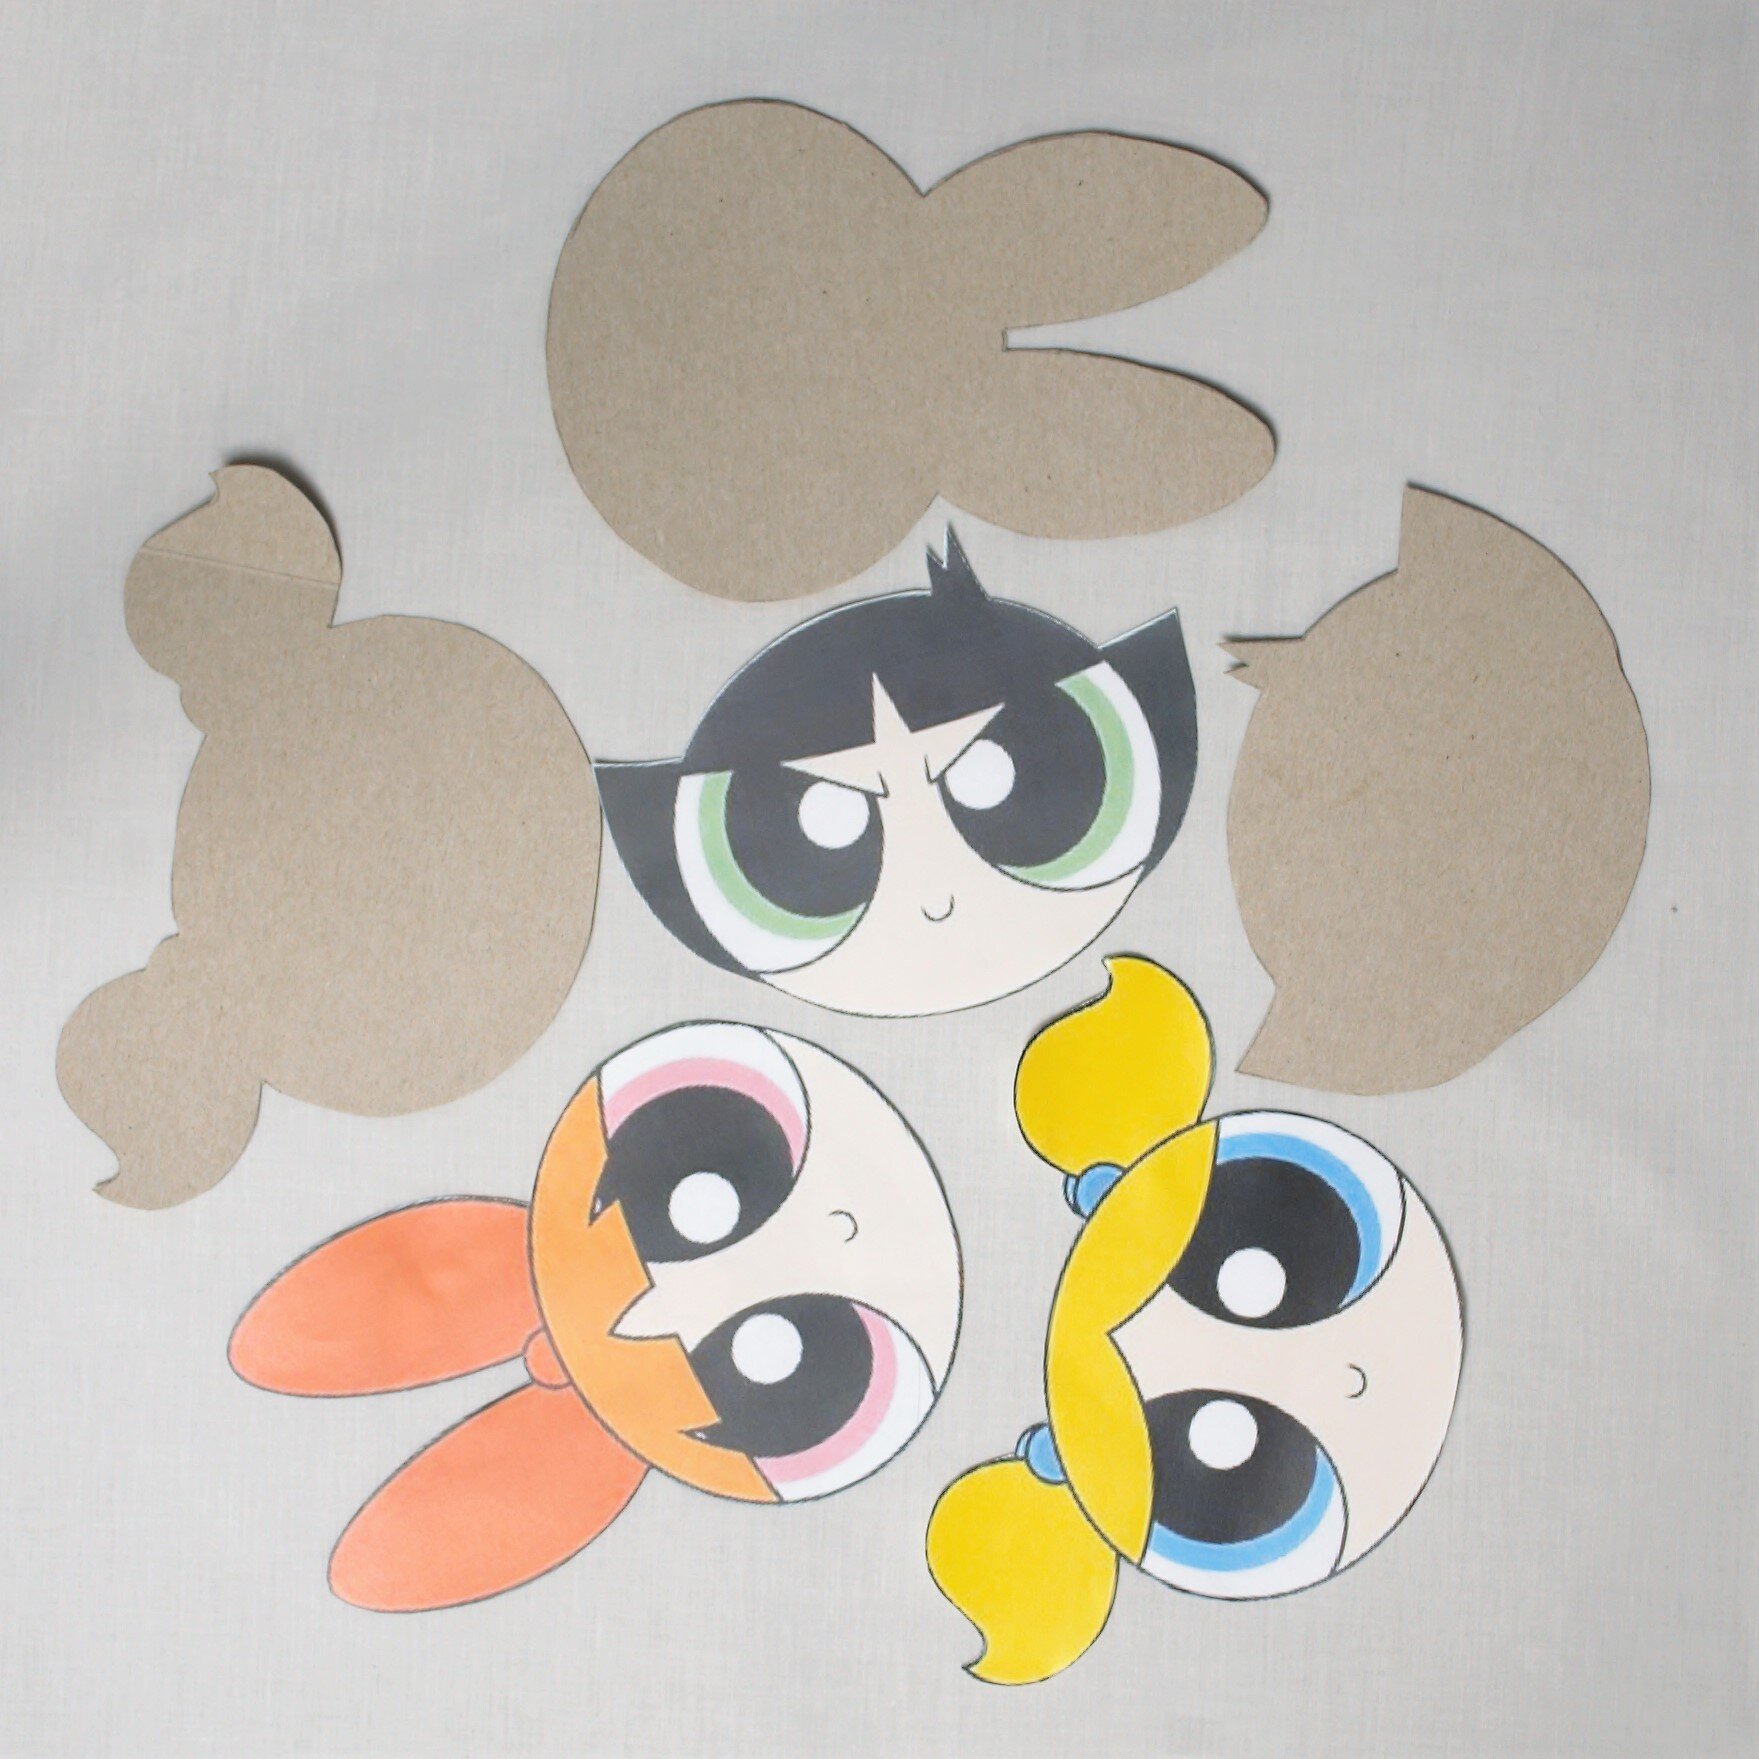
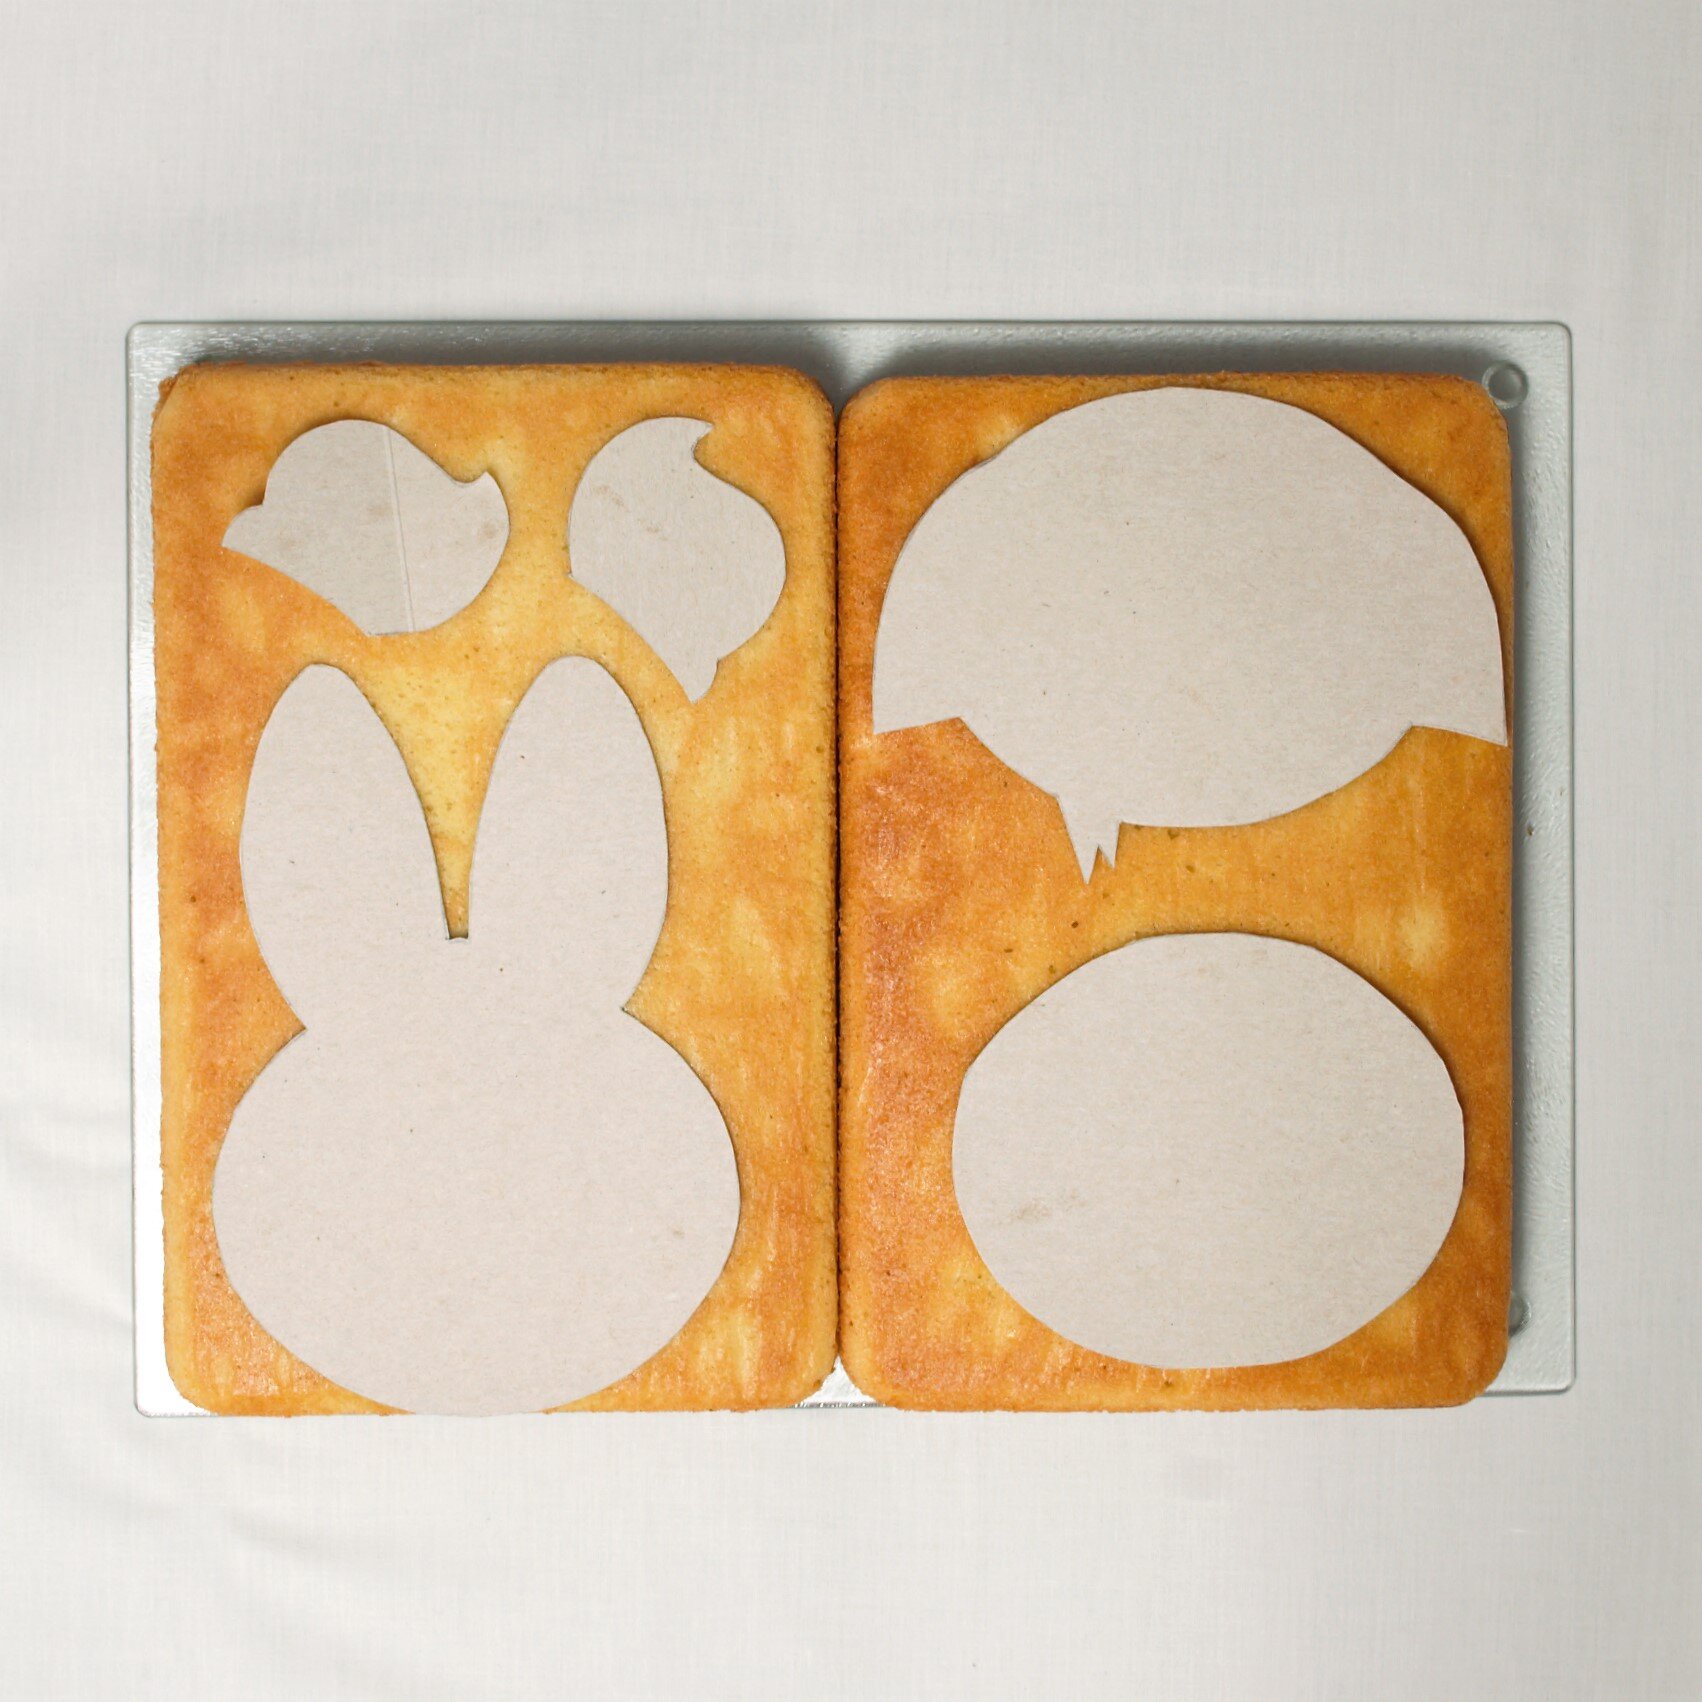
2. While the cake is cooling, print out snap shots of the trio on paper or card, the widest part of their faces should be roughly 12cm. Cut these out to be your templates. If you don’t have cardboard to print onto you can use your paper ones as a base to create cardboard versions. I used an old cereal box. Once the cake is completely cool arrange your templates across the bottom side making sure they all fit. You may have to chop off Bubbles ponytails like I did in the pic below. Once you’re happy with the spacing, carve around the templates. Keep any spare cake trimmings to the side, we will come back to them later.


3. While the cake is cooling. Beat together 375g of butter and 750g of icing sugar until smooth. Gradually add in very small drops of ivory gel food colouring until you match the trios skin tone. Cover all three cakes in a thin layer of buttercream and smooth it out. Place in the fridge to chill for 30 minutes. Once chilled, cover in a second layer of buttercream and smooth down with a palette knife. Return to the fridge for a further 30 minutes.
4. Now for the decoration, we’ll use Blossom as the example. Let’s start with her hair and bow as they’re the largest area. Take your scissors and start trimming your template by section, starting with the hair and bow. once you have your new templates, roll out the red and orange fondants to 2mm thick and large enough to fit the template inside with no gaps. Carve the fondant around the template and place to the side. Repeat for Bubbles and Buttercup. Once you have all the hair ready, remove your cakes from the fridge and gently rub a small drop of boiled but cooled water over the hair sections. Very carefully lift the fondant onto the cake and ease it into position. Once in place, go over over gently with a fondant smoother.
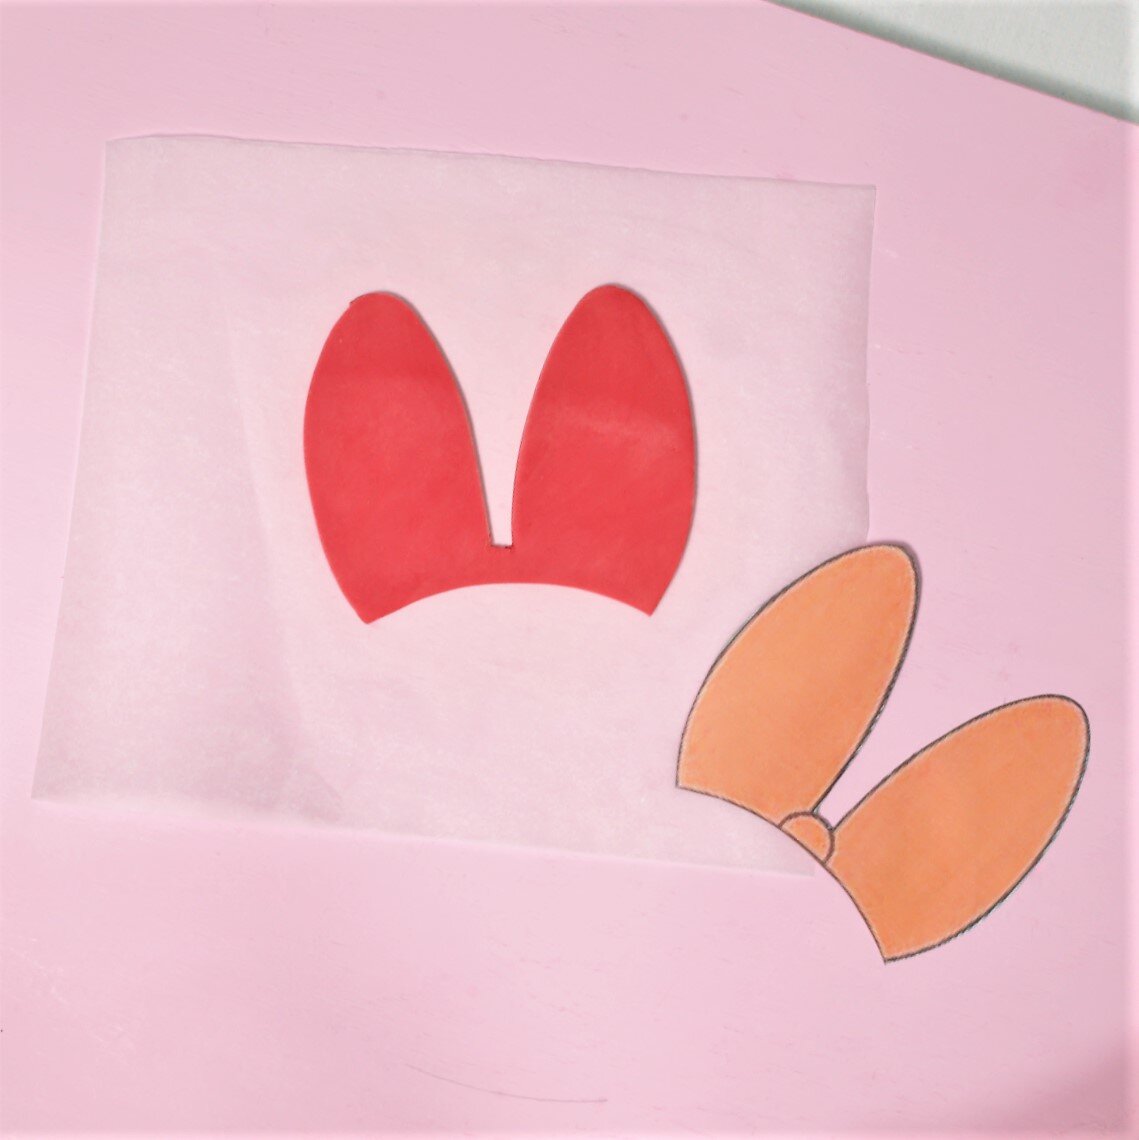


5. You might have noticed Blossom and Bubbles need a few additional touches to finish their look. With the remaining red fondant, cut out a small circle, the opposite end of a piping nozzle is great for this. Slice off a tiny piece at the bottom so the bottom has a straight edge and attach this to the centre of Blossoms bow with a drop of sterilised water. Repeat for Bubbles but this time cut two circles in blue with a straight bottom edge. Attach the circles to the inner edges of Bubbles ponytails with a small drop of water. Using the remaining pieces that you cut from the blue circles. gently squeeze one end to make it narrower and attach above the main circles. The narrow ends should point inwards.
6. Onto the eyes. Cut the eye sections out of your templates, leaving the whole eye intact. Roll out your white fondant to 2mm thick and large enough to fit all 6 eyes. Cut around the templates. Now remove the white outer edges and split the black and coloured sections as shown below. Its very important to keep track of which pieces belong together as they are all slightly different. Roll out the remaining black fondant to 2mm thick and large enough to fit all 6 pupils. Cut around the pupil templates and then attach them to the corresponding white section with a small drop of water. Repeat for the irises. Lastly, use the remaining white fondant to cut 6 small circles and attach these to match the the original image. Gently place the entire eye onto your cake, using the tiniest drop of water to attach them to the buttercream. Repeat for the other 5.


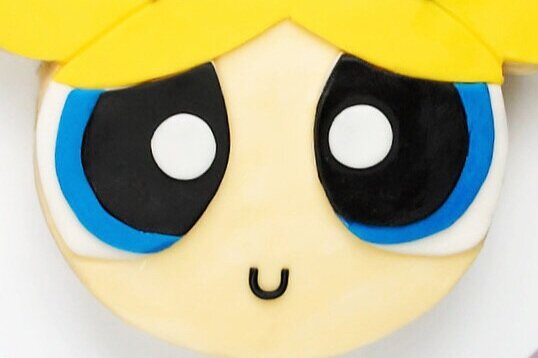

7. We’re on the home stretch, only a few finishing touches to go. Roll out a small piece of remaining black fondant into a long, skinny rope. Starting with the mouths, cut three pieces of rope to 2cm each and bend into ‘U’ shapes. Place on to your cakes and gently press into position. With the remaining rope, cut two pieces to 4cm each and place onto Buttercups eyebrows, bending upwards at the inner edge (cos she’s not a happy bunny). Gently press into place.
And you my friend, are done! Congrats, you smashed it and I can’t wait to see you at the same time next month when I get all Christmassy up in here.
Ps. Did you think I’d forgotten about all that leftover cake? As if if I would do you like that! Crumble the leftovers into the remaining buttercream and mix it all up. Once its fully combined, tear off small pieces, about the size of a chocolate truffle and roll in your palm into a ball shape. Lay these on parchment paper and place in the fridge to chill. After 30 minutes, melt 300g of chocolate over a bain marie. Once melted, dip the balls in to the chocolate to coat them. Use a fork to strain off any excess chocolate and return to the parchment paper to dry. If you really wanna do this but don’t have time right now, no stress, just wrap the cake mix up securely in cling film, pop it in the freezer and then coat with chocolate at a later date when you’re free. You won’t be sorry!

*this includes extra buttercream to turn the cake scraps into cake pops, if you don’t plan to make these reduce the amount to 2/3.