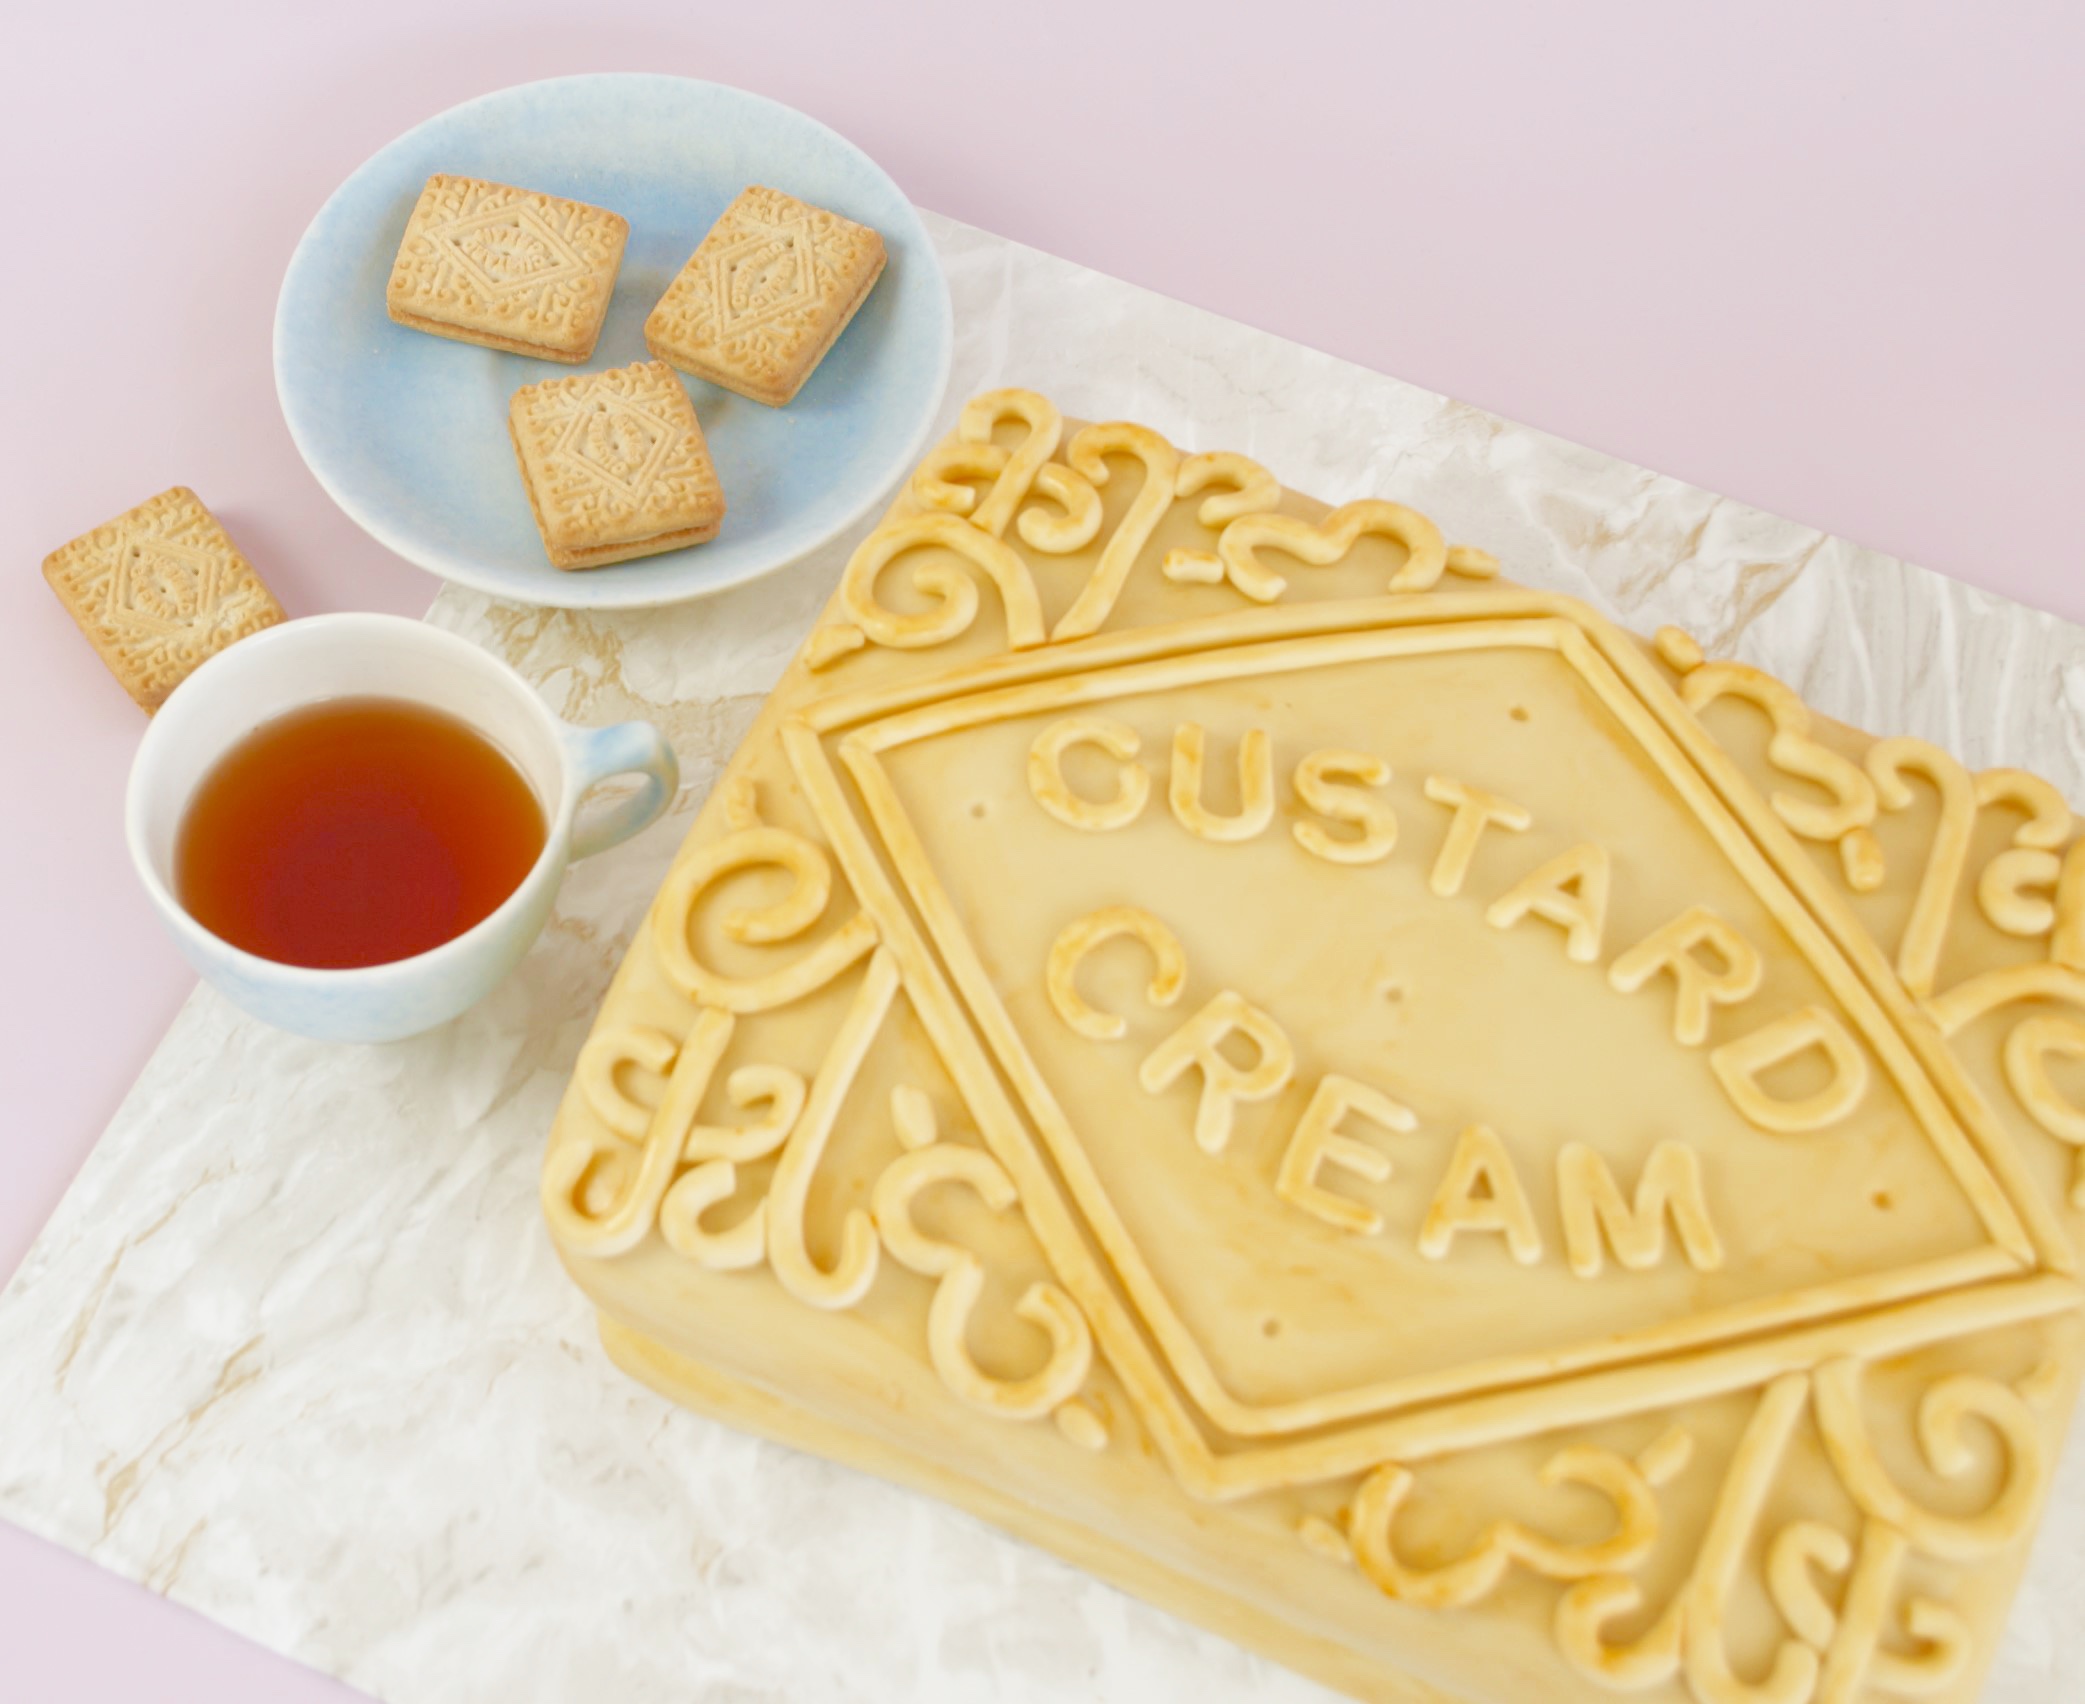
How To Make An Awesome Giant Custard Cream Cake
Hello! Welcome back, I’ve got an absolute cracker today. I won’t say this custard cream cake is my new favourite cos I know I know I say that EVERY week, but you know it totally is!
You remember how I put it off last week because I wanted a cake I could totally zone out into instead? Well, turns out I needn’t have bothered cos this baby was perfect for that! It had repeating tasks, spatial awareness and you see all those little raised design elements? Each one gets rolled to the same width and then shaped meaning super concentration and some of the old hand eye coordination. Meaning? It turned out to be an awesome session of cake mindfulness that I could have totally made last week. Damn you hindsight, always making a mockery of me. I’m shaking my fist as we speak.
I’m also furiously writing up this post cos horror of all horrors, I had to make this cake twice! I was finishing off the final one at 8am this morning, caking like a mad woman. You see, I scheduled the bake in for Thursday night/Friday morning but then just as I finished the top layer and carried it lovingly to the rest of the cake… I dropped it. Not onto the floor (thank god!) but onto the cake. You see, I’ve been playing fast and loose with my sponge for a while now and it finally came to bite me on the ass.
I usually stick with a Victoria sponge cos well, I love it, I know the ingredients by heart and I know exactly how much is needed for each sized pan. But it’s a delicate soul old Vicky and I finally pushed it too hard. I tried to cover a long, shallow sponge in a lot of fondant and then casually pick it up. Of course it crumbled beneath me. And of course I panicked and rapidly dropped it thinking the faster it went down the better. It wasn’t better.
It wasn’t all a disaster though, my gorgeous friend got a whopping great chunk to eat, I got to fix the things I didn’t like about the first one and when researching sturdier sponges, I discovered you could add less sugar to cake without it affecting the structure. Which meant I could offset the sweetness of the custard frosting with a less sweet sponge the second time around. I think I might actually start doing that with every cake cos I LOVE cake but when there’s frosting and fondant it does verge on oversweet sometimes, you know? I learned an amazing tip from re-runs of the Bake Off though; if you add less sugar it won’t brown as much so be careful not to over bake.
Okay, I’m stacked full of new info, I got a new recipe and a cake that I know is not just gonna look amazing but it’s gonna make you feel super relaxed and calm and accomplished afterward. Shall we get started?
Ingredients
Cake
480g butter or marg
390g grams sugar
6 eggs (lightly beaten)
420g self-raising flour
180g plain flour
6 tbsps milk
2tsp vanilla extract
Toppings
250g butter
4 tbsp instant custard powder
100g cream cheese
500g icing sugar
700g white fondant
Food colouring
1 tbsp vodka
Method
Line three, 11x8 inch baking trays with parchment paper and preheat the oven to 170°C (150° Fan).
Cream together 480g of butter or marg with 390g sugar until light and fluffy. Gradually add in 6 beaten eggs and 6tbsp of milk, very slowly to prevent the mix from splitting. Mix in 2 tbsp of vanilla.
Sift in 420g of self-raising flour and 180g of plain flour and fold into the wet mixture until fully combined. Careful not to overwork.
Split the mix equally across the 3 lined pans and bake for 15-20 minutes or until a skewer comes out clean. As we’re adding less than usual it may be pale when it’s ready so be careful not to let the colour trick you into overbaking them.
When baked, turn the cakes out onto a wire rack topside facing down. This should be enough to even out the tops since the cakes are so shallow and long. Leave to cool.
Mix together 250g of butter and 100g of cream cheese until pale and fluffy. In a cup, add 4 tbsp of instant custard powder to 3 tbsp of boiling water and mix together until it forms a paste. Add the paste to the butter and cream cheese mixture, whisking well. Finally, add 500g of icing sugar and mix until fluffy. The frosting should be smooth to spread but hold on the beaters when they’re lifted from the bowl.
Once the cakes are cool, trim one of the long sides on each sponge until they all measure 24cm long. This step isn’t essential if you don’t like leftover cake you absolutely don’t have to do it, but this way better matches the dimensions of the original biscuit. Then trim one of the sponges by a further 1/4cm on all sides, this will be the middle layer.
Build the layers with a spreading of frosting between each, making sure that the smaller one goes in the middle. With a knife, gently carve off the sharp edges and corners, we want them to be a little softer and a little rounder. Apply a thin crumb coat of frosting all over and place the cake in the fridge.
While the cake is chilling, knead the fondant with a knob a butter or margarine and gel food colouring until it’s a lovely biscuit-y colour. Wrap in film and move to the side.
Remove the cake from the fridge and cover in another layer of frosting, a little thicker this time. Use a palette knife warmed in boiling water to smooth it down, paying careful attention to the top layer. Return the cake to the fridge.
Roll out the fondant to about a 1/4cm thick or as thin as you’re comfortable, making sure it’s big enough to cover the entire top layer of sponge. Remove the cake from the fridge and cover it with the fondant. Use a fondant smoother to smooth down any lumps, bumps or air bubbles. Work it over the corners and down the sides of the cakes, gently pushing it into the little ridge left by the middle layer.
When you’re happy it’s all smooth, carefully use a knife to cut away any excess so that the fondant is only covering the top layer of cake. After trimming, use your fingers to gently smooth the fondant under the ridge, making sure it’s secure.
Roll out the fondant again, this time into 2 long strips roughly 35cm long by 4cm wide. Wrap these around the bottom layer of cake and gently mould them into the ridge again. Trim off the excess like you did with the top layer and use the blunt side of your knife to gently push the fondant at the bottom just underneath the cake a little.
Lastly for today, fill in any gaps in the middle layer with frosting and smooth it down. Leave the cake to dry overnight, this will allow the fondant to harden making it easier to transfer the guides we need for those gorgeous patterns to be the same on all 4 corners. But make sure not to store it in the fridge, when fondant comes out of the fridge it starts to sweat making it soft again.
The next day cut a piece of paper the same size as your cake. Fold it in half, then fold it in half again. Draw a diamond with each point at one of the 4 creases. Lay this over the cake and using a sterilised pin or needle, poke a hole in each corner, these will be your guides. Using a paintbrush, brush over a little water, just to dampen the fondant in the same way as you drew the diamond on the paper, using the holes as guides.
Roll out a piece of fondant into a long thin rope. It’s easiest to use your fondant smoother to do this as it will keep the rope nice and smooth and even. When it’s the right thickness and long enough to make half the diamond, attach it to the cake and trim any excess. The water should have made the fondant sticky. Repeat for the other half of the diamond.
Roll the fondant into a rope again, same length as before but this time thinner. Dampen the fondant just inside the diamond this time and attach the thinner rope.
This time, we need a flat piece of fondant, 1/4cm thick. From this, cut out the letters you need to spell ‘custard cream’ and leave them to the side to dry a little.
Cut a piece of parchment paper to fit the corners of the cake that are left after we added the diamond. With pencil, draw out the shapes you see in the custard cream. Don’t overthink it, I did them completely wrong on the first cake and everyone still knew exactly what it was. No-one even questioned it, I swear. Go back over your sketch leaning quite hard on the pencil and then place it pencil side down on your first corner. Secure with a pin.
With your pencil, trace back over the design a few times. The pencil on the underside should rub off leaving behind a handy guide. Remove the parchment paper. Dampen each of the lines in the guide with a little water on a paintbrush.
Now, we’re gonna go back to rolling the fondant into ropes. This time, place the ropes onto the cake following the shapes traced out by the pencil, gently trimming away any excess. When the corner is complete, repeat for the other three.
Let’s add the letters now. Line them up first without dampening the fondant. This will help you to see how they should be, the curve of the arch etc. When you’re happy, secure them with a little water.
Using the handle end of a paintbrush, gently push in those 4 little holes you can see on the biscuits. Be very gentle otherwise the fondant will crack and don’t push all the way through, just a little indent.
Finally, let’s add a little more depth by mixing a drop of vodka with a spot of ivory gel food colouring. Brush this all over, focussing a little more on the raised parts as these are the bits more likely to be darker from the oven.
And we’re done, nice one!
Sharing At


