How To Make A Totally Fetch Mean Girls Cake
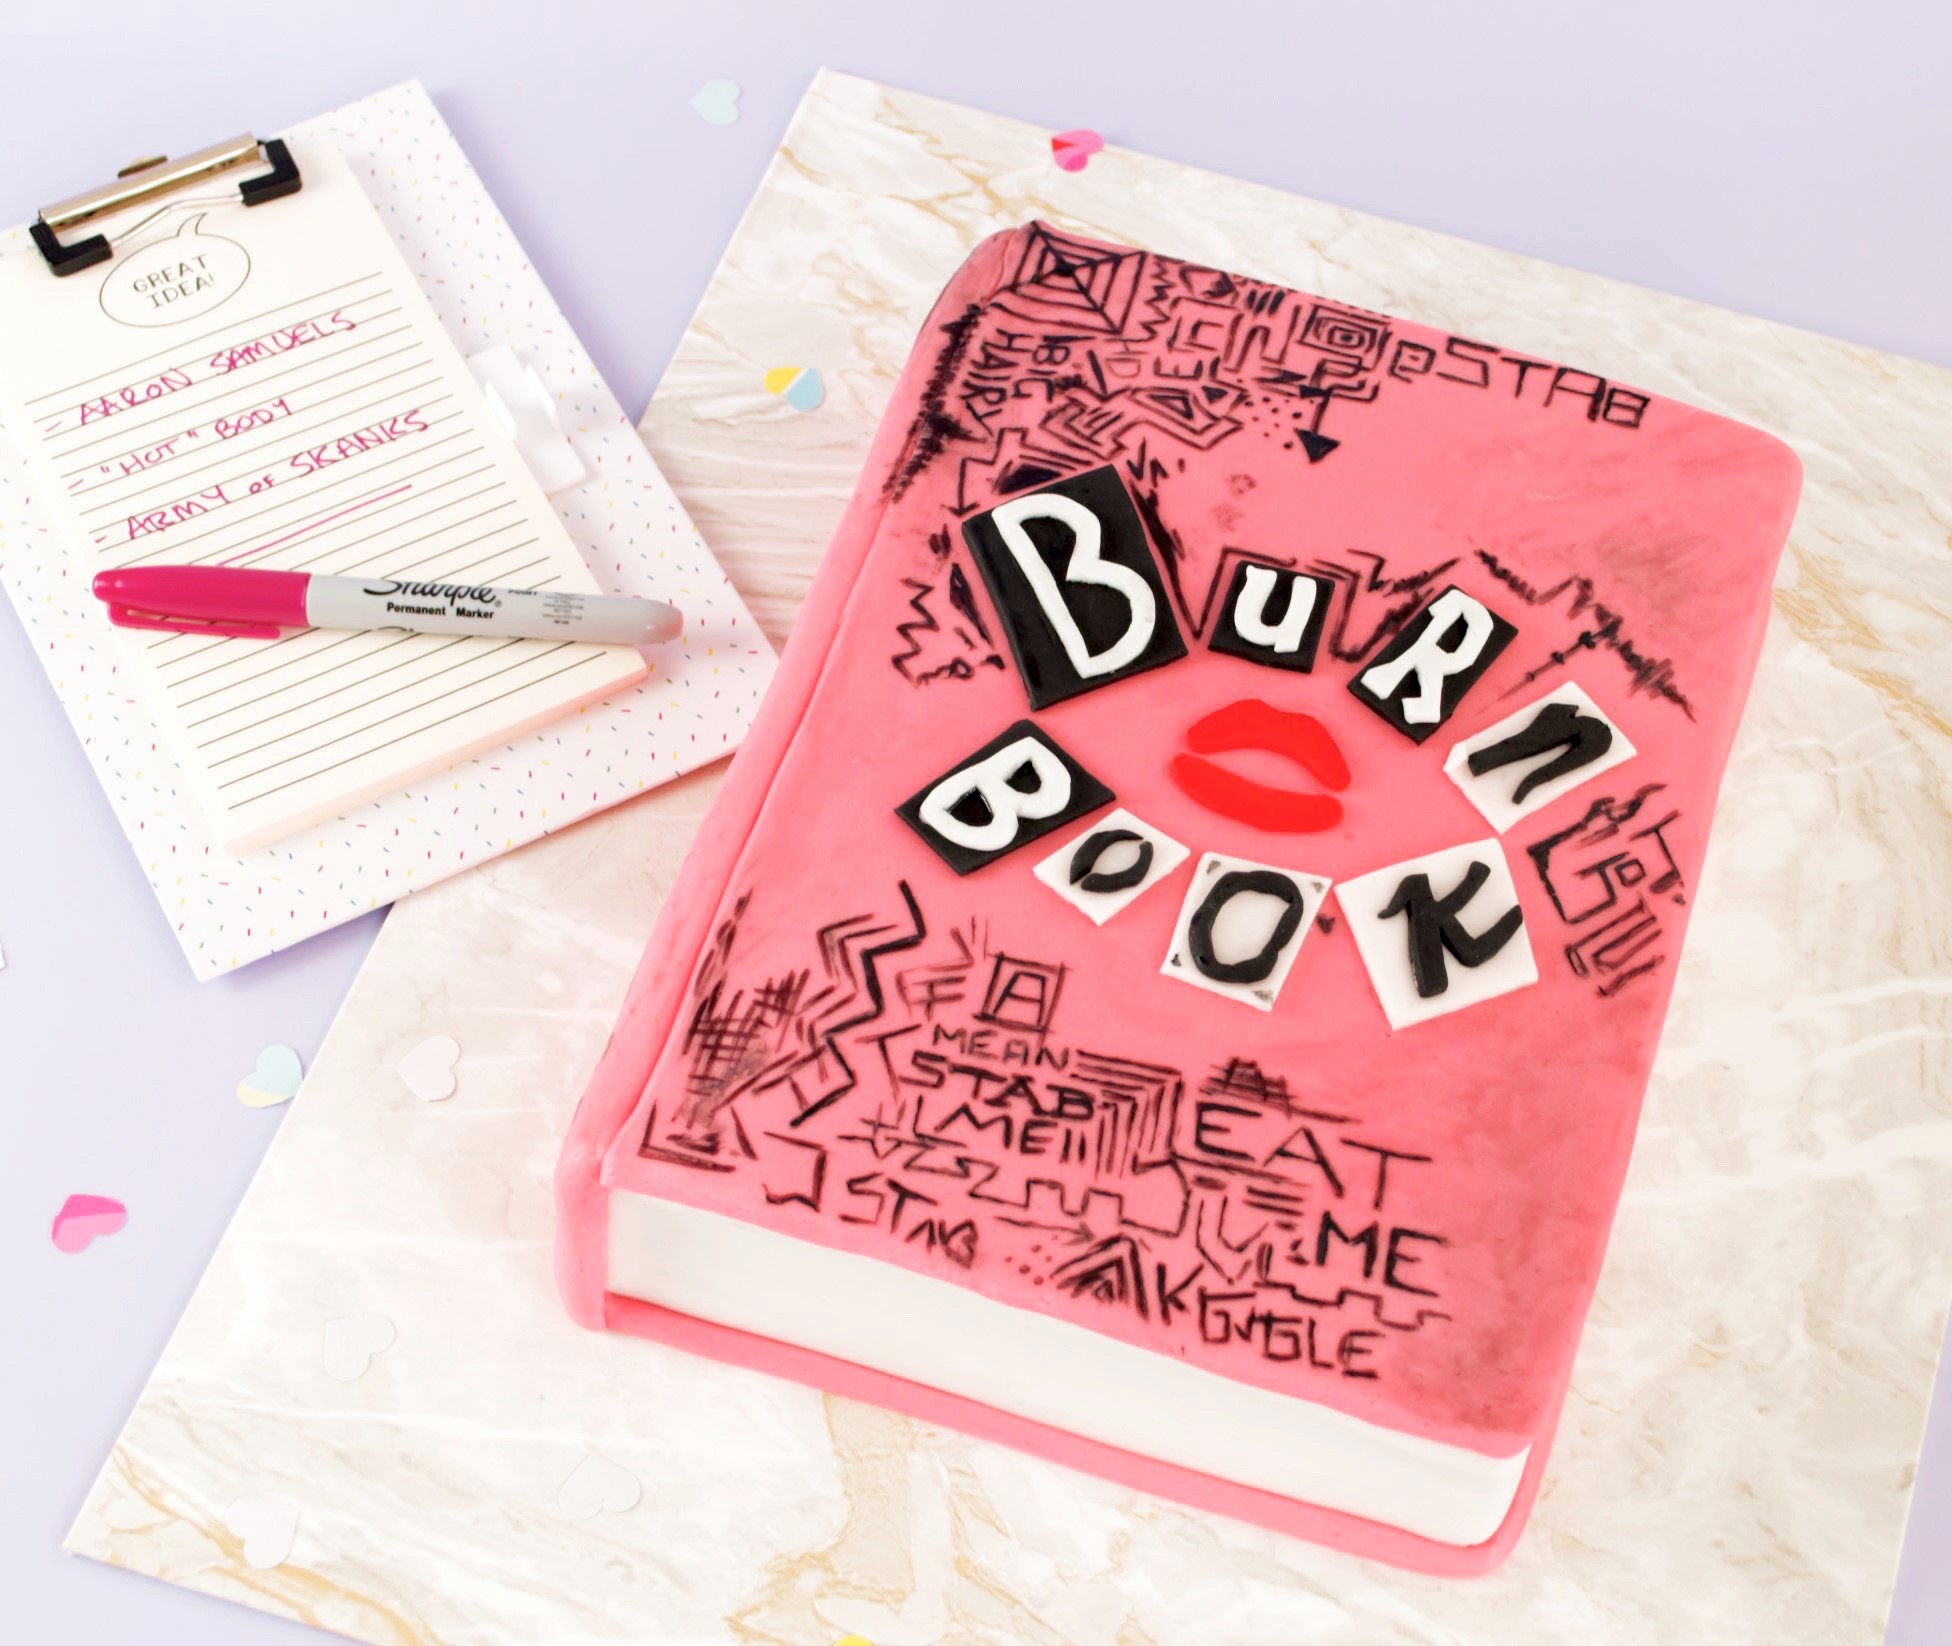
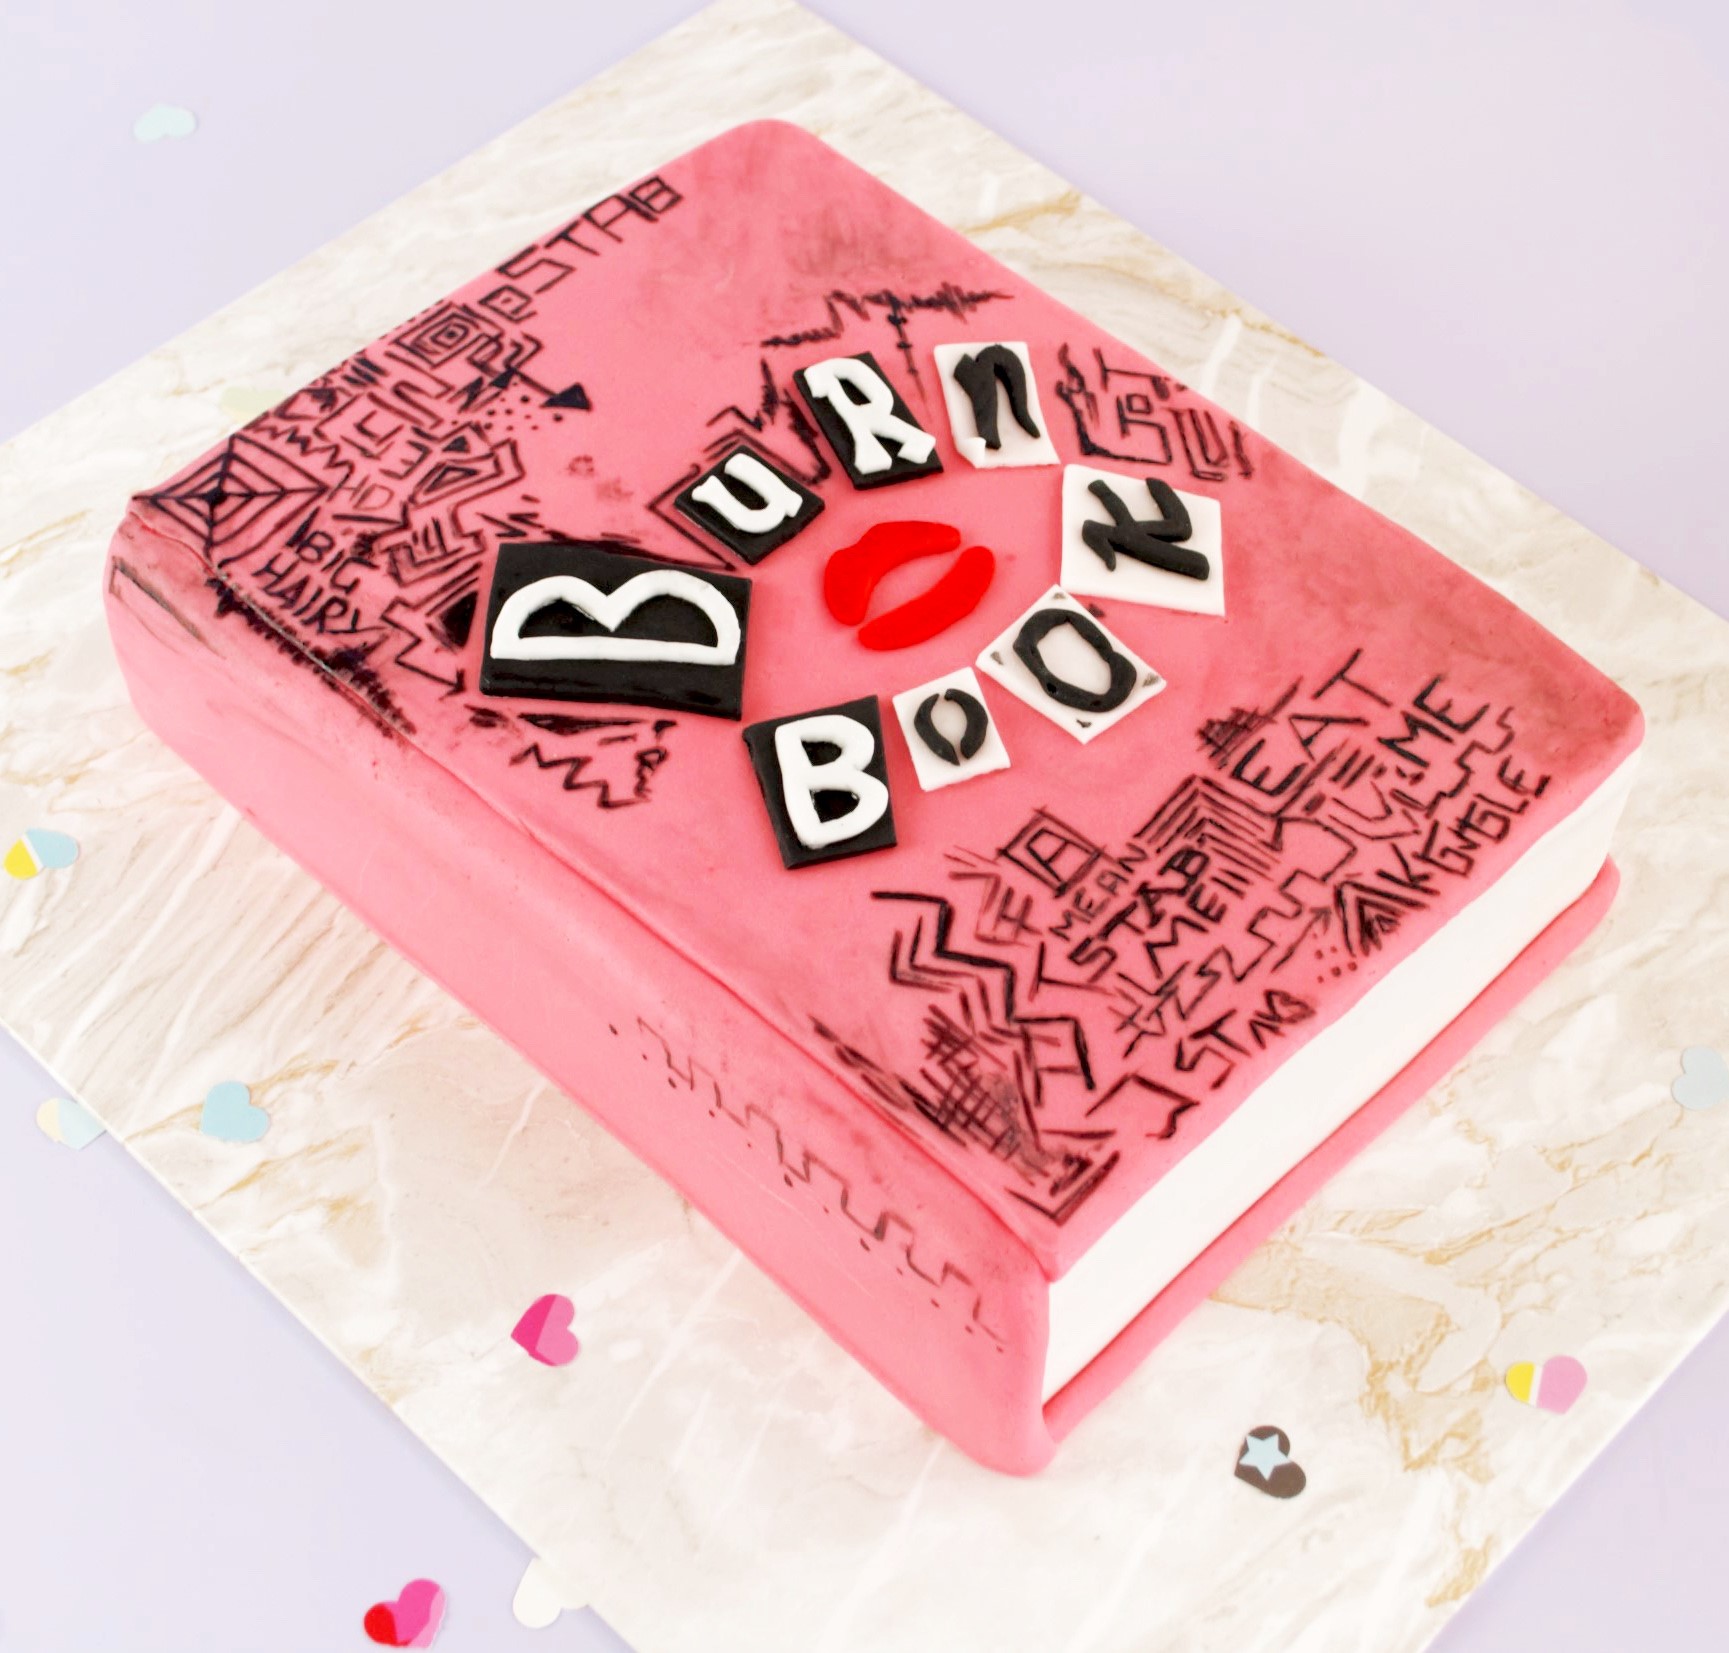
Put it in the book sweetie! Oh man I freaking love Mean Girls! And I could not resist caking the Burn Book. I actually had a totally different cake in mind this week but on Friday night I saw a list on Pinterest, Top 10 Mean Girls Quotes and I immediately changed my mind. I couldn’t stop myself!
I got way too excited though and lost all my abilities of baking. All the lessons I’ve learned this year went out the window as I gush gush gushed over this design. I layered it without frosting and couldn’t prise it back apart. I put the fondant in the wrong place twice and had redo it (once, the second time I just rode that mistake train to it’s destination). I left the cake in the fridge overnight after I put the fondant on which meant it started sweating when I tried to paint it. I even accidentally gouged a hole in the side while taking the pictures. It’s true what the say, love makes you crazy!
Maybe it’s cos I live my life in a constant state of Gretchen breaking down over ‘YOU CAN’T SIT WITH US!’. I’m always on that edge. In fact, you know I think I actually have shouted that at someone. BTW, I totally would have let fetch happen. Gretchen I love you and your hooped earrings!
Or maybe it’s just cos I was a total loser in high school, I absolutely love watching the queen bee clique being dismantled.
Or maybe it’s just cos it’s so damn funny! Amanda Seyfried is comedy genius as Karen, “It’s like I have ESPN or something. My breasts can sense when it’s gonna rain. Well, they can sense when it’s raining.”
Can Tina Fey just be my bestie already? She can adopt me with Amy Pohler, I promise it won’t be weird! They’ll crack me up and I’ll bake them cake, it’s a match made in heaven.
And did you know that Aaron Samuels now presents Cake Wars on the food network? So, now all I have to do is move to America, be accepted on to the show, somehow arrange my filming to take place on October 3rd and have him ask me what the date is and finally all my dreams will have come true? Pretty simple yeah?
I got so excited, I couldn’t get it together enough to create a cake recipe so this week I went knocking on Nigella’s door and boy did she deliver. I found this insanely good Devil’s Food Cake recipe that is just mmmmmmmmmmm. It’s so freaking good I even had a piece with breakfast this morning. I was walking past and the letters of ‘Burn Book’ magically rearranged into ‘Eat Me’. Well, who am I to say no to such a power? Let them eat cake!
Ingredients
2 batches of Devil’s Food Cake (I used this one)
250g butter plus 2-3 tbsp
100g cream cheese
500g icing sugar
1tbsp cocoa
1kg of white fondant
50g red fondant
50g black fondant
1 edible black pen or black food colouring
1 tbsp vodka or decorators alcohol
Method
1. Line and grease four 11 x 8inch cookie trays. Mix the Devils Food cake batter and pour it equally into each of the pans.
2. Bake in a preheated oven at 180°C (170°C Fan) for 15 minutes or until a skewer comes out clean. When the cakes are ready, leave to cool in the pans for 10 minutes before turning out onto a wire rack.
3. In a large bowl, beat together 250g of butter, 100g of cream cheese. 500g of icing sugar and 1 tbsp of cocoa. It should be easy to spread but stay on the beaters when you lift them out of the bowl. If it needs thickened add more icing sugar, if it needs to be slacker add a splash of milk.
4. When the cakes have cooled, build them up in layers with a spread of frosting in between each. If you look closely, my middle layer is missing the frosting because I accidentally layered the cakes without the cream to check the height and couldn’t prise these two apart. What an eejit! When the cakes are all layered, transfer to the fridge to chill for 15 minutes.
5. Remove the cakes from the fridge and trim any sides that aren’t straight or have a little bit of a dip to them then apply a crumb coat of frosting all over. Return to the fridge for 30 minutes.
6. Repeat with another layer of frosting and chill time.
7. Measure three sides of the cake, 1 long and 2 short. For me this came out at 26 inches but its best to check since we will all trim the edges a little differently. Now measure the depth of the cake and take a note of the number.
8. Knead 300g of white fondant with a tbsp of butter for 5-10 minutes, kneading makes it easier to work with and the butter helps with those pesky cracks.
9. Roll it out into a long strip, at least the same length as the three sides we measured earlier and the width at least as big as the depth of the cake.
10. Remove the cake from the fridge and mist the sides with water that has been boiled and then cooled. Using a clean tea towel. Dry any parts of the cake board that are still on show, it’ll be easier to neaten up the fondant if it doesn’t stick to the board.
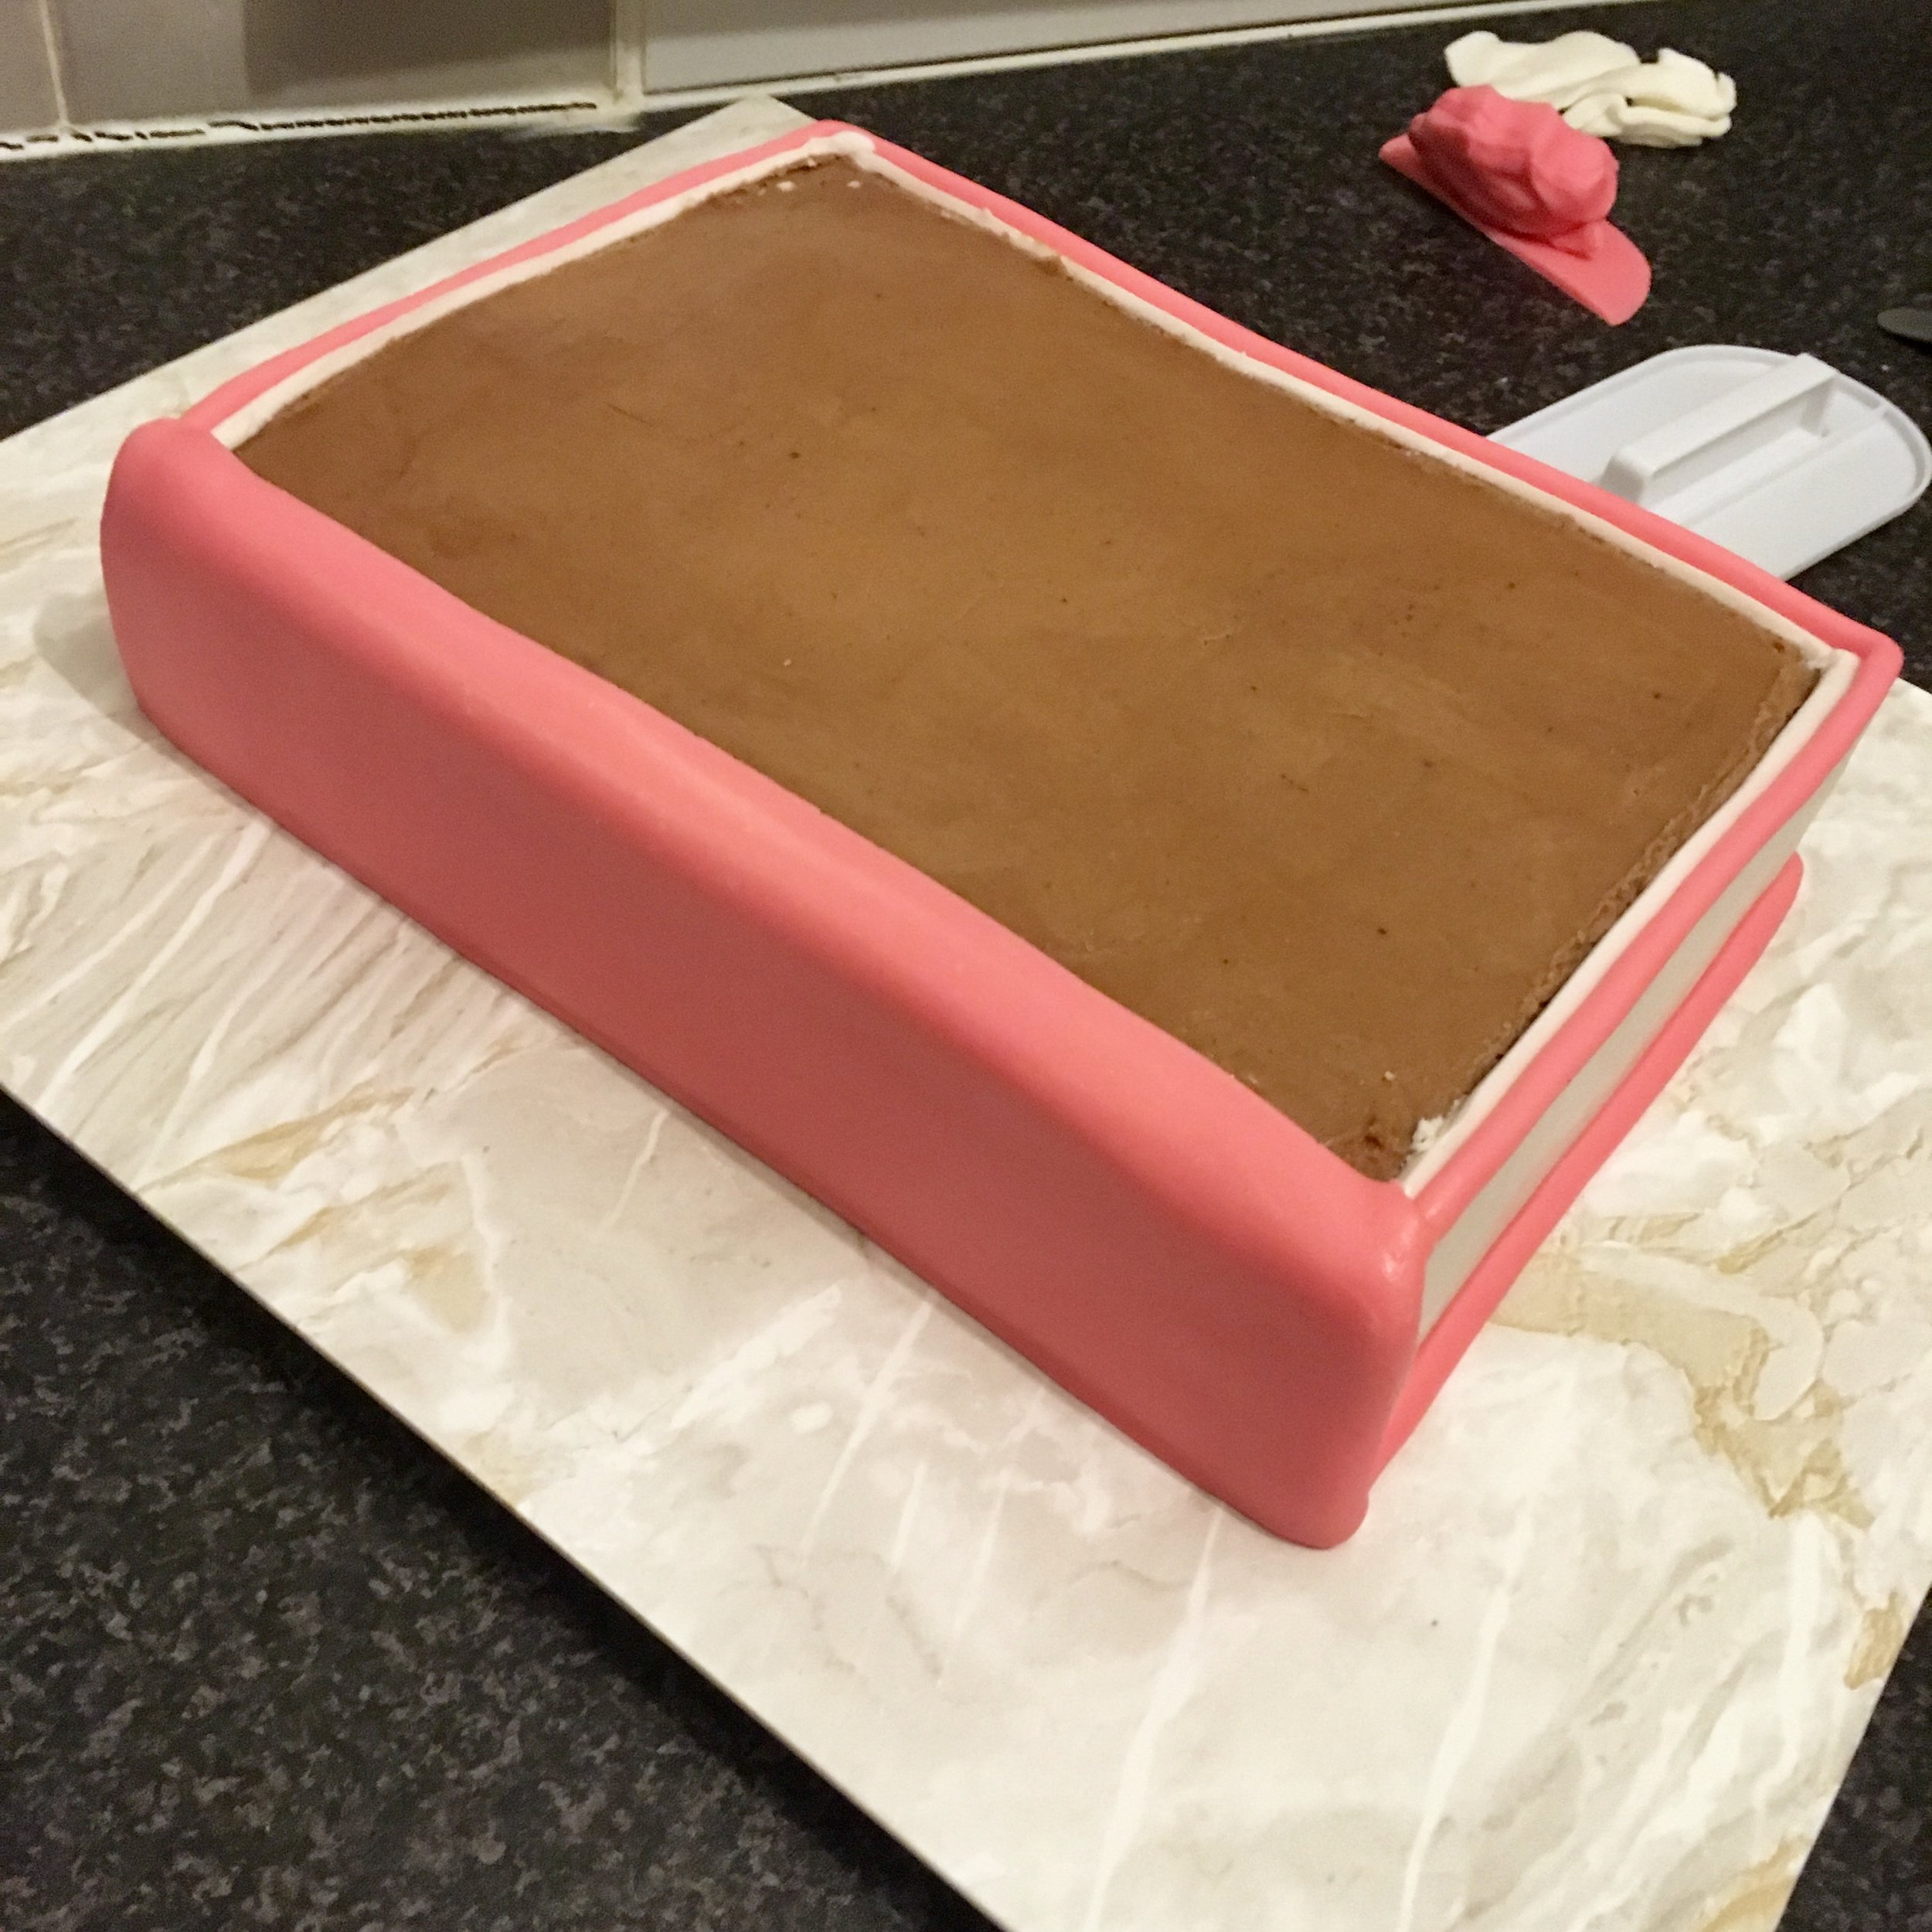
11. Attach the white fondant strip around the sides of the cake, taking care to smooth the corners. Trim any excess from the top and bottom. Remember it’s 1 long side and 2 short, I accidentally covered 2 long and one short and had to take the entire thing off. Twice!!!
12. Knead 500g of white fondant together with a tbsp of butter and a little of the red until you get a nice pink colour.
13. Using the pink fondant, roll out a long thin rope the same length as the white fondant we measured earlier plus 4 inches. To get it really smooth and even, it’s best to roll it under a fondant smoother.
14. Attach this around the bottom edges with a little vodka. Repeat, this time looping a rope around the top edges.
15. Roll out another piece of pink fondant to at least the length and depth of the cake, this will cover that naked side. Attach it to the side of the cake with a misting of sterilised water and smooth down with a fondant smoother.
16. Roll out the remaining pink fondant large enough to cover the top surface of the cake that’s still bare. Trim one of the long sides to create a perfectly straight line, this side will line up with the pink edge of the cake.
17. At this point, I had let my sister eat the leftover frosting because I’m a fool! Instead, use any frosting you have left to fill in the top of the cake, making sure that all of the edges are level. Otherwise like mine, your top frosting will sink a little.
18. Trim the excess, leaving enough fondant to wrap around the ropes we made earlier, smoothing them on the underside of the ropes out of sight. Leave the cake to dry overnight somewhere cool and dry.
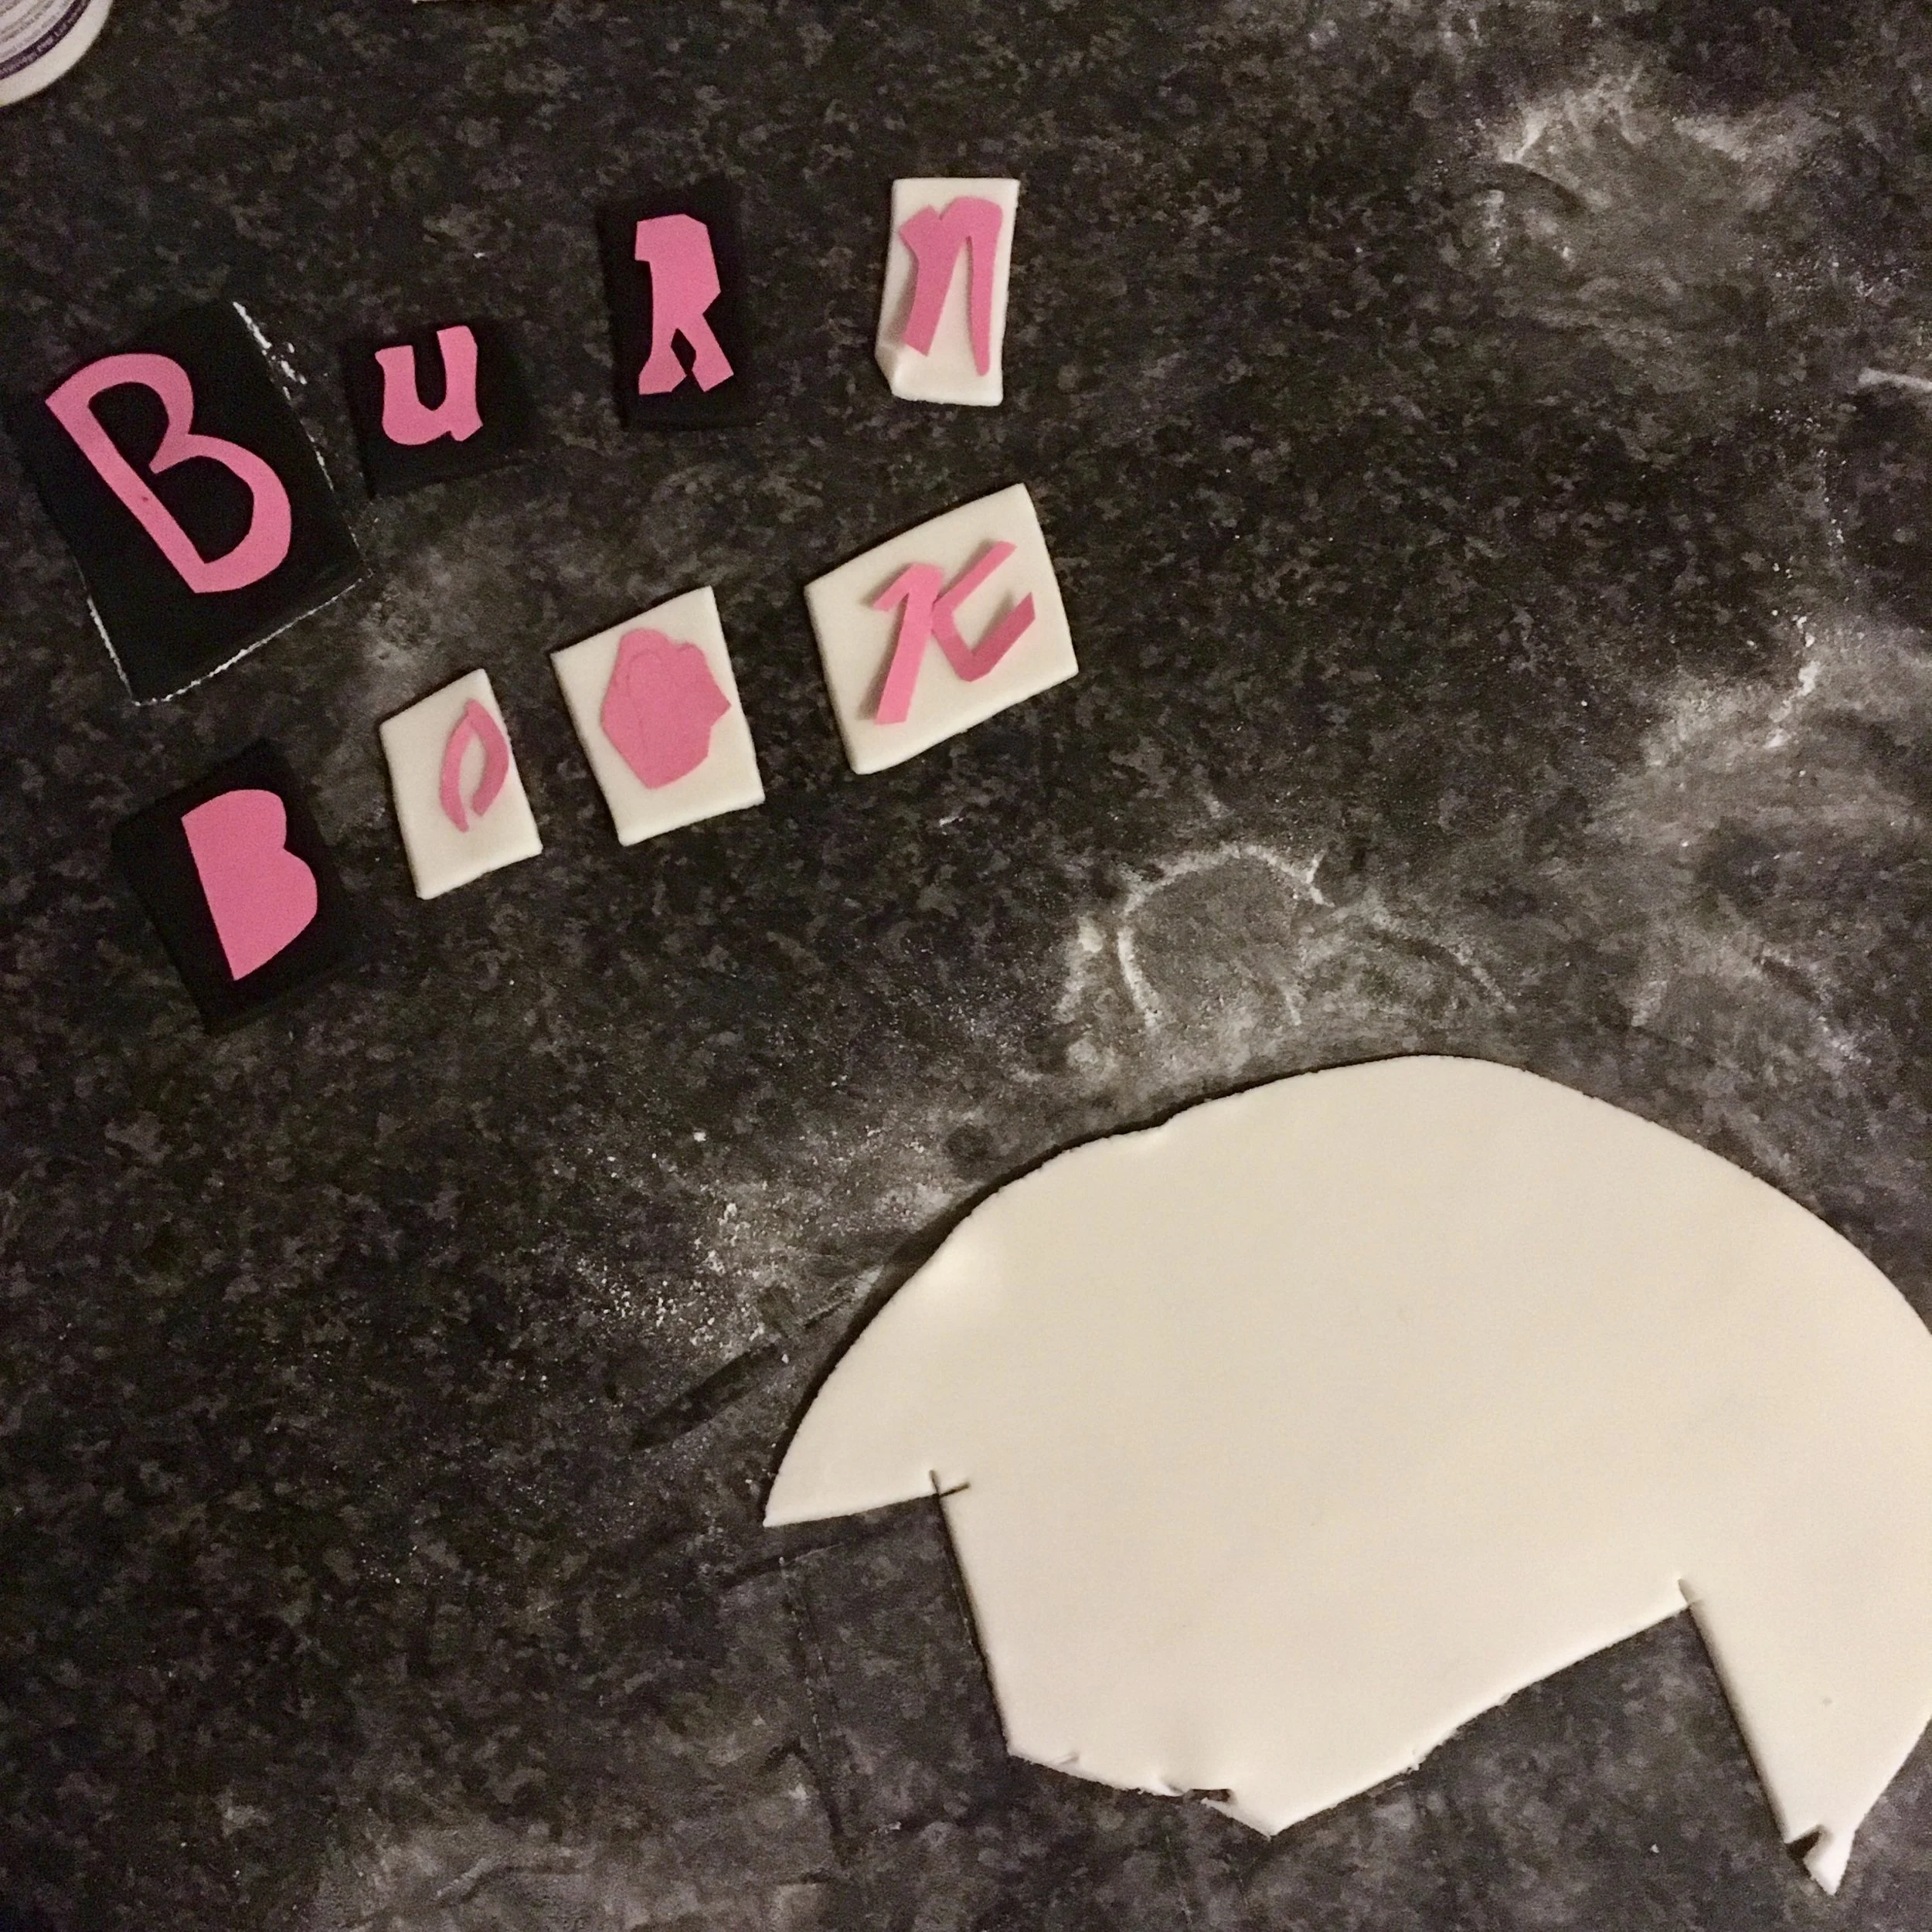
19. In the meantime, create a template for the lettering ‘Burn Book’. You can do this two ways; by doing a google image search which you would then resize and print. Once printed you can cut out the letters and the squares around them. Make sure you keep these paired up.
20. Or if like me you don’t have a printer, you can use the same image, but this time trace it from your tablet onto parchment paper and then cut them out.
21. Knead the remaining white fondant and all the black fondant separately with a little butter. Roll them out flat and place your templates over the top.
22. Cut around the templates with a sharp knife. Keep referring to the original image to check which should be white and which black. When cutting out small, intricate shapes I find it easiest to give the fondant time to dry out a little before cutting, it stops the fondant from dragging so much.
23. When all the squares and letters are cut, match the letters up to the correct squares and attach to each other with a spot of vodka. Leave these to dry overnight.
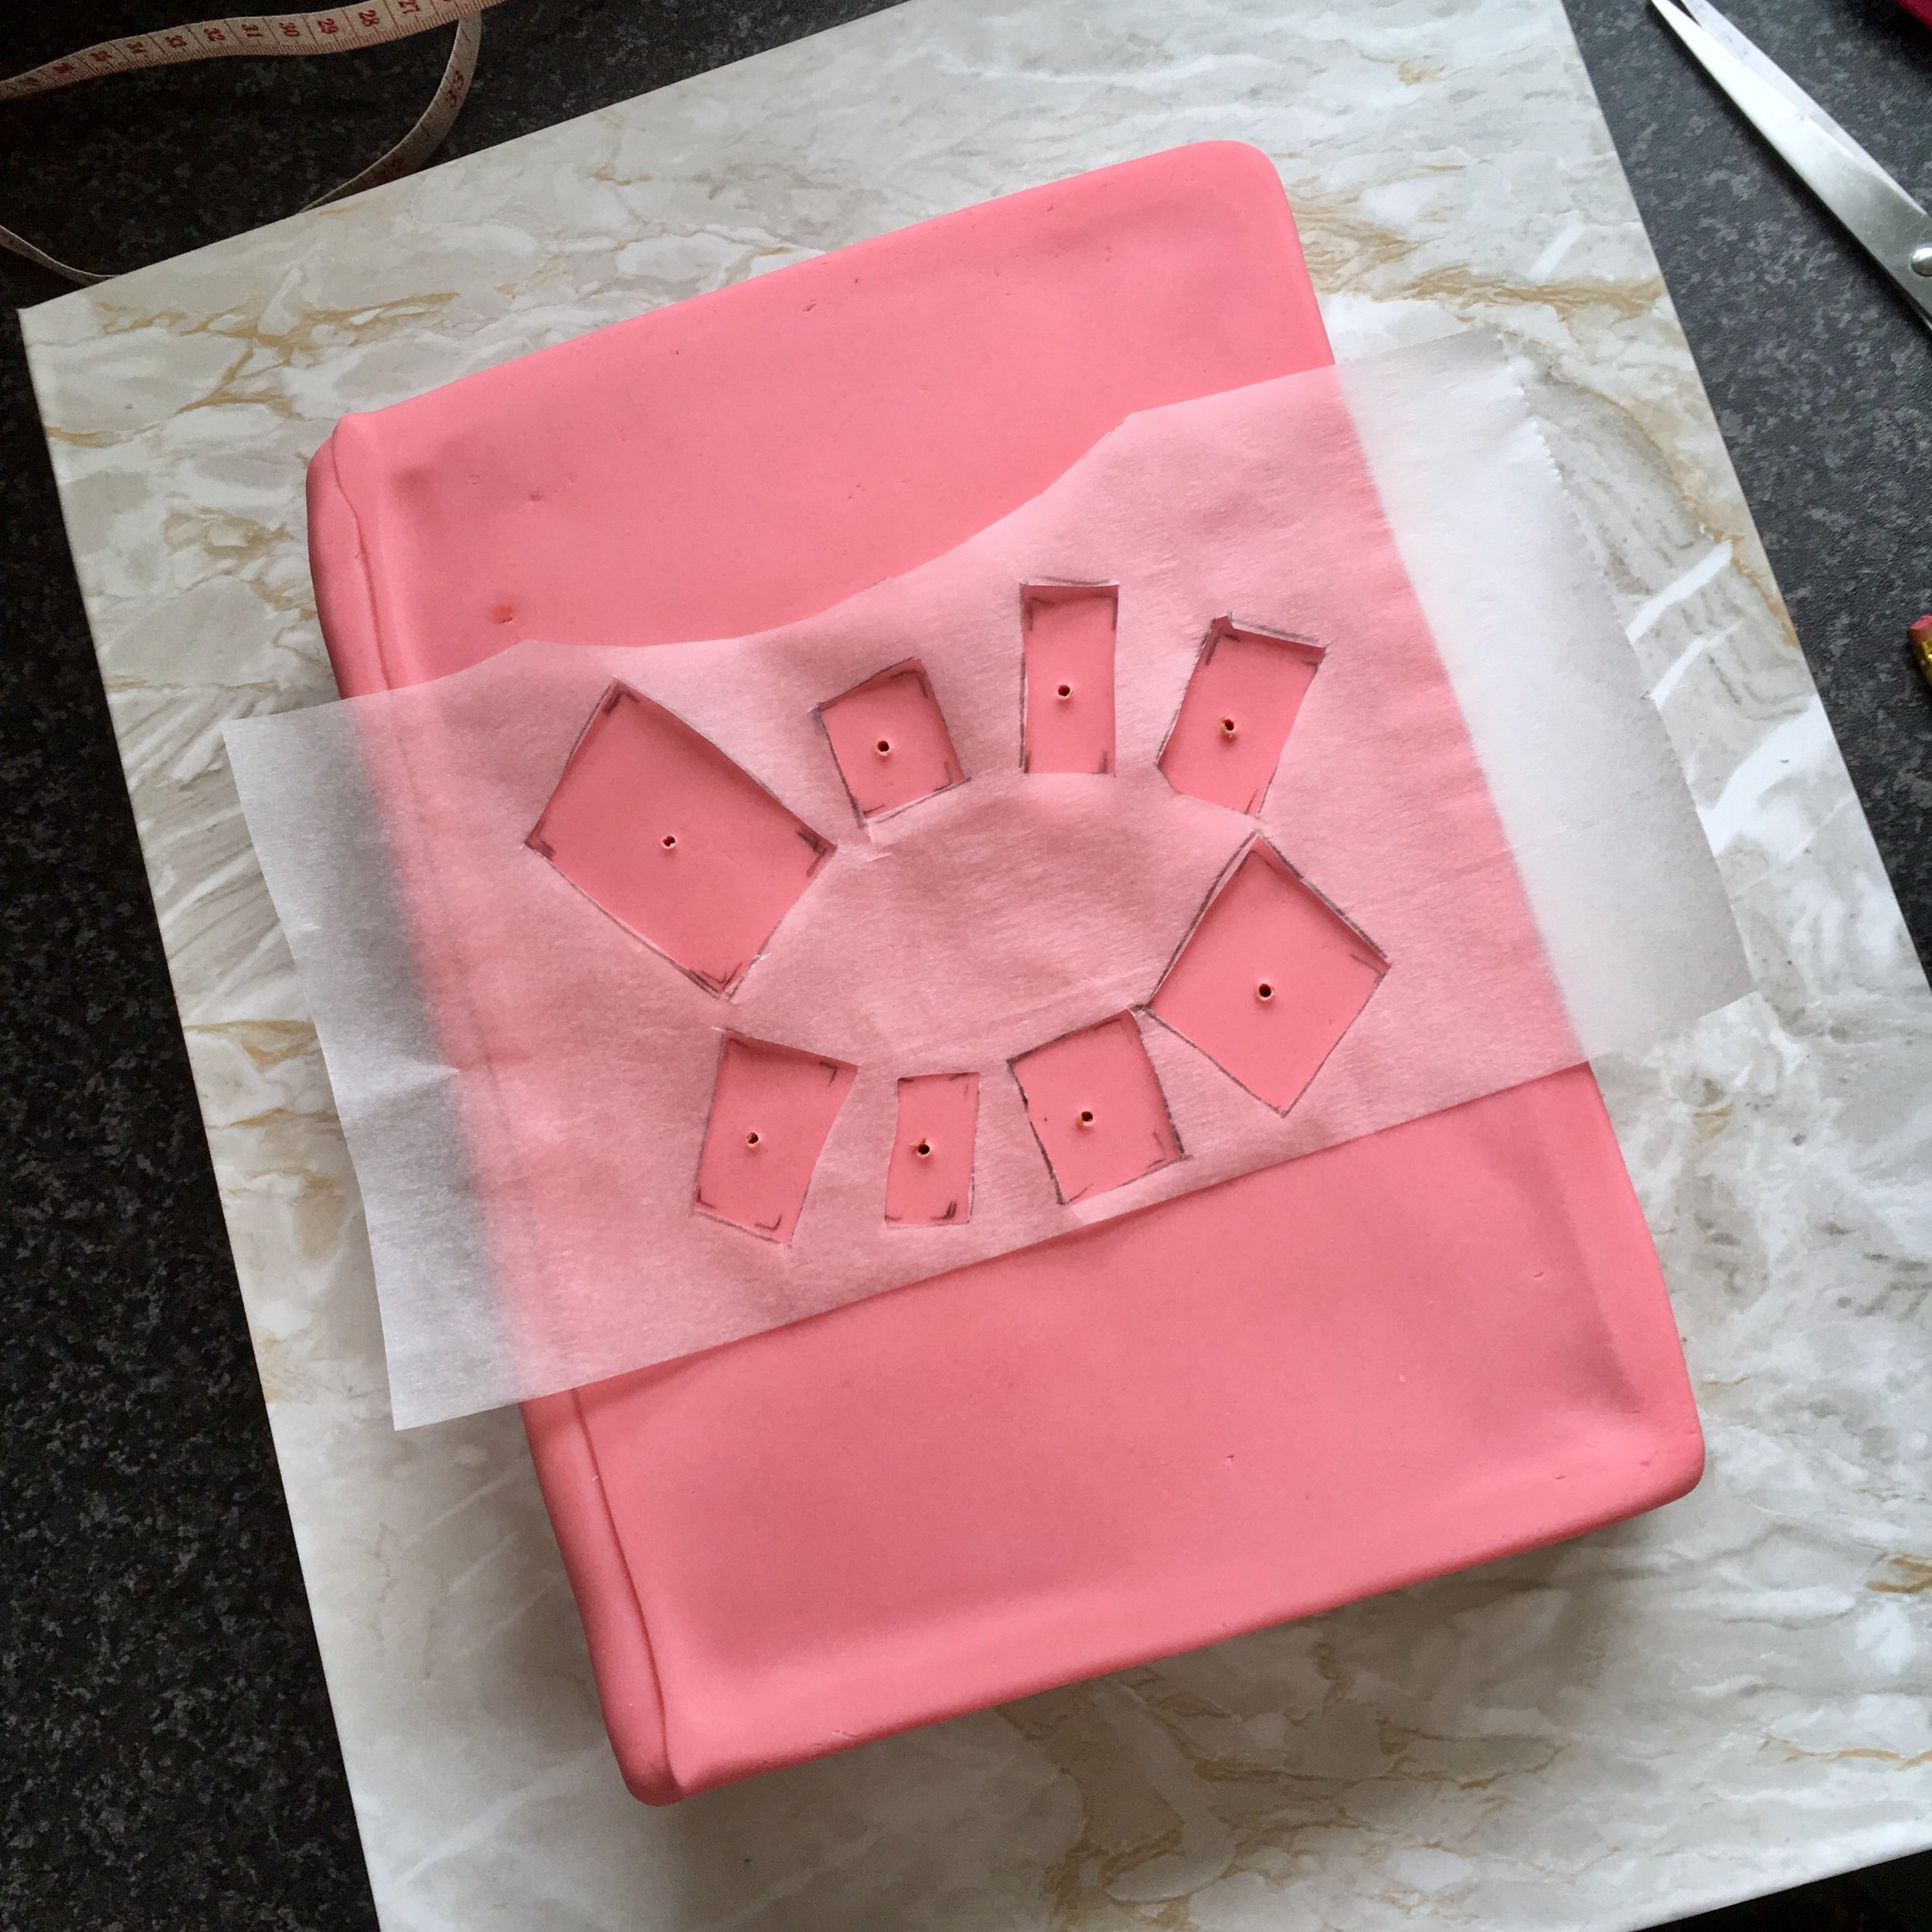
24. The next day, create another template, this time cut out just the squares. Place this on top of the cake, in the centre. Using a pencil, mark out the corners of each square. This will be our guide to place the fondant letters in the right places.
25. With a sterilised pin, poke a hole in the centre of each square. As the day heats up, any gas released from the cake can escape here instead of causing the fondant to bulge.
26. I added the letters first but in retrospect I would recommend doing the doodles first. Have a look back at your burn book image from before and copy the doodles onto the cake with an edible pen. Don’t overthink it too much, start with the bigger shapes and then work out from there to fill in the gaps. You might have to go over a few times to get it really dark.
27. If you don’t have an edible pen, you can paint with a mixture of vodka and black food colouring, it will be a little more cumbersome though so it might be best to practice off cake first.
28. Smear a tiny drop of black food colouring mixed with vodka over a few of the blank places, to age it. But be careful you only use a little colouring, so it shades rather than stains.
29. When you’re happy with the doodles, attach the lettering to the cake with a little vodka following the guides you marked out earlier.
And we’re done! Check you out!


