

How To Make An Adorable Fox Cake
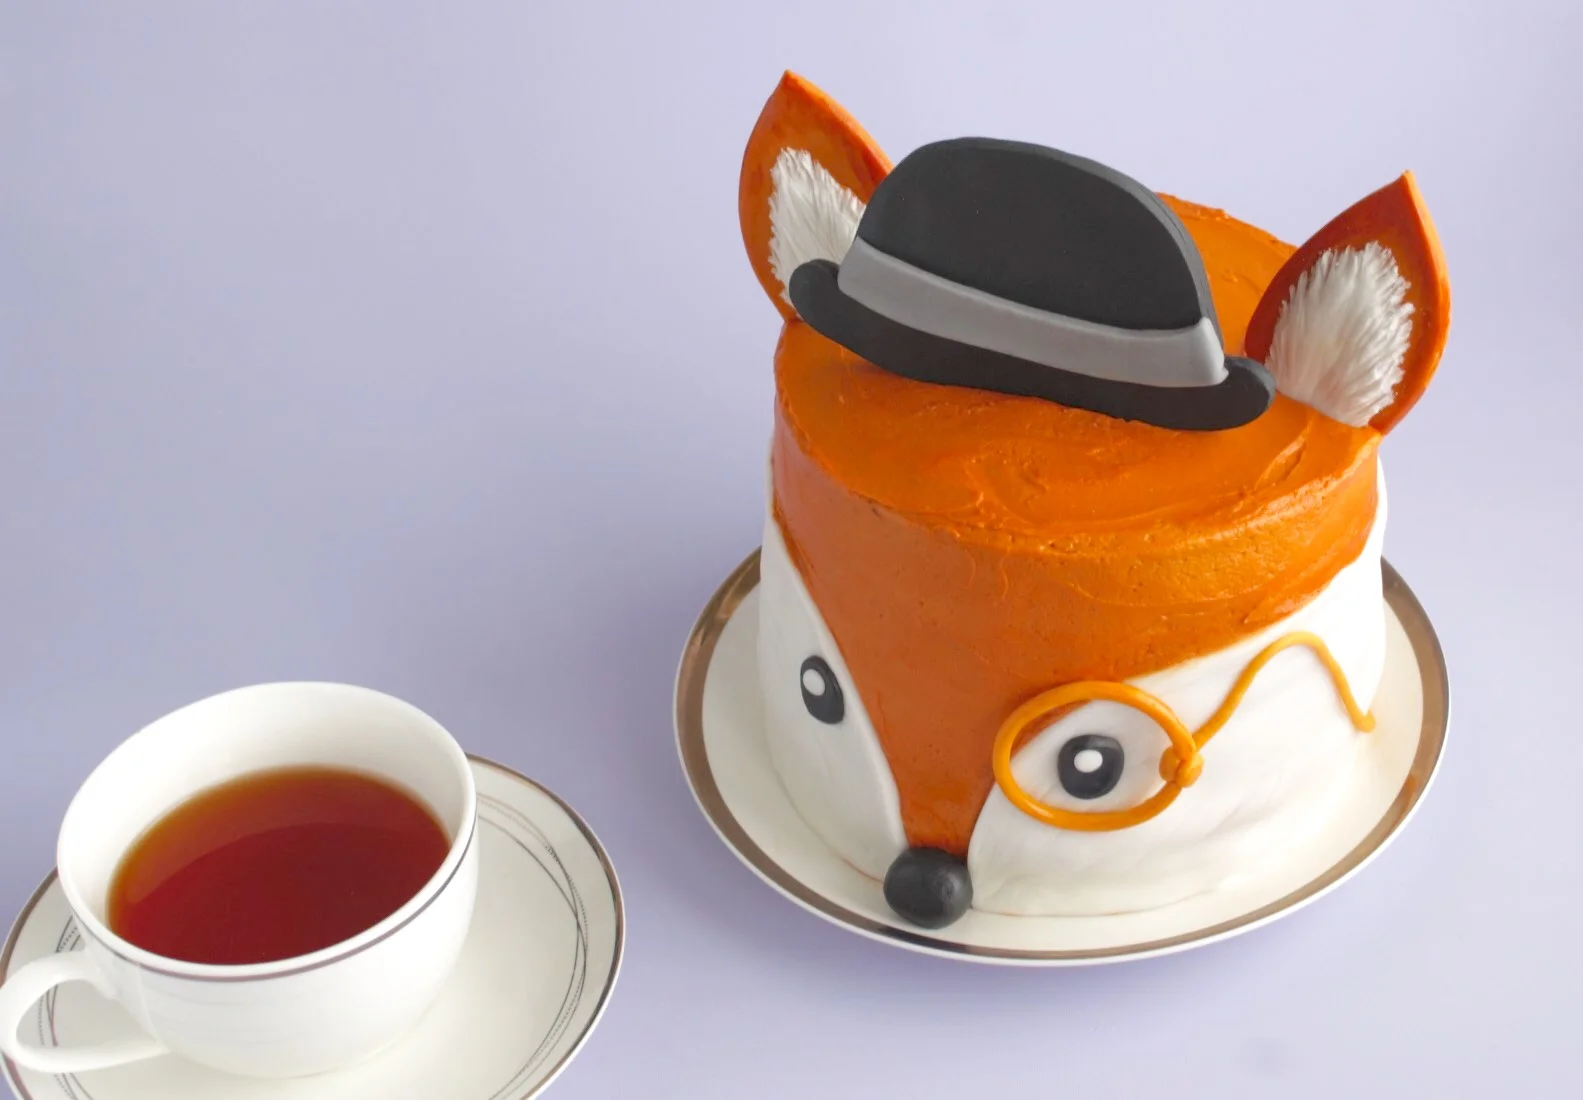
I’ve been obsessed with foxes ever since I started following @juniperfoxx on Instagram, anyone with me? It’s the sweetest page! Juni was the inspiration behind my Fox Cookies a while back but I thought I’d step it up and go full on hipster fox cake this time. Well, actually that’s a lie. It started as a straight-up fox cake and then as I sketched it out I was like, oh it needs a little something more. Enter the bowler hat and monocle. Da da de dah!!!! I mean bowler hats and monocles just make everything better don’t they? I’ve only seen a monocle in real life once before, but it made my day. It was this cute older gentleman, he was having lunch in a small town pub and as soon as he was given the menu, out popped his monocle to help him read. He wasn’t even a hipster, just short-sighted. It was love at first sight.
If you aren’t following Juniper yet I really think you should, she is quite honestly the happiest fox and her infatuation with their dog Moose is just the most adorable thing I’ve ever seen. It’s reeeeeaal love. My favourite part is that every week her lovely owner does a little roundup of what it’s actually like living with a fox, so no-one has the bright idea to jump on the bandwagon. And in the process, you get to hear some interesting facts about these furry friends. For instance, did you know they’re really shy? It turns out strangers make foxes really nervous and it takes a long time for them to warm up to anyone new. Isn’t that the cutest?
This week I had a kind of job interview at a hotel and as part of the tour, I got to see inside the pastry kitchen. It was so cool! I mean, I wasn’t in love with the hair net but the giant commercial mixer? It was beautiful, it had me at hello. You know what I forgot though? To get a pic of myself in the chef whites! Could have kicked myself, wasn’t til I was back in my room that I even realised. I was just so mesmerised by all the shiny kitchen kit and giant ovens I forgot about everything else. My serious respect for anyone working in a kitchen, when I got back to my room I had to put my poor tired feet straight in a bath. All these years sat on my ass at a desk, five hours on my feet had me dying! I didn't get the chef whites shot but I did take a cheesy mirror selfie as I went down to dinner. I couldn't resist! There's just no mirror in my house with such a tidy reflection.

On the cake front, I had a little bit of a comedown. When I made this cheeky chappy I don’t know what happened but my mind went blank. I forgot to chill after frosting. Twice! Meaning my crumb coat did not stop crumbs invading my top coat. I forgot to take the cakes out of the freezer and had to run around my house laying them on top of radiators (probably not the safest, I do not recommend). And then just when you think it can’t get worse, I forgot to check the length of the barbecue skewers against the height of the cake. When I popped the bowler on top it sat 2 inches higher than the cake. Nightmare! I had to very carefully snip 2 inches off the bottoms without tearing a hole through the hat. Absolute nightmare! So, what I learned this week is to always give myself a decent time buffer, just in case my brain takes a vacation (it’s very likely).
Before we get cracking, I have a wee favour to ask. If you like what you see and don't wanna miss out next week remember to come follow me on Pinterest. Ok, plug over, let's cake!
Ingredients
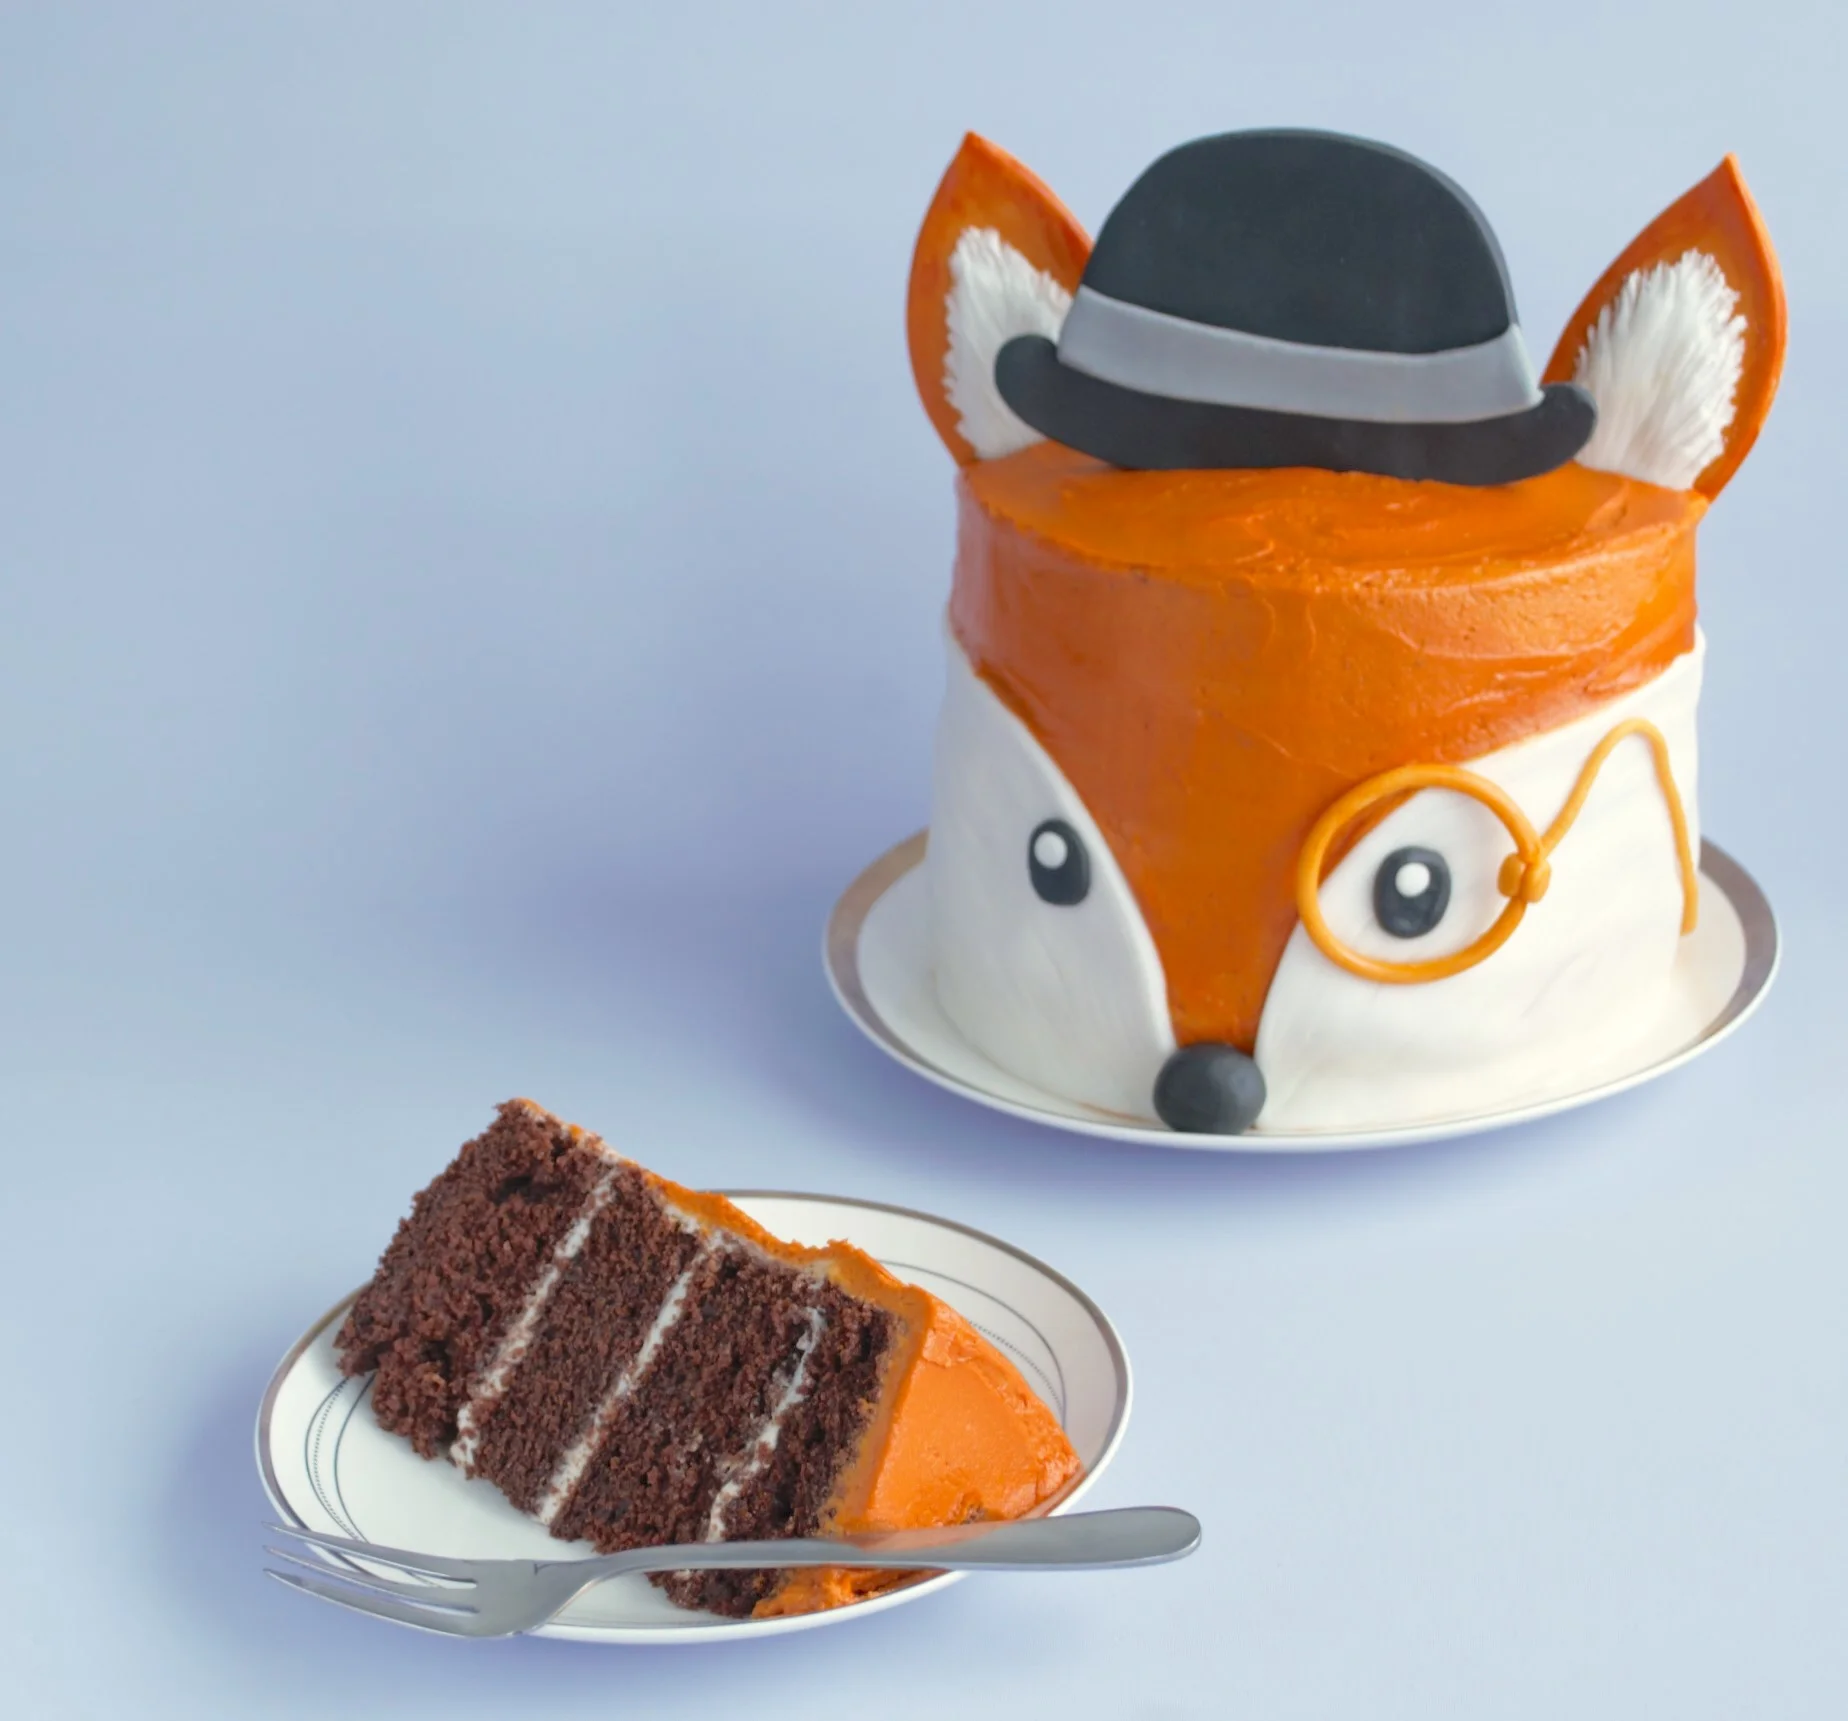
2 batches of chocolate cake (recipe here)
400g butter
800g icing sugar
4 limes
125g black fondant
250g white fondant
50g orange fondant
2 tsp tylose
1 tsp vodka (or other clear alcohol)
4 barbecue skewers
Food colouring, orange and yellow
Method
- Bake the chocolate cakes in 6-inch cake pans at 180C/160Fan for 40-45 minutes or until a skewer comes out clean
- When cool, cut each cake in half so you have two layers each cake and then wrap in cling film and place in the freezer
- Let’s start with the bowler hat because it takes the longest to dry. Mix a little tylose into black fondant and knead until it’s fully distributed
- Between two sheets of parchment paper roll the black fondant flat and cut out a bowler hat. I drew a template on parchment to keep it symmetrical, but you can absolutely freehand it if you’d rather
- Brush the bowler with a little vodka and press in 2 barbecue skewers, careful not to push them through the underside. And remember, check the length of the skewers against the height of the cake. Snip off any excess
- Roll out the remaining black fondant and lay this on top of the bowler. Gently flip everything over so the rolled fondant is underneath and cut around the bowler to remove the excess
- Using your finger, gently smooth around the edges to remove any sharpness
- Mix a small piece of black fondant with a little white to make grey for the hat trim
- Roll out the grey and cut into a strip, using your finger to smooth the edges. Attach this to the front of the hat with a little vodka
- Leave the hat to dry overnight on a piece of parchment
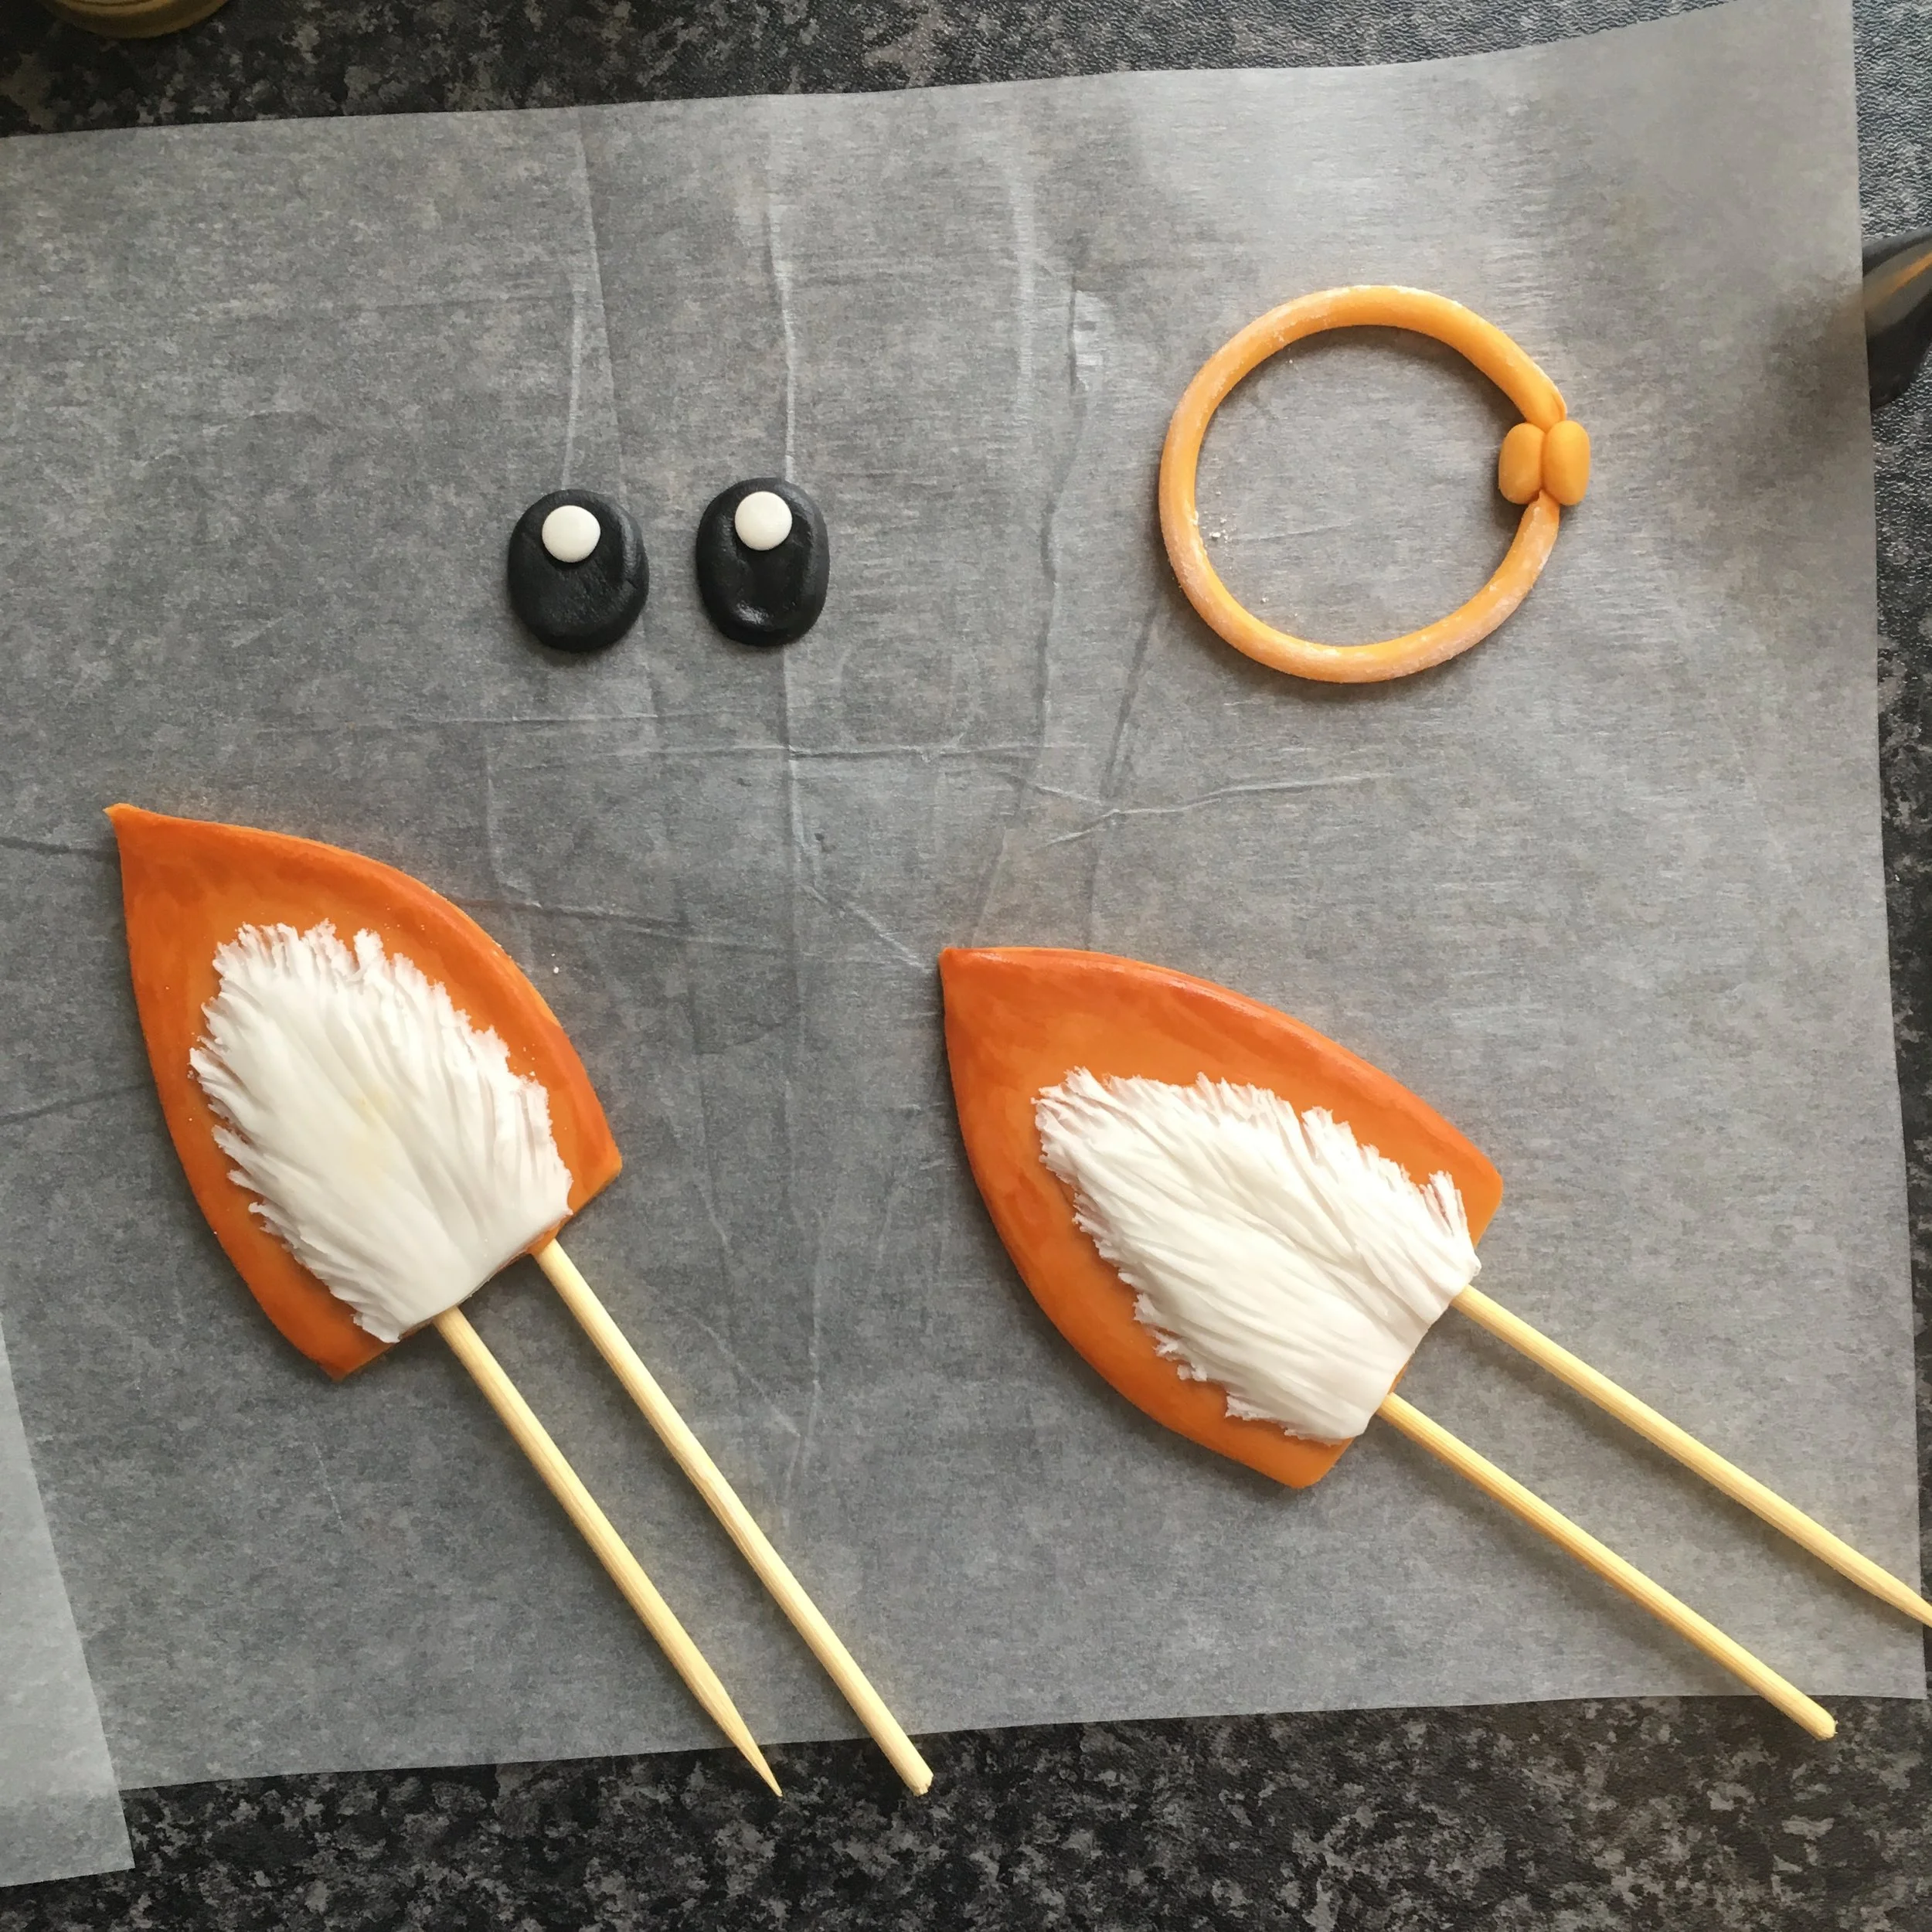
- Knead a little tylose into orange fondant, roll flat and cut out two ears
- Roll out white fondant and cut two shapes the same as the ears but a ¼ inch smaller on all sides
- Using a knife, gently score around the sides but not the bottom to create a furry texture
- Snip 2 barbecue skewers in half and brush the orange ears with a little vodka. Carefully press in 2 pieces of barbecue skewer per ear then attach the white fondant on top
- Mix a drop of vodka with a little orange/brown food colouring and use this to paint around the sides of the ears and create some depth. Leave these to dry overnight
- Use food colouring to change a small piece of white fondant into a gold-ish yellow and knead in a dusting of tylose
- Roll the golden fondant into a thin rope and shape into a circle, roughly 2 inches in diameter. To make this easier, I dusted a spice lid with icing sugar and shaped the fondant inside to make a perfect circle
- Roll 2 small balls in gold fondant and brush with vodka. Press these gently into the join of the circle to seal it. Leave to dry overnight
- The following day, remove the cakes from the freezer 2-3 hours before you start assembling
- In a large bowl, mix together 400g butter, 800g icing sugar and the juice of 4 limes. The frosting should be fluffy but hold its shape. If it’s too soft, add more icing sugar. If it’s too stiff a splash of milk should do the trick
- Assemble the cake with a spread of frosting between each layer. To each layer of frosting add the zest of a lime for an extra kick. The zest gives it a great lime flavour but by only adding it to the layers the little pieces of lime won’t be seen on the outside frosting and mess up the design
- Coat the entire cake with a thin layer of frosting to catch the crumbs and place in the fridge for 30 minutes to set
- While the cake is chilling, colour the remaining frosting dark orange and use this to apply a generous layer to the entire cake. Chill for another 30 minutes
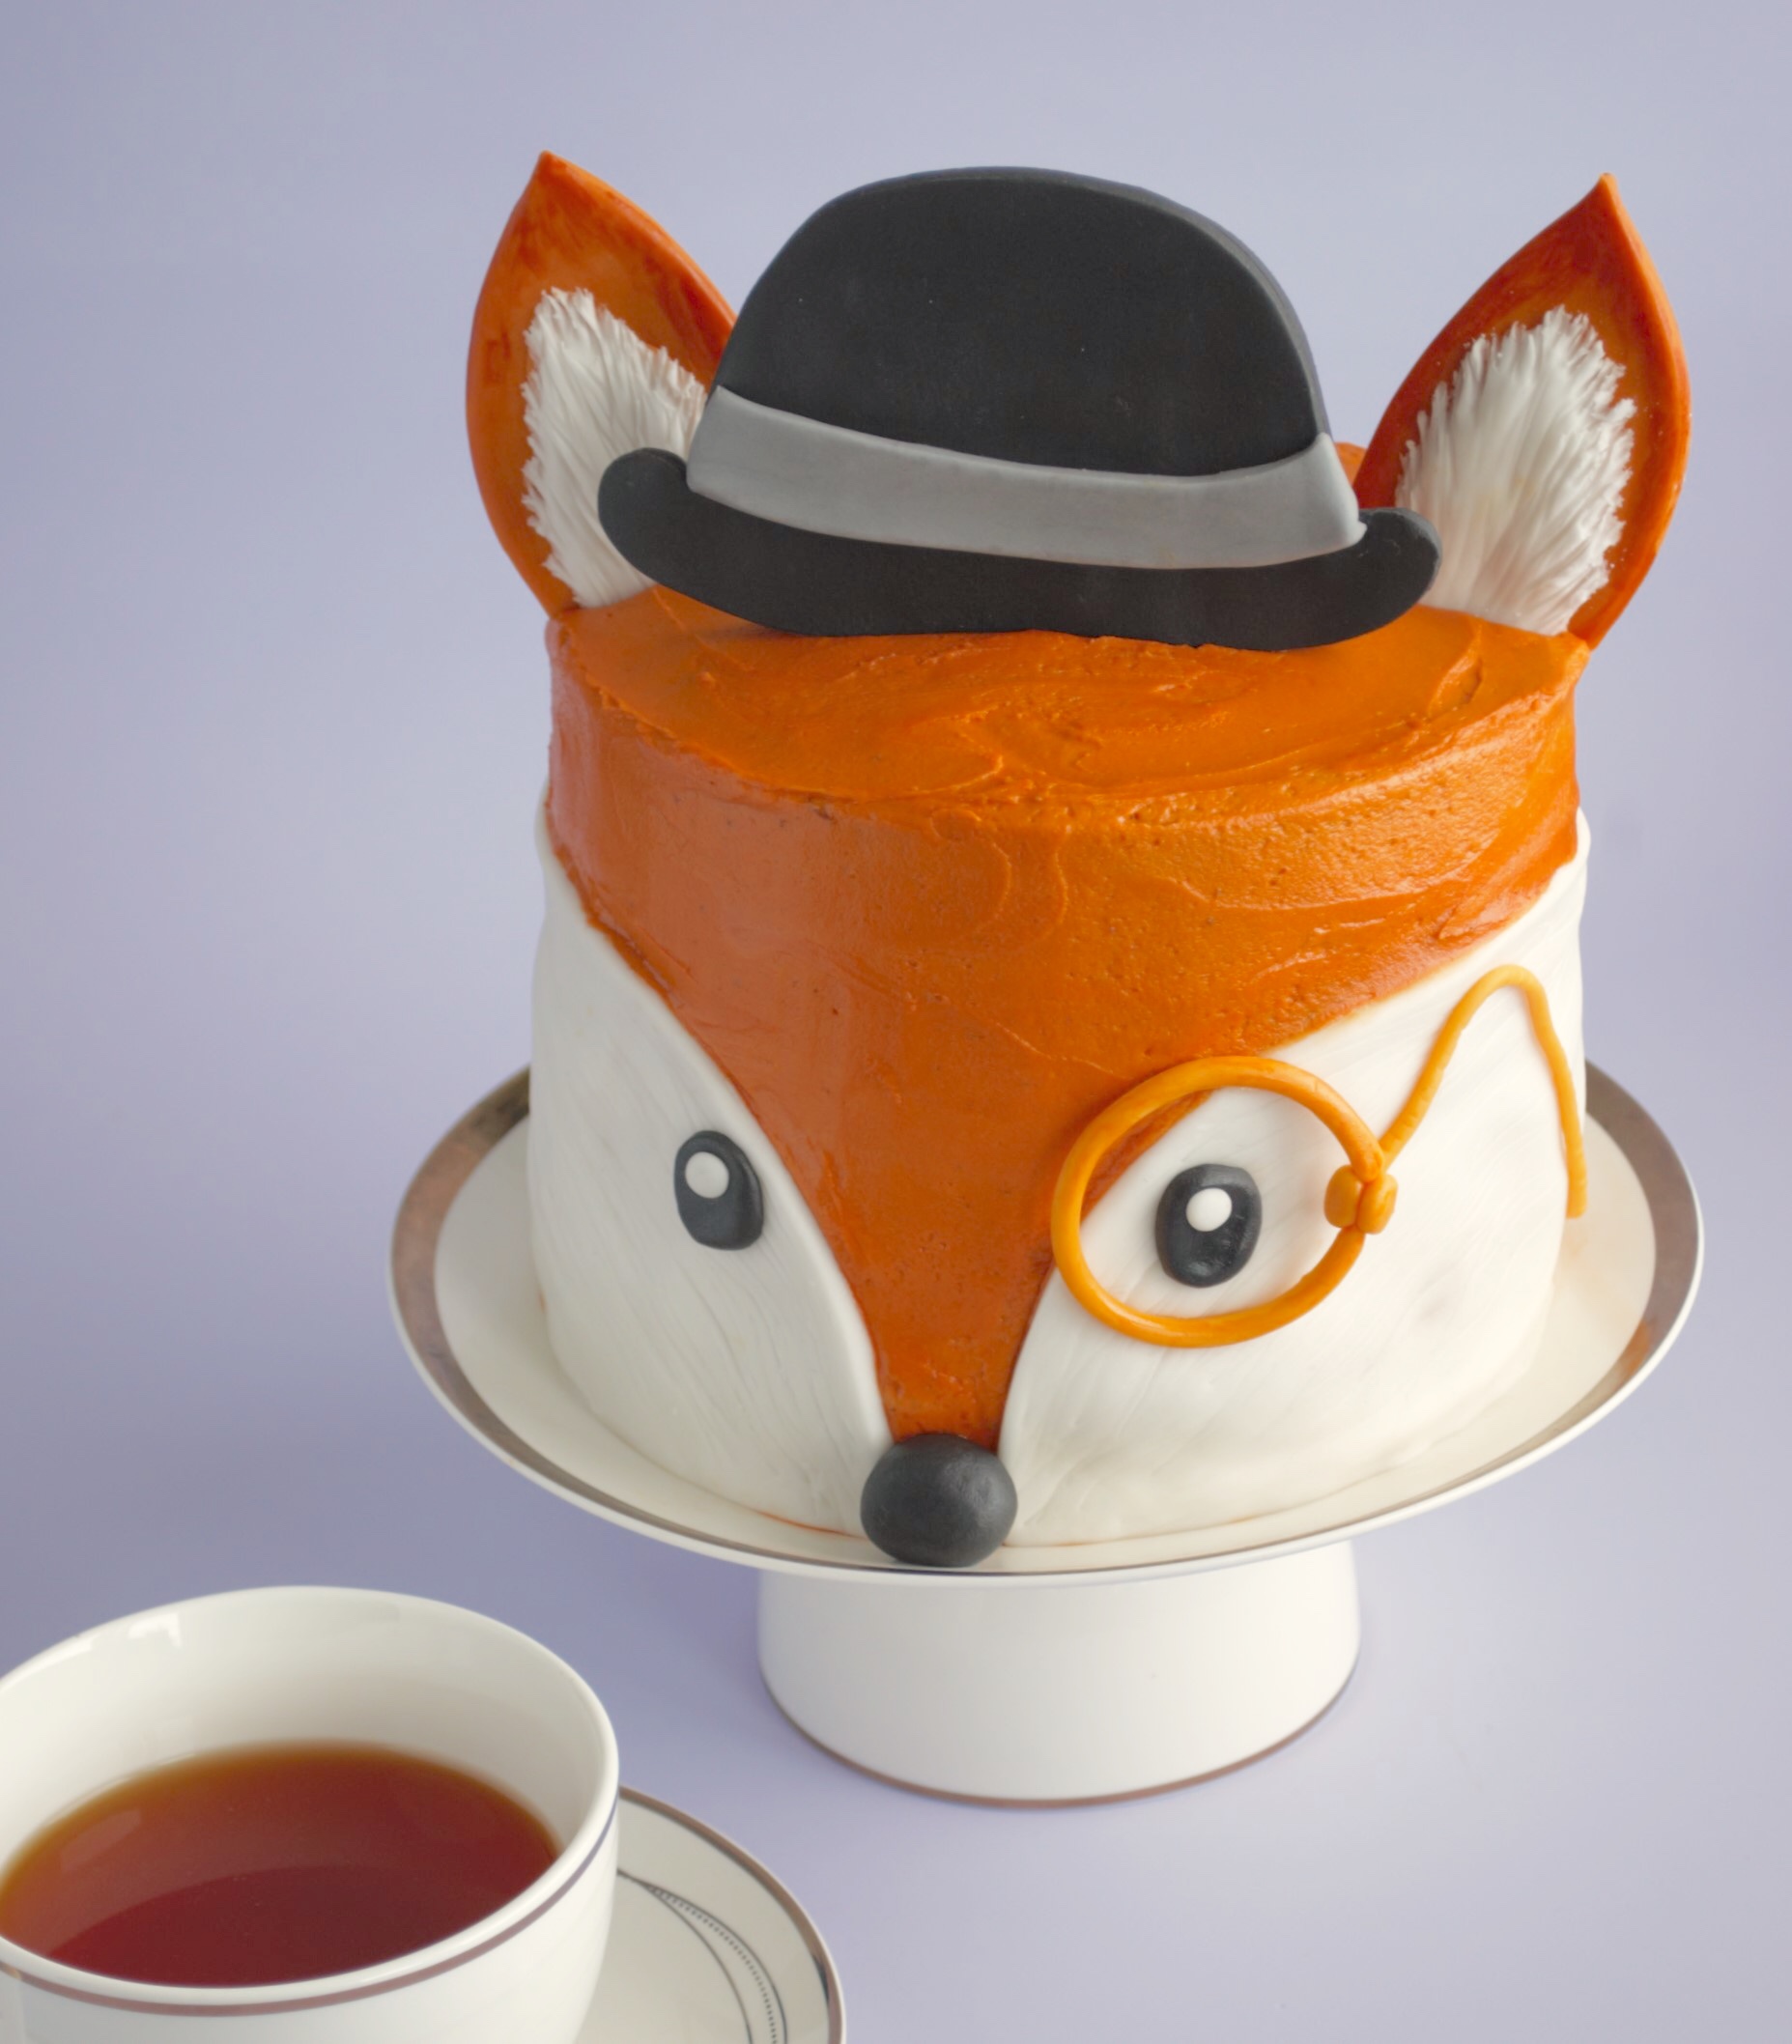
- When the frosting has set, roll out white fondant to ¼ inch thick and cut two half-moon shapes for our fox’s face. Brush the back with a little vodka and attach to the front of the cake
- To make the eyes, roll out a little black fondant and use the back end of a piping tip to cut two small circles. Gently, squeeze the sides until they are more oblong than circular. Add two tiny, white balls on top and press down
- Attach the eyes to the white fondant on the cake with a little vodka
- Mix a sprinkling of tylose with a drop of water to make an edible glue. Apply this to the back of the monocle and then hold the monocle in place over the right eye for a few minutes to help it stick

- Roll any remaining gold/yellow fondant into a long rope and brush with vodka, attach this to the cake starting from the monocle
- To finish the face, roll a little ball of black fondant for the nose, pressing on the top to make it a bit more oblong. Attach to the front with a brush of vodka
- Finally, go ahead and push the ears and bowler into the top, taking extra care to line them up with the face
We did it! Another project bites the dust!
Sharing at Mix It Up Monday, Brilliant Blog Posts and Recipe Of The Week


