How To Make The Best Howling Wolf Halloween Cake
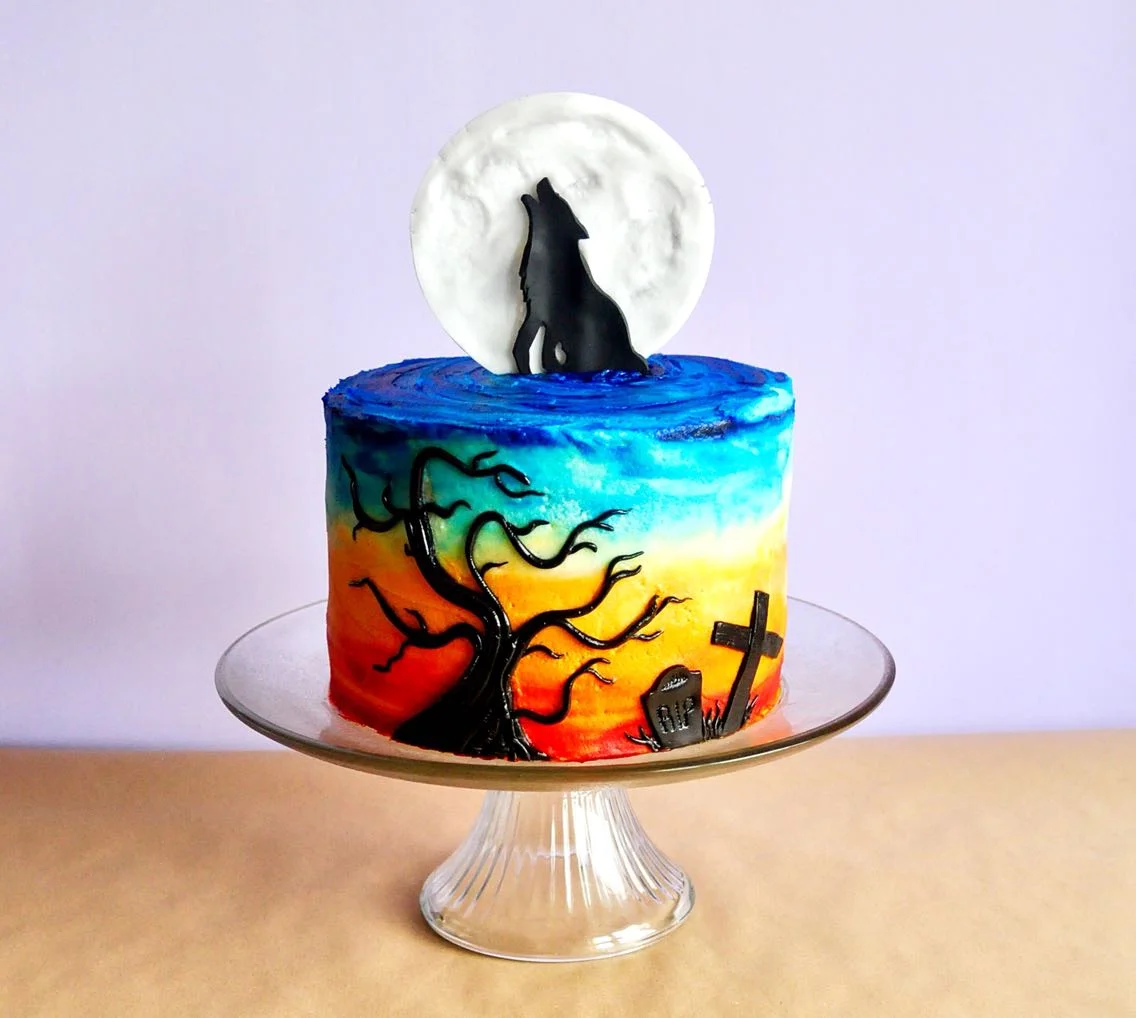
This week I’ll be showing you how to make the best howling wolf Halloween cake with a step by step picture guide. Are you as excited as I am? Halloween is quite literally my favourite time of year! The weather’s cold enough that you can wear comfy clothes and drink hot chocolate, mmm mm mmmm. And the dressing up! Oh man, I freaking love it! You can play around with make-up, give yourself crazy hair, wear outrageous clothes. It’s the one time of year that the crazier you are the more people think you’re cool, Halloween is my boo! This year I’m honouring Halloween with three awesomely spooky cakes, it’s gonna be creeptacular!
I’ve kept this cake simple on the inside but I whole-heartedly encourage you to mix it up, switch up the sponge, add some pumpkin spice, caramelise the frosting, go wild!
What You'll Need
4, 7-inch round sponges (you can find my recipe here)
6 cups of frosting (1 part butter:2 parts icing sugar)
2 barbeque skewers
100g black fondant
100g white fondant
Food colouring – red, yellow, blue
Method
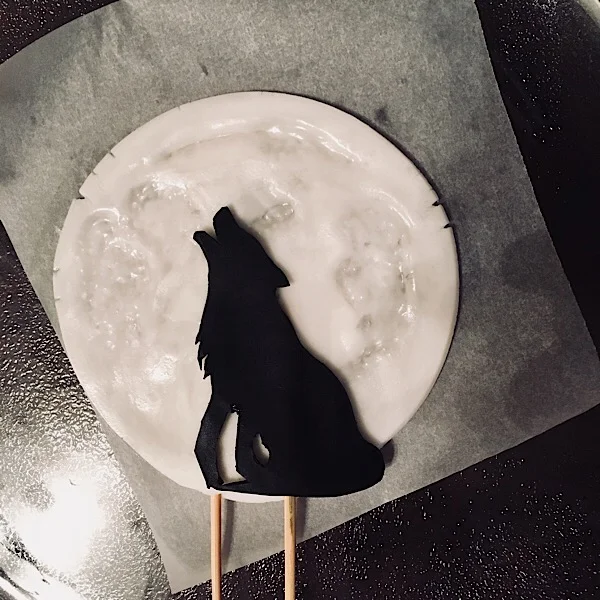
Roll out white fondant to 1/8 inch thickness and cut into 2 circles, 4½ inches in diameter. Cut 2 barbeque skewers to a length of 6 ½ inches each. Lay these on top of one white circle like this
Brush on a little water and add the remaining white circle on top, press gently to secure. Trim the edges to return it to a perfect circle. Leave to dry
Roll out the black fondant to the same thickness and cut out a wolf shape, roughly 3 ½ inches high and leave to dry. After an hour, use your fingers to gently press craters into the moon. By waiting an hour to create the craters, little cracks will appear on the edges as you push, enhancing the texture. When you’re happy with the surface of the moon, use a little water to attach the wolf on top. Leave to dry overnight
The following day, layer the sponges on top of one another with a spread of frosting in between then chill in the fridge for at least 30 minutes.
Apply a thin coat of frosting to the outside, smooth the sides and top and return to the fridge for another 30 minute
While the cake is chilling, split the remaining frosting in to 2 separate bowls. Take ¼ cup from each and place into a third bowl. This smaller portion will remain cream coloured. Colour the larger 2 bowls of frosting orange and pale blue. Cover the bottom 3 inches of the cake in orange frosting, then 1 inch with cream, finally cover the remainder of the cake in blue. Use the end of a spoon to pull frosting from the top into the colour below like this
Using a palette knife, smooth all around the sides and neaten then top
Clean the spoon and use it to apply straight food colouring to the cake, red on the very bottom, blue at the very top. Use the palette knife to smooth all the way around
On top, I used the spoon to swirl the blue food colouring into a spiral shape but if you’d rather, you can smooth the top with the palette knife
Roll the remaining black fondant into little rounded strips and attach them to the cake in a tree shape. Building up rolls of individual branches gives the most wonderful texture that catches the light perfectly, adding a little more creep factor to this devilish cake
When you’re happy with the tree, cut out one cross and one headstone. I love texture so, for these ones, I used the point of a darning needle to scrape in some bark and carve out a little RIP sign. This is your chance to really make it yours by adding your own little flair to the decorations
Finally, carefully push the moon into the centre of the cake. The first time I did this, I was a little too rough and caused a split down the bottom centre. Thankfully, a little fondant patchwork and 5 minutes in the oven left my moon right as rain. Saved by the leftovers! Probably the biggest lesson I’ve learned since I started cake decorating is that something always goes wrong and you have to hustle baby, you’ve got this


