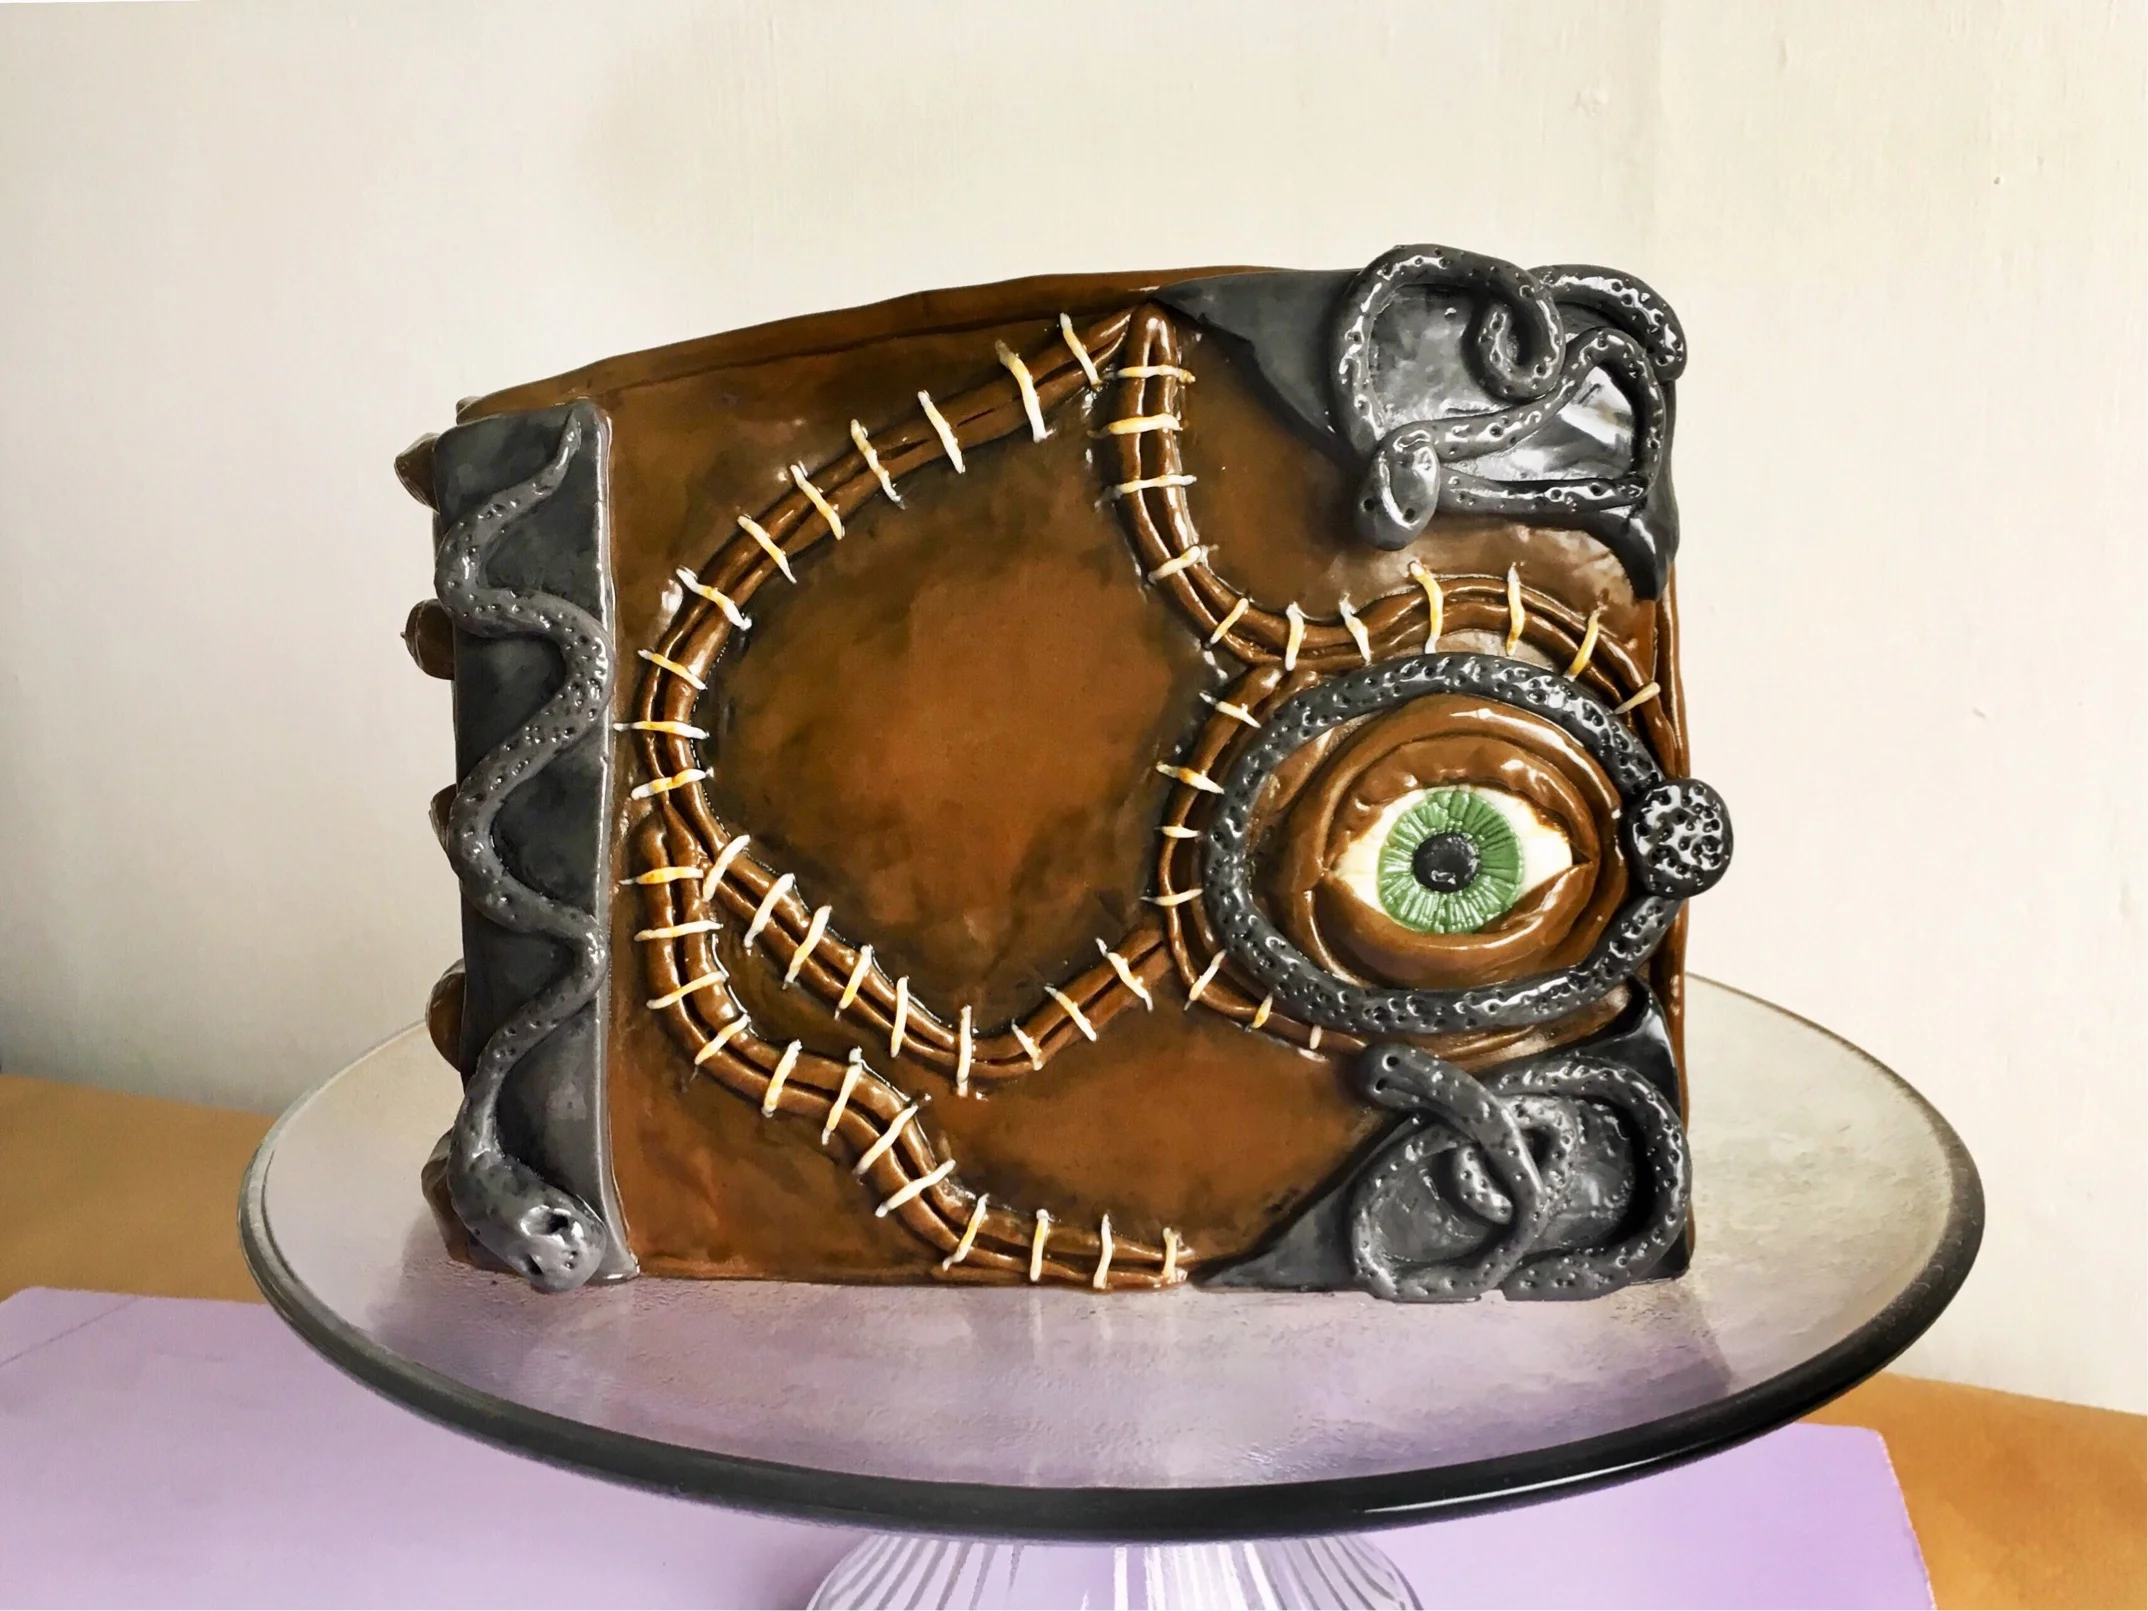
How To Make The Most Magical Hocus Pocus Cake
Today I’ve got everything you need to make the most magical Hocus Pocus cake ever! Before I start, I do have a tiny confession. This cake was actually scheduled for next week, this week I’d planned on a Beetlejuice theme. Until I messed that right up. I’d imagined a sponge version of Barbara’s giant mouthed monster with eyeballs on the tongue. Turns out, it’s pretty difficult to make that from cake. As I found out after I’d hacked away at my 4-layer masterpiece with a kitchen knife. Oh, the horror! After melting down on the kitchen floor, I pulled myself up (by my bootstraps, obviously) and started project sponge salvage.
Thankfully, I had almost enough cake left standing to create the Hocus Pocus spell book and with a little chocolate frosting and cake cut-off’s I was able to patch in the rest. It wasn’t pretty but hey, no one’s looking at the inside anyway. (if you look below you can see a little patch up in the top corner)
After the drama of the mess up was over I had the best time! There’s just something about Halloween that makes me so happy and this movie is up there in my all-time favourites list. So, if you share my huge love for the Sanderson sisters why not show them by making this super cool cake in their honour.
What You'll Need
4 layers of your favourite sponge (find mine here)
3 cups of frosting (1 part butter:2 parts icing sugar)
150g of dark chocolate
700g of fondant
Food colouring; brown, black, green
1 tbsp of clear drinking alcohol (vodka or gin)
Method
To cook the cakes, I used 7.5inch, round, cake pans. However, this does create a lot of waste so, if you have more suitable pans, definitely use them. The dimensions of the cake inside are 6 ½ inches long, 1 inch wide on the left, 4 ½ inches wide on the right. Layer these with a thin spreading of frosting and place in the fridge to chill. After 30 minutes, carefully use a knife to carve the shape of the spellbook.
Over a bain-marie, melt 150g of dark chocolate. Leave it to cool for a few minutes then add the chocolate to the frosting with an electric whisk. At this stage, if the frosting is a little thick, add 1 tbsp of butter and mix. It should become smooth and glossy again. Apply a thin layer of this to the entire cake and return to the fridge.
Split the fondant into 2 equal pieces and colour one brown. Split the remaining fondant in half again. Colour one half grey and leave the other half white.
Coat the cake with another thin layer of frosting and smooth all the way around. Roll the brown fondant to a thickness of ¼ inch and attach it the front, back and spine of the book. I found it easiest to work one side at a time. Be sure to leave the top clear as this will be the white pages. Cover any scraps you trimmed in cling film and save for later.
Roll out the white fondant to the same thickness, making sure it is long enough to cover the top and right side in one, continuous piece. Attach to the cake and smooth down. Using a knife, score page marks in the white fondant, be careful not to cut all the way through.
Return to the remaining brown fondant. Roll out 4, round, strips and attach them to cake where the seams should be. Use a little brush of water to help them stick. With a knife, score down the centre of each seam.
Roll out another 5 strips. This time they should be the same length as the width of the spine. Attach these to the spine with water and pinch the front slightly to add a little texture.
Create the eye by adding 3 circles on top each other, decreasing in size. White, then green, then black. Use a knife to score the iris and create a little depth. Attach to the cake with a little water. You may need to hold this in place for a few minutes depending on the weight. When secure, dust the eye with a little icing sugar and the space directly around the eye with a little water. Create a patch with the brown fondant big enough to fit inside the seam around the eye. Attach this over the eye and press gently around the eye to secure it. Using a knife, carefully slit open the centre of the patch so that you can see the eye. Gently push the edges back to make eyelids. Add a strip of brown fondant around the edge.
Roll out the grey fondant to the same thickness as before and cut a strip long enough to cover the left edge and 1 inch wide. Attach this to the cake with a little water. Cut out the 2 flat, corner pieces and attach to the cake. The remaining grey embellishments are all made from rolled strips attached to the cake in the different patterns you can see below. When these have been attached, use a needle or a toothpick to impress little holes into the strips, not too deep.
Add a little age to the book by painting on food colouring. Mix a drop of alcohol with black food colouring and paint around any seams or joints, fading out from the join. You can also use this technique later with brown food colouring to paint a little age into the stitches and pages.
Use any remaining white fondant to create the stitches by rolling very thin strips and cutting to ¼ inch in size. Attach across the seams with a little water. The needle will come in handy here too, you can use it press the stitches down without leaving fingerprints. At this point, mix a little vodka with brown food colouring and paint on to the stitches and pages to help age them.
The alcohol food colouring paint should keep the cake shiny for a few hours but if you want to refresh it later a little syrup mixed with alcohol misted over with a spray bottle works wonders.
Come back next week the cutest monster who just can't keep his brains in!


