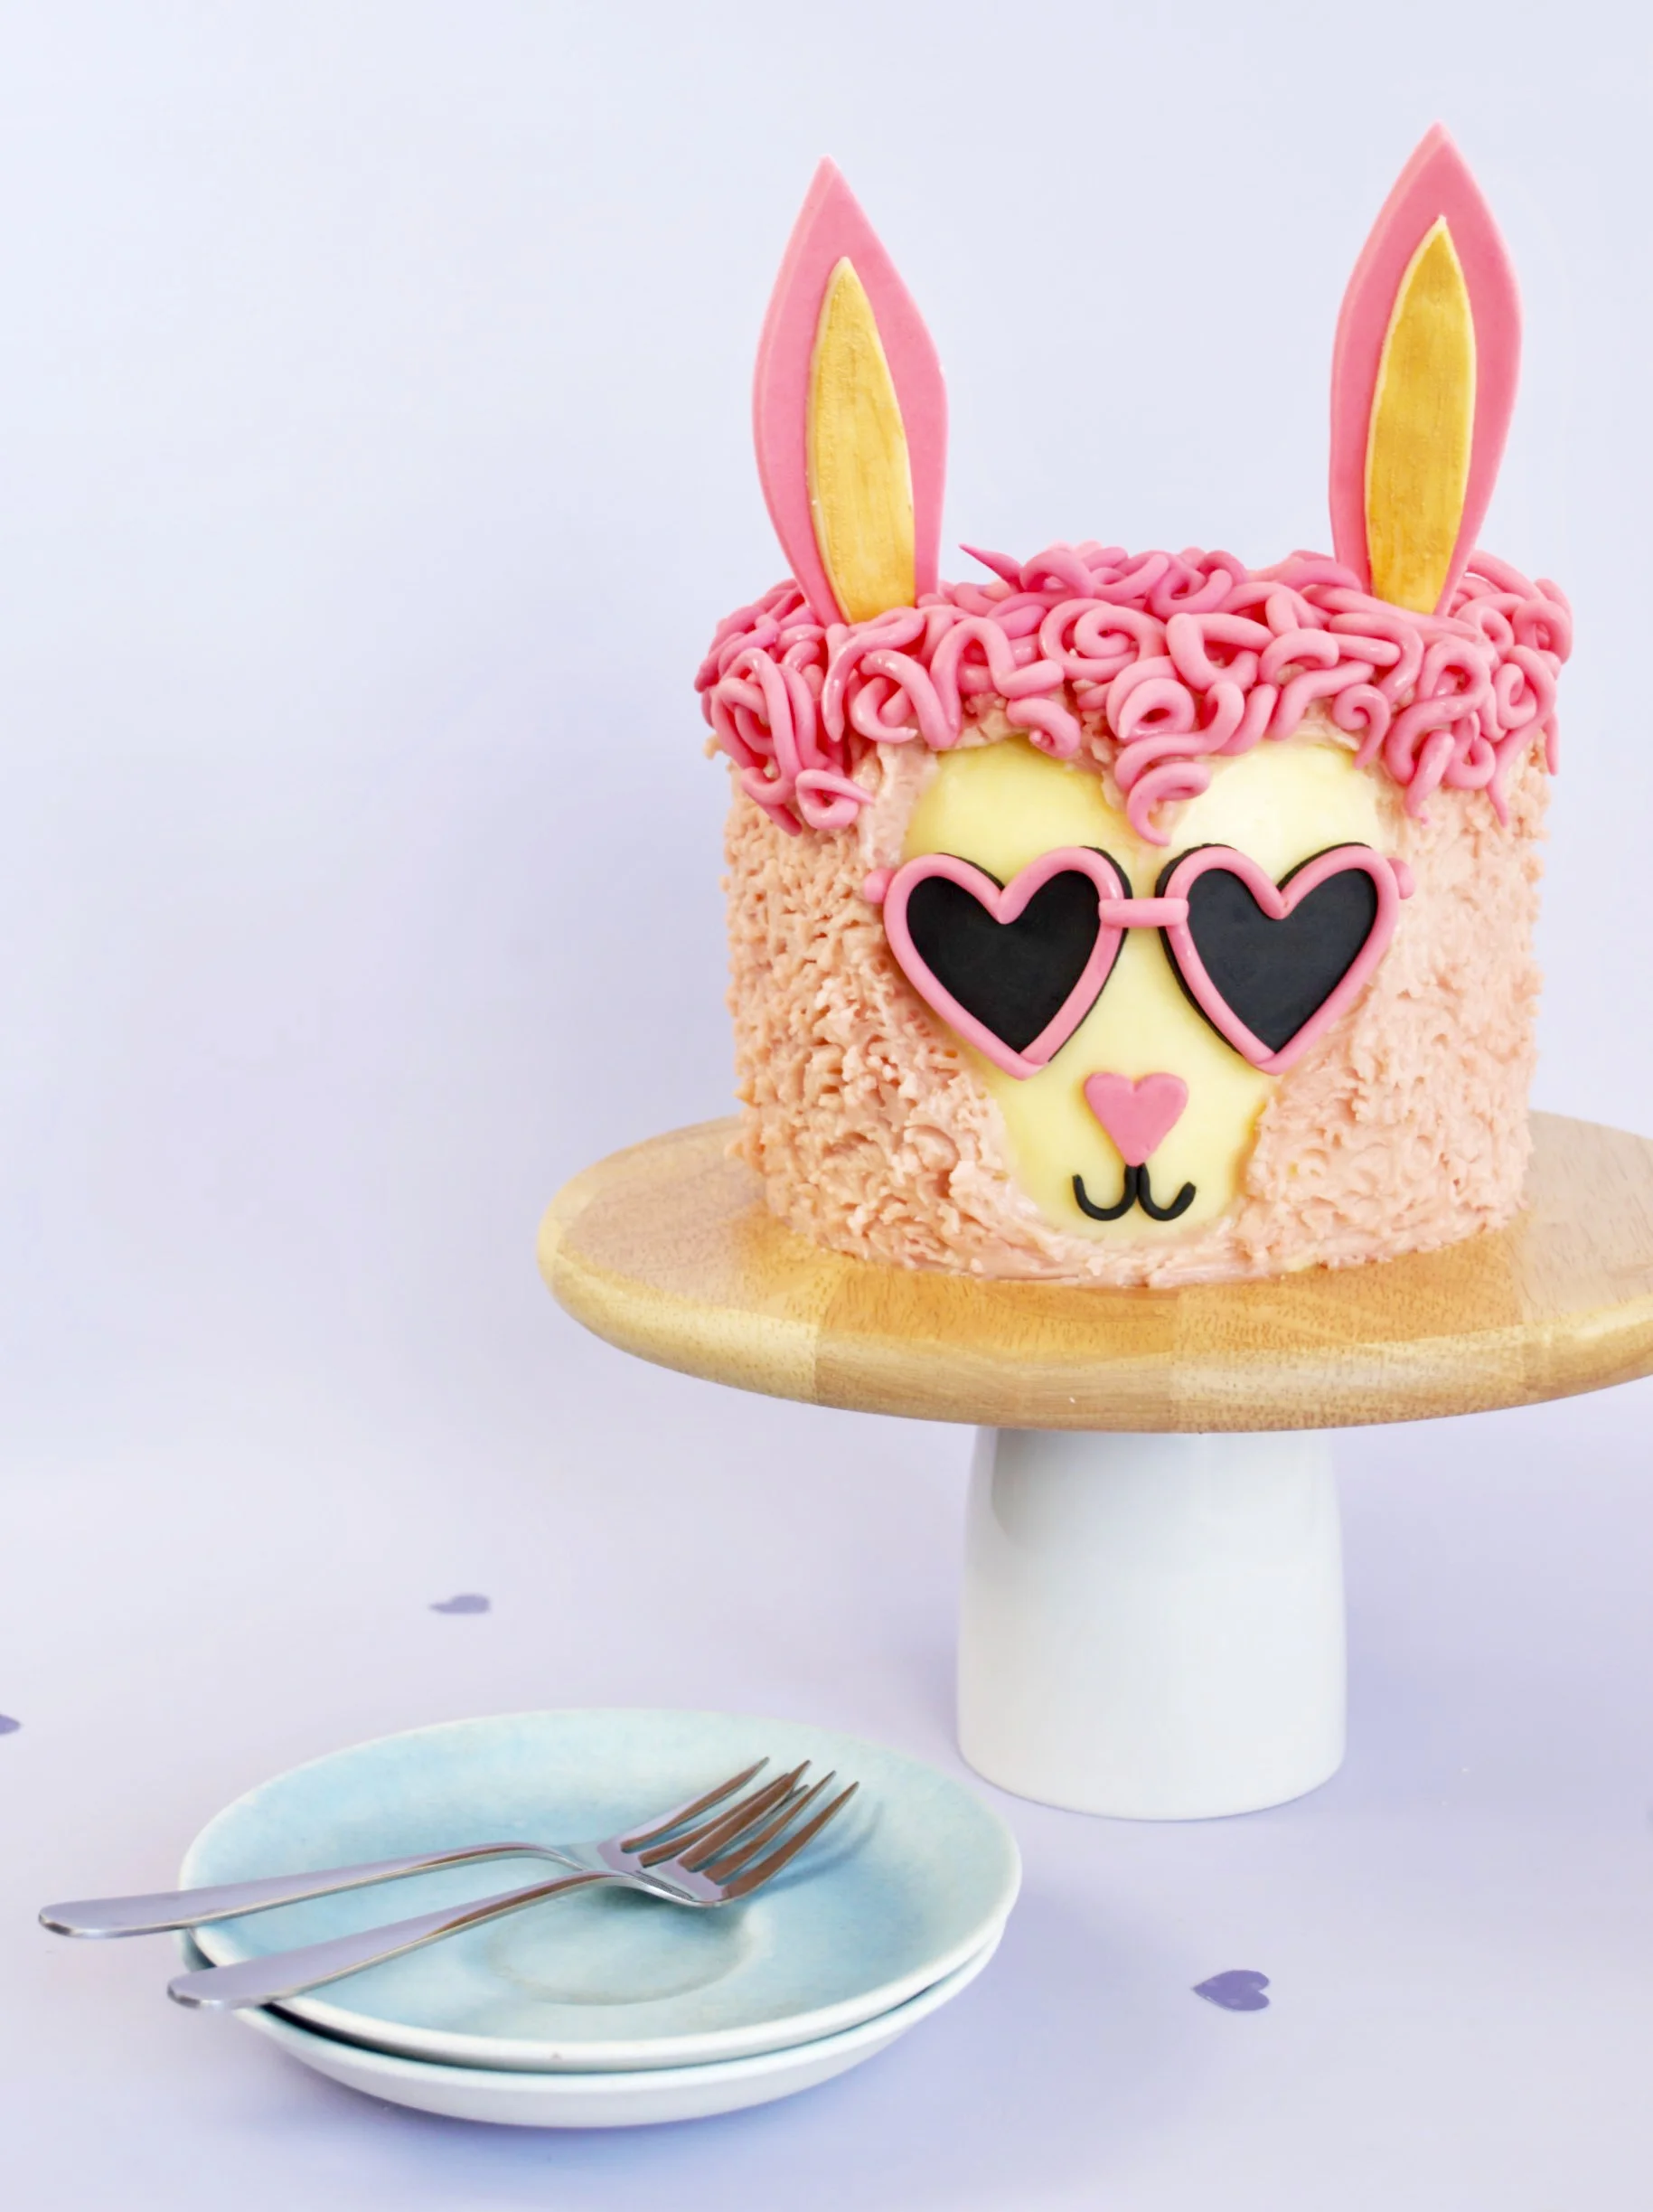
Cool AF Pink Llama Cake Tutorial
Hey hey! How are we all this week?? Sorry in advance for the extra peppiness, I finally started working out again (I know, I know I’m late for the summer bod) and I’m on a new endorphin high. I really hope it lasts these babies are a freaking treat! And, hindsight has taught me that I suck at maintaining lifestyle changes like this, so I’ve set myself a 6-month goal to be able to run 10k non-stop. Get your fingers and toes crossed for me! Or better yet, hold me accountable. I want you on my back about this, keeping me up when I’m down and kicking my butt when I’m being lazy. Winners never quit and all that jazz.
I picked running cos honestly, I just end up getting bored of everything else after a while but I figure with running its all down to the podcast. I wanna forget I am running and instead it’s just the things my legs do while I fit in my favourite podcast listens. I’m still absolutely obsessed with The Guilty Feminist so that’s Mondays covered and 2 Dope Queens can make my hump days feel like a dream and Fridays I can fit in Ted Work Life so I’m even throwing some productivity into the mix. Got me like ahhhh yeah.
The only downside is I managed to buy the ugliest freaking trainers around. I’ll need to run so fast that no one can see these absolute monstrosities. Keep an eye on insta and I might let you see just how bad when I manage to dirty them up a little. Maybe that can be my treat when I get to 10k I’ll buy some kicks that don’t make me cringe! Gotta have that reward system.
As for the cake, this week I wanted to really focus on getting my life and my mind back on track, so the cake design is super simple. Seriously, no skill needed just sit back and enjoy getting your hands busy. This one is super beginner friendly but what if you’re more advanced? Crack on anyway, it’s a great design and taking your pedal off the metal for once can remind you how much you love the simple side of things; stress-free caking is a dream!
And Brucie Bonus, check out the hair on this cutie! Rolling out the strands is one of my favourite tasks for calming the mind if you can really immerse yourself in the process and experience the feel and movement of the fondant I promise when you finish that noggin is gonna be relaxed and raring to get on with life!
On the flavour game, I tried my first swiss meringue buttercream and I’m not sure how I feel about it. It’s very buttery which should a good thing no? But something just ain’t sitting right. I’ve listed the recipe I followed below so if you use it, what did you think? Next week I’m gonna try again but with one of Liv For Cake’s recipes to see if maybe this changes things. I love everything she does so I’m sure if anyone can convert me it’s her.
Ingredients
Cake
4 eggs (lightly beaten)
8oz sugar
8oz butter
9oz self-raising flour
2 tsp vanilla extract
5 tbsp milk
Icing
1 batch of your favourite frosting (I used this one)
500g pink fondant
50g black fondant
50g yellow fondant
1 tbsp vodka or cake alcohol or lemon juice
3 tbsp jam (optional)
Edible gold paint (optional)
1 barbecue skewer
Method
1. Roll out a small piece of pink fondant to ¼cm thick and cut out 2 long ears the same size. Do the same with the yellow fondant but this time cut the ears a little smaller on all sides. Using a little vodka, wet a line down the centre of the pink ears.
2. Cut the barbecue skewer in half and gently press each half into the centre of the pink ears. Place the yellow ears on top and gently press in to secure. If you want, you can now paint the yellow part of the ears gold with edible paint, but she’ll look great without if you don’t have any. Leave these to dry overnight somewhere cool and dry.
3. Roll the black fondant flat to ¼cm thick and cut out 2 hearts. Back to the pink fondant, roll a small piece into a thin rope. I find it’s best to use a fondant smoother for this to get it even all the way along. When its rolled, use it to outline the black hearts, securing with a little vodka. Leave these to dry overnight.
4. Pre-heat the oven to 170°C and line two 6-inch cake pans with parchment paper. Cream together 8oz of sugar and 8oz of butter until pale and fluffy. Still beating, gradually add in 4 eggs until fully combined. Beat in 5 tbsp of milk and 2 tbsp of vanilla. Gently fold in 9oz of self-raising flour until the batter is smooth. You can see I added some colour through my sponge but not enough to look cool, let me know if you get it working.
5. Split the mixture evenly between the lined pans and bake for 35 minutes or until a skewer comes out clean. When baked, allow the cakes to cool in the pans for 5-10 minutes before turning out onto a cooling rack.
6. When cool, use knife to level off the tops and cut each cake into 2 layers. Wrap each layer individually in cling film (a few wraps each) and place in the freezer overnight. Freezing the cakes overnight makes it much easier to frost later and I really like having a break between the baking and the decorating.
7. The following day remove the cakes from the freezer and leave to thaw slightly. While the cakes are thawing a little, make the frosting. I used this recipe but feel free to stick with your favourite.
8. Now it’s time to build the cake. Attach the first sponge to your cake board or stand with a little frosting to stop it sliding and moving around. Apply a layer of frosting and a layer of jam on top, spreading them out to the sides. As you can see, I don’t put much frosting between the layers because that’s how my family like it, but you can go for as much or as little as you wish. And you can even skip the jam if it’s not your bag, this is your show. Repeat for the other layers.
9. Once the cake is built, apply a crumb coat of frosting all over and pop the cake in the fridge for 15 mins. When it’s cooled, apply a thicker layer of frosting top to bottom but only on one side, roughly 5-inches wide. Return to the fridge to chill.
10. Colour all remaining frosting a light pink colour. Remove the cake from the fridge and using a knife carefully sketch out the shape of the llamas face into the side of cake that has the thicker frosting, this will be your guide. Now, spread the pink frosting all over the cake except on the face we marked out. Don’t worry too much about getting it smooth, we’re gonna rough it up soon anyway.
11. Using the handle end of a paintbrush, ‘rough up’ the pink frosting to look like llama hair by dragging the frosting in little circles. Do this all over the sides but don’t worry about the top, she’s gonna get a little fondant topper.
12. Let’s crack on with the face. Back to the black hearts we made yesterday, these are gonna be her super fetch sunglasses and you can attach them to the front of the cake with a little smear of frosting. Hold them in position for a few seconds until they’re secure.
13. Grab the pink fondant again and this time roll 3 little sausages, one should be long enough to connect the hearts like the bridge on a pair of glasses, the other two should be a little shorter. Wet the hearts where the bridge will attach with a little vodka and give it quick second to get sticky. Hold the bridge in place for a few seconds until it’s stable. Now, stick the other two sausages to the sides like legs.
14. Lastly on the face, cut out a tiny pink heart for the nose and use thin pieces of black fondant to make a ‘W’ shape for the mouth
15. Like we did for the hearts, roll small pieces of pink fondant into long skinny ropes only this time, roll the ends thinner so that they taper to little points. Drape these over the top of cake, winding the ropes into curls until your llama has a lovely mop on top. If the frosting is too dry, brush it with a spot of vodka to help the fondant stick.
16. I should point out, the alcohol in the vodka evaporates off so it’s totally fine for tee-total-ers (no idea how I’m supposed to write that) but if you’re still worried you can use water or lemon juice instead, they will take a little longer to dry though.
17. Finally, gently press in the ears trying to get them as close to the sides as possible.
And we’re done! How easy was that?! I mean, I know I say that a lot but really this one was a doddle and I hope you had as much fun as I did. Remember to send me your pics, I love seeing your results, it makes my heart so happy!


