How To Make A Giant Jammie Dodger Cake
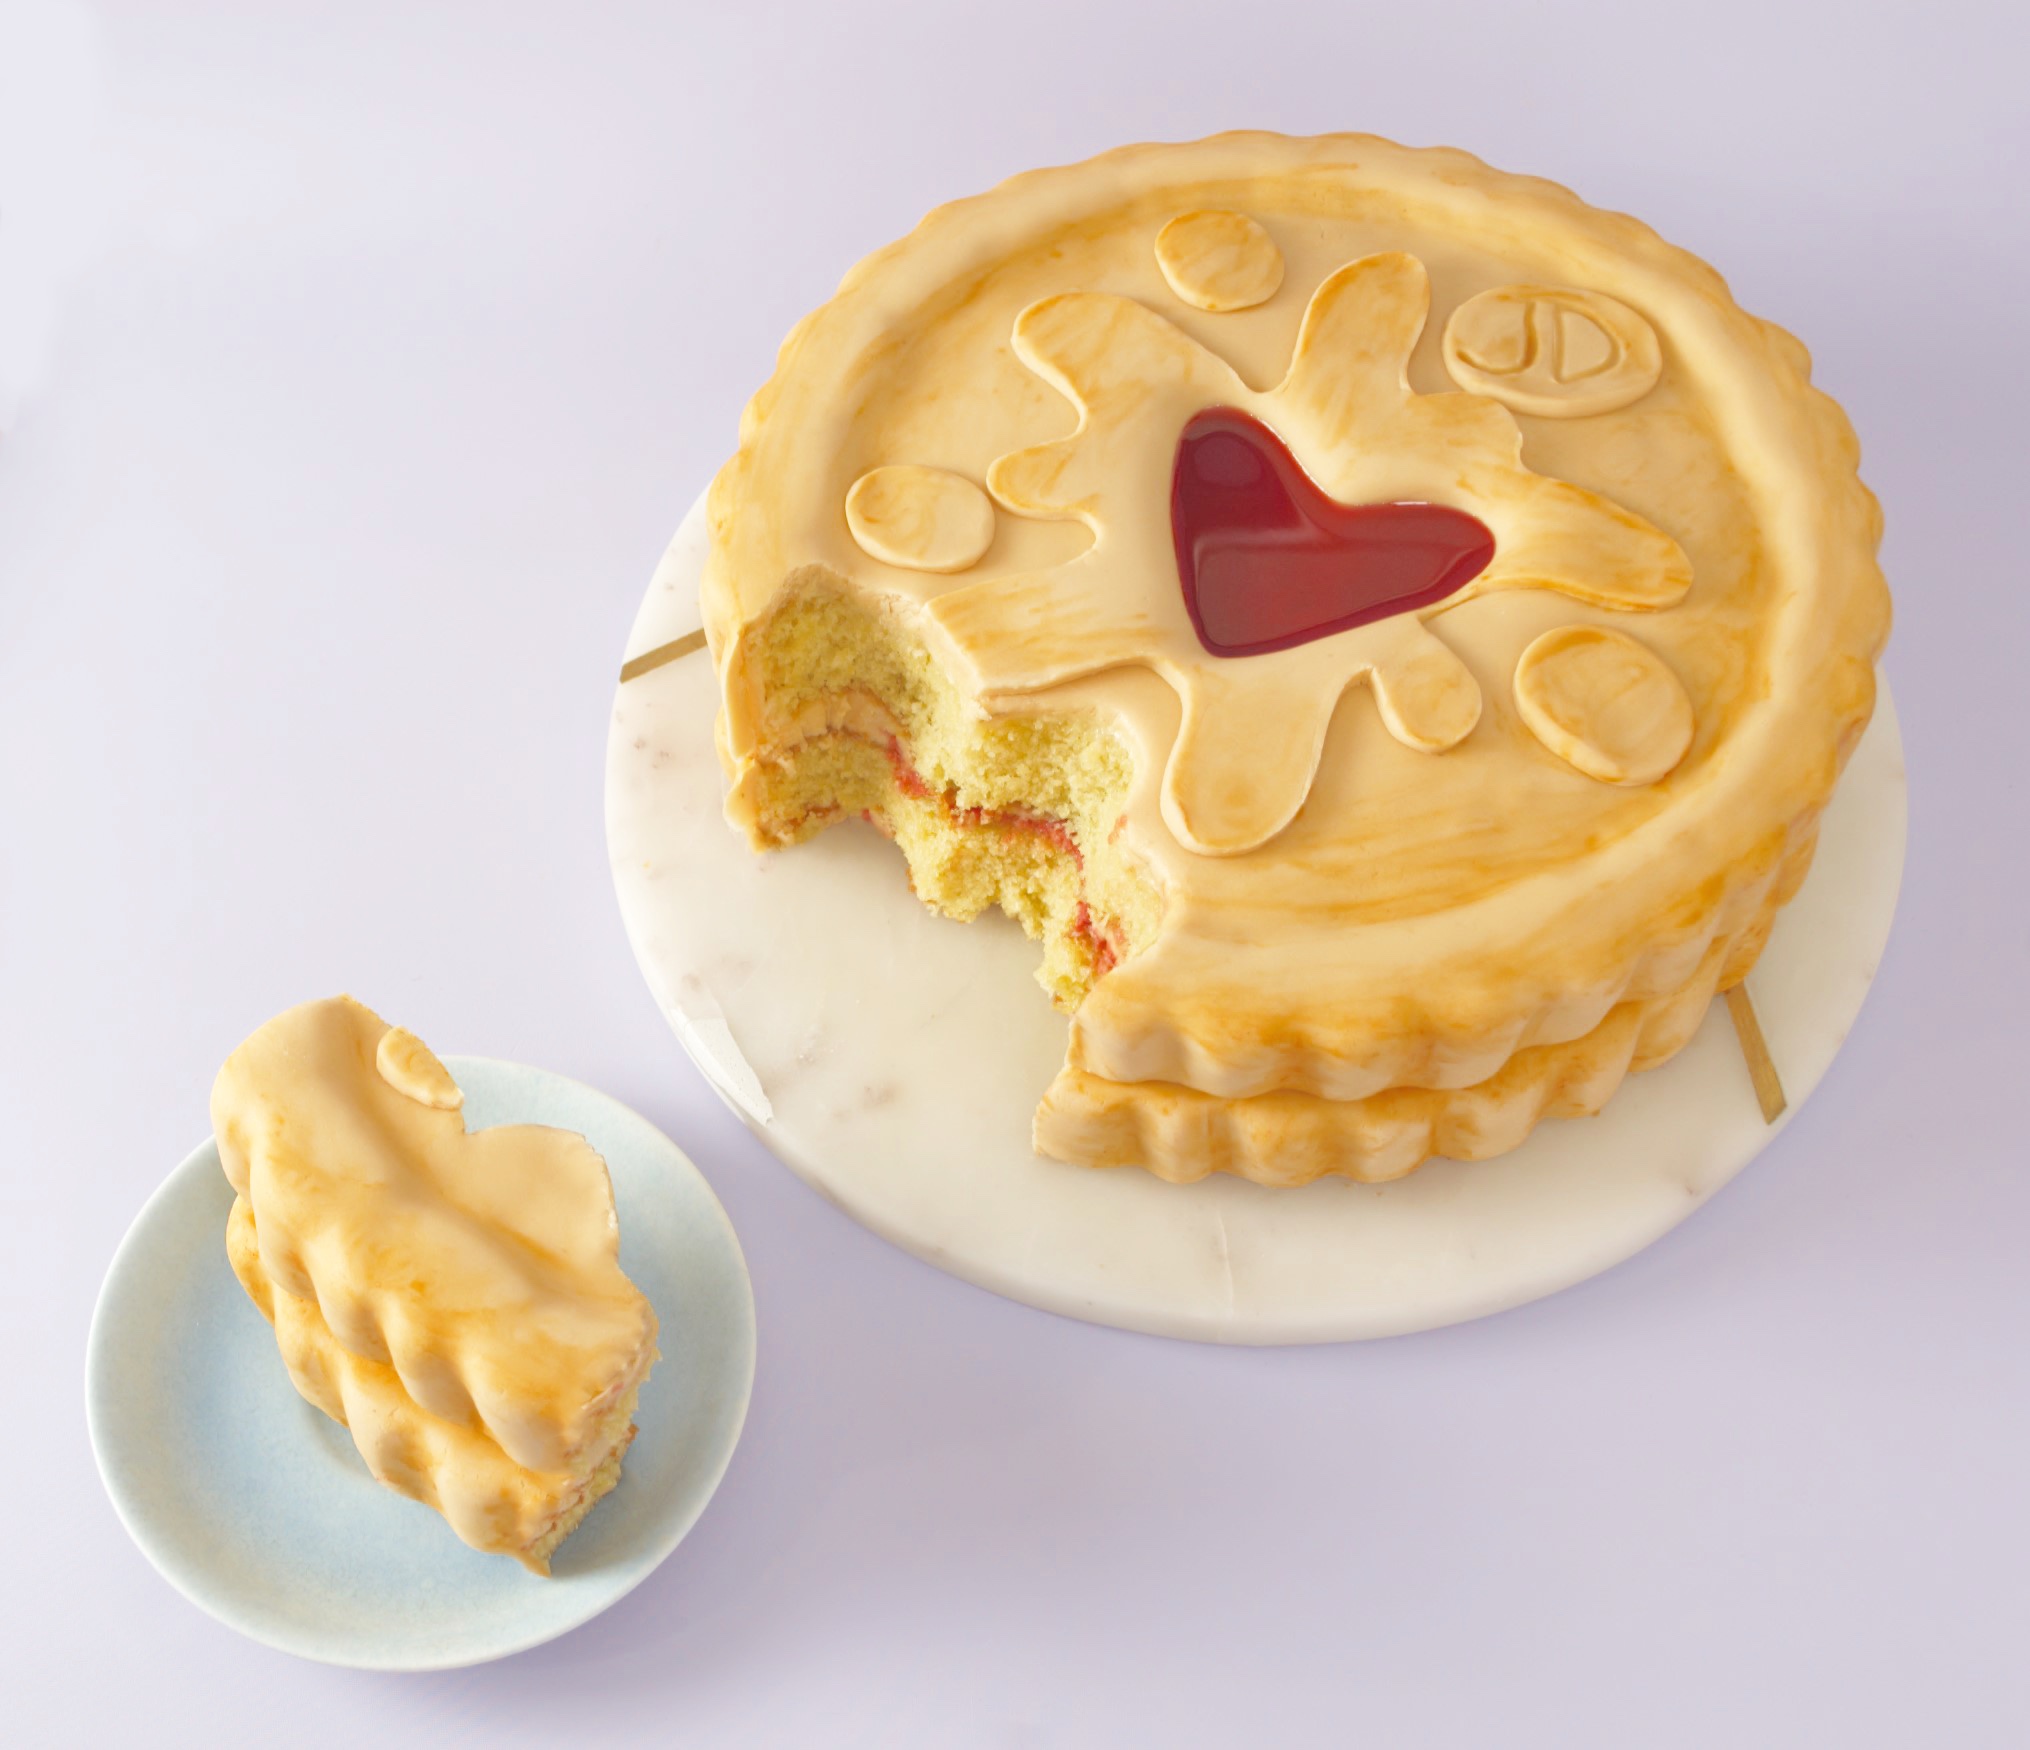
Hello my lovelies, come join me while we make this completely outrageous giant Jammie Dodger cake. Oh, and Happy Easter! I fully expect everyone to be choc full of chocolate and hot cross buns while wondering why Easter Monday telly is so crap this year. Like seriously, get your finger out UK, bank holidays are for terrestrial TV, not Netflix. Thankfully my dad pulled through with an amazing MaltEaster Bunny Egg to take the edge off. What a cracker he is!
Despite my glorious egg I need to have a wee rant about how much of an idiot I am! I have completely shot myself in the foot with this cake. Ok, let’s start at the beginning. If you remember last September I made a freaking cool mermaid tail cake for my sister Samantha’s birthday. It was a giant feat of cake engineering and she loved it, woohoo!
Except the next day she was like, “Oh man, I wonder what you’ll make next year to top it?”. Sheer panic set in. What was I gonna make?? What on earth could top it??? Well, you guessed it, halfway through making Jammie, I realised this could have done it.
Aaaaaaaaaah feck. She is the worlds biggest Jammie Dodger fan. She even has rules around how we can eat them. Like, you’re not allowed to have a single Jammie, they must be eaten in pairs otherwise you run the risk that a single Jammie might be left at the end and apparently that’s the worst thing since unsliced bread. She’s fingered me as the culprit for this and so now, my dad and younger sister have taken to leaving single Dodgers at every opportunity just so they can hear me get the blame. Oh, it’s a happy family we have.
I did have one win for the home team this week, I managed to quit watching Netflix in the background and get back to focussing on the cake. It’s kind of like my version of mindfulness with cake. Whenever I feel my brain wandering off into randomness I pull it back to the bake and I definitely noticed a difference in my overall focus this week.
I also armed myself with a few other tools to try and keep the looming blues at bay. Urgh, I hate when people call it the blues but then I also don’t wanna call it by its real name either. I got myself 2 apps and a book. One app for meditation so that every day, baking or not, I take the time to help my brain quiet down. One app for productivity, based on the Pomodoro Technique. It set’s little timers so that you work in wee chunks and get rewarded with little breaks. And lastly, I’m re-reading ‘Daring Greatly’ by Brene Brown. You can see her Ted Talk here, I really recommend it if you struggle with self-doubt and self-compassion.
Ok, let’s crack on with the exciting part.
Ingredients
Cake
8 eggs (lightly beaten)
16oz self-raising flour
16oz butter (softened)
16oz sugar
6tbsp milk
Decoration
1kg white fondant
250g butter plus 1 tbsp
150g cream cheese
700g icing sugar
100ml strawberry ice cream sauce (the cheap kind)
Gel food colouring – red, ivory and yellow
Splash of vodka or cake alcohol
Method
1. Line two 10-inch cake pans with parchment paper and preheat the oven to 190°C (170°C fan). Mix together all the cake ingredients until just smooth, try not to overwork the flour. Split the batter into 2 equal portions and pour into the lined cake pans. Bake for 45-50 minutes or until a skewer comes out clean. When baked, leave to cool in the pan for 5 minutes before transferring to a wire rack.
2. Create templates for the heart and the splat from a piece of card. Keep referring back to the cake to check the sizes, trimming and altering as needed. Leave these to one side.
3. In a large bowl, mix together 250g of butter, 150g of cream cheese and 700g of icing sugar. The frosting should be easy to spread but not fall off the beaters when they’re lifted out of the bowl. If it needs to be stiffer add more icing sugar if it needs to be looser add a splash of strawberry sauce or milk. Cover with cling film and leave to the side.
4. Colour 1kg of fondant a biscuit-y shade by kneading in 1 tbsp of butter/marg and gradually adding ivory and yellow gel food colouring. It’s best to take this really slowly even though your arms will be killing you because if you add too much by accident there’s no going back. Wrap the fondant tightly in cling film and leave to one side.
5. By now, the cakes should be cool, so we’ll start trimming. At this point, you can either cut the cakes into 2 layers each or leave them as they are. I chose to leave them since my family aren’t big on lots of frosting but it’s totally up to you. If you do add an extra layer of frosting be sure to chill them before carving. To start, using a pencil draw around a 9-inch cake or pie tin on a piece of parchment paper and cut the circle out. Fold the parchment circle in half 4 times. Using a pencil and ruler, mark along each crease. Now, add another line through halfway through each little triangle until the circle has 64 individual sections. Sterilise 4 pins in boiling water.
6. Place one cake on top of an upside-down pie plate, ideally a few inches smaller than the cake. Use the sterilised pins to secure the parchment template you made earlier on top of the cake, this will be your guide.
7. Each line on the template is where the ridges found on a Jammie Dodger will indent into the cake. Use a sharp serrated knife to cut ridges all the way around. Be really careful and patient during this part, if you cut off the wrong piece of cake there’s no going back. Continue until both cakes have ridges all around.
8. Flip both cakes upside down and place each on to a large cake board. Pick the best one to be the top and move the other one to the side. With a sharp knife, cut a border roughly one inch from the outside all the way around, not too deep, we don’t want to go all the way through to the bottom.
9. Now, take the knife and remove a shallow layer of sponge inside this line about ¼ inch deep. You’ll be left with a raised ridge all the way around the outside. Now, place the heart template in the centre and cut around it, again, not too deep. Remove another ¼ inch of sponge from inside the heart outline.
10. Use the frosting we made earlier to apply a crumb coat to each cake. It’s quite tricky to get the frosting into each of the ridges so I used a combination of my smallest offset palette knife and the handle of a teaspoon to really get inside all those corners. Place the cakes in the fridge for 15 minutes. When the cakes have chilled, apply another coat of frosting and return to the fridge for 15 minutes.
11. Dust the counter with a little cornflour and roll out half the fondant until it’s 15 inches across in every direction. Remove the cake that’s to be used as the bottom layer from the fridge and mist it with water that has been boiled then cooled.
12. Cover the cake with fondant but don’t trim the excess. Smooth across the top with a fondant smoother then very gently, work the fondant into each of the little ridges, until they are all distinctive and smooth.
13. Place a cake board on top of the cake and flip it upside down. Working quickly, spread a little frosting around the edges, roughly 1 inch wide and then pull up the excess fondant, attaching it to the cake and gently flattening it down. Trim off any excess.
14. Check all the ridges are still clear and re-smooth where necessary. Flip the cake again so it is right side up. This time, we’re gonna trim the fondant on top. Using a knife, cut a circle in the centre of the fondant so that there is a 1-inch border of fondant all around the cake, remove the fondant from the centre.
15. This will be the bottom layer of the cake so I decided to remove the fondant because not everyone likes to eat it and this way they can still easily avoid it. As you can see, my borders bigger than 1 inch but that was me playing it safe. Now that it’s complete I realise I was being overly cautious.
16. Colour the remaining frosting dark red and apply a layer on top of the cake we just covered in fondant. Be careful to keep the frosting inside the fondant border because if you look at a Jammie Dodger, you can’t see the filling between the layers, only on the top. Move this cake to the side for later.
17. Roll out ¾ of the remaining fondant to 15 inches across all sides. Remove the top layer of cake from the fridge and mist in sterile water. Cover the cake with fondant and again don’t trim the excess. Gently work the fondant into all the little ridges, starting with the heart and moving out towards the sides.
18. When the fondant is smooth, flip the cake upside down and attach the excess fondant to the underside like we did before. Trim off any excess. Flip the cake again, right side up and smooth down any fondant that may have become displaced during all the flipping.
19. Roll out the remaining fondant and place your splat template we made earlier on top. It’s a good idea to quickly double check your template against the cake to make sure it will fit before we start cutting.
20. Using a sharp knife, cut around the template and smooth around the sides. On the top layer of cake, brush a little vodka or cake alcohol inside the heart indent. Place the splat on top of the heart and gently work the fondant into all the edges. Carefully, press down around the edges so they are sharp. When you’re happy with the heart, use a spot of vodka to secure the rest of the splat.
21. With a small cookie cutter or even the lid from a spice jar like me, cut out 4 circles from the remaining fondant. One should be slightly bigger than the others. Smooth the sides and press a little until they become slightly more oblong than circle. On the biggest piece, mark in ‘JD’. I used a blunt butter knife to keep it thin.
22. Attach the circles into place with a brush a vodka. When you’re happy with how it’s looking, lift the top layer onto the bottom and carefully shimmy it into place.
23. Now to add the shading. I use egg cups but shot glasses or small plates work great too. To one egg cup, pour in a thimble-sized drop of vodka. To the other, a smear of ivory food gel. Wet a clean paintbrush with vodka and then lift a tiny spot of ivory gel.
24. Paint the ivory gel into any crease or ridge on the cake. It might seem quite harsh at this stage but don’t panic, that’s ok. Load up the paintbrush with vodka again but this time don’t add ivory gel. Return to the section you just painted and blend out the colour. Repeat until the cake has been shaded all over.
25. Lastly, use this same technique with red food gel to paint inside the heart. This will help really give that centre some depth. Leave the paint to dry, it shouldn’t take too long because vodka evaporates really quickly.
26. For the Jammie heart centre, you have two choices, you can go authentic and fill it with seedless strawberry jam or like me choose strawberry sauce instead. I went for the sauce cos I wanted that sexy, completely smooth finish but it’s totally up to you. Whichever you choose, add in a little red food colouring because the original Jammie Dodger centre is pretty dark. Carefully pour in your topping of choice and you’re done!
Congrats! We nailed it.


