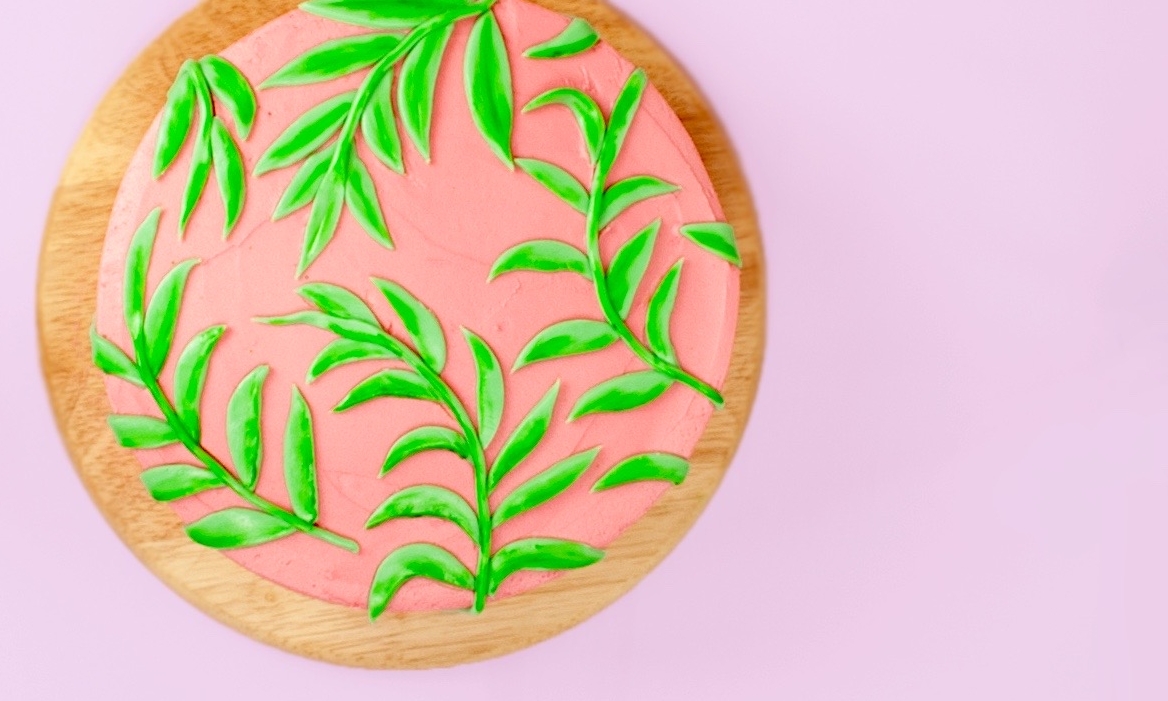
DIY Cake For A Plant Lover
Hands down, this is the easiest and quickest cake I have ever made and as such is now in the running for my new fave (I’m fickle af, I know). I’m just so short on time these days I need to get my kicks fast and this cake ticked that box and then some! Iced and decorated within an hour, minimum finesse needed. Boom, how’d you like them apples?
I’m looking for a new flat and so obviously spend my whole day at work daydreaming about interior design (that I’d never get around to in reality but dream I shall) which led to image searching ‘cool wallpaper’. Obviously. And I kept coming across leaf prints that I absolutely loved, so while I’m waiting on my flat I thought I’d turn it into a cake to tide me over. Smashing. And I’ve now got a whole new Pinterest board dedicated to wallpaper prints I wanna turn into cake. It’s the gift that keeps on giving.
Ingredients
Cake
8oz sugar
8oz butter
4 eggs
7oz self-raising flour
1oz of cocoa
4 tbsp of milk
Icing
250g butter
1tbsp cream cheese
500g icing sugar
2 tbsp lemon juice
150g green fondant
Gel food colouring – pink and green
Cornflour for dusting
Method
1. Line two, 7.5inch cake pans with parchment paper and preheat the oven to 180°C/160°Fan.
2. Cream together 8oz of sugar and 8oz of butter until pale and fluffy. Into this sift 7oz of self-raising flour and 1oz of cocoa and add 4 eggs and 4tbsp of milk. Beat together until just smooth, careful not to over work the batter.
3. Split the mix evenly between the two lined pans and bake for 25 minutes or until a skewer comes out clean.
4. Leave the cakes to cool in the pan for 5 minutes and then transfer to a wire rack to cool completely.
5. Beat 250g of butter, 1tbsp of cream cheese and 2 tbsp lemon juice until really fluffy. Gradually add in 500g of sifted icing sugar and beat together until smooth.
6. Add a few drops of pink food colouring to the buttercream and beat until the colour is even. Adding more gel if you need to.
7. When the cakes are cool, spread a thin-ish layer of buttercream on top of one and sandwich the other on top. If you flip the sponges upside down when you build the cake you’ll get a nice flat top.
8. Cover the entire cake in a thin layer of buttercream and move to the fridge to chill for 30 minutes.
9. When the cake has chilled and the buttercream is quite hard, spread another layer of buttercream all over and smooth with a palette knife or bench scraper. I didn’t spend too much time smoothing down here cos I thought the little bit of texture in the buttercream suited the look on this one.
10. Return the cake to the fridge to cool again.
11. While the cake is chilling, knead the green fondant for about 10 minutes until it becomes easier to handle.
12. Dust the counter with cornflour and roll a small chunk of green fondant to 1-2mm thick.
13. Using a sharp knife, carefully cut out 40-50 leaves.
14. When chilled, remove the cake from the fridge and score a curved line on top, this will be the line to follow when placing the leaves.
15. Brush a little water onto the back of the leaves and place them either side of your guideline. Curving them as you go to the follow the bend.
16. Tear off a small piece of green fondant and roll it on the counter into a thin rope. It should be at least as long as the guide line you scored into the cake.
17. Using a rolling pin, flatten one end, about 2½cm long. Using a knife, cut a point into the end.
18. Place this along the guideline and trim any excess from the bottom.
19. Repeat until the whole cake is covered in leaves.
20. Finally, dilute a little green food colouring with a drop of vodka or lemon juice and paint onto the leaves to create a little shading.
And we’re done, what a doddle right?


